How To Get Started Printing with New Filaments
2023-10-09 | By Maker.io Staff
3D Printing 3D Print Accessories Filament
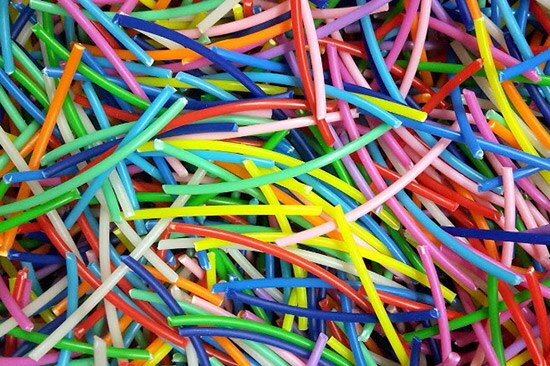
 Source: https://pixabay.com/photos/to-dye-pla-plastic-threads-4618724/
Experimenting with new filaments allows you to create 3D prints with magnificent details and special properties, as some offer significant strength while others help achieve a certain look. However, tuning the printer and process to work with new materials can be tricky, especially for beginners. Therefore, this article summarizes some tips and tricks you can utilize to get started with new filaments.
Take the Time to Clean and Maintain the Printer
Performing general maintenance on a 3D printer at regular intervals is always a good idea, regardless of whether you want to use new filament types. Doing so ensures consistently good prints and reliable operation. General 3D printer maintenance includes greasing the moving parts and cleaning the nozzle and print bed. Doing so can also prevent typical problems, such as a clogged extruder, skipping motors, and poor print bed adhesion.
Preparing the Filament
You must always begin by choosing filaments made by a reputable manufacturer and sourced from a reliable supplier, such as DigiKey, to ensure you get a genuine, good-quality product.
Then, you should store the 3D printing filament according to the manufacturer’s recommendations. That generally means away from direct sunlight and heat sources and in a cool, dark, and (most importantly) dry environment. Most filaments include a re-sealable bag and a moisture-absorbant pack, and you should place the material in the bag and carefully push out as much air as possible before tightly sealing it. Alternatively, you can utilize an appropriate storage container.
Even when taken proper care of, some materials degrade over time. Therefore, you should replace old material when it becomes brittle. Sometimes, you can rejuvenate brittle filament by drying it at temperatures of around 120 degrees Fahrenheit (50°C) for approximately half an hour.
What You Need to Know About Loading New Filaments
When swapping out the old filament in a printer, you should always unload the old material using that filament’s recommended temperature. Once removed, load in the new filament using either the old material’s temperature or the new one’s — whichever is higher. For example, when the old material requires a temperature of 230°C and the new one prints at 180°C, you should load the new material at 230°C and extrude some of it until the new material comes out clean and has the chance to push out all of the previously loaded filament. Doing so ensures the new material purges the old filament from the nozzle to prevent clogs.
Fine-Tuning a 3D Printer When Swapping Materials
Many slicer programs, such as Cura Lulzbot Edition, offer presets for the most common filament types. In many cases, using such a preset may be enough to achieve acceptable results when used with a common material like PETG. However, specialty filaments will most likely always require additional fine-tuning.
The tuning process always starts with ensuring proper bed adhesion, as there’s no point in making any other adjustments unless prints stick. First, you should ensure your printer’s build plate is clean and grease-free. Then, you must closely follow the filament manufacturer’s recommendations regarding bed temperature and surface preparation and apply an adhesion agent if necessary.
Next, you can adjust the print temperature to ensure maximum strength and layer adhesion. In addition, doing so prevents side effects such as curling or warping. In general, the higher the temperature, the better the layer adhesion. However, too high temperatures can introduce artifacts in the finished print.
Once you get the prints to stick and the temperature figured out, you can tweak the flow and retraction rate to prevent problems such as stringing. To find the correct flow rate, inspect the final layer of a print. The flow rate might be too low if you can observe holes in the topmost layer. In contrast, when the flow rate is too high, the nozzle scrapes against the material it was put down earlier, and the nozzle might clog.
Finally, you can tweak the print speed. However, this one is optional, and you should favor slower speeds that lead to consistently good results over saving a few minutes. In general, it’s good idea to follow the manufacturer’s recommended settings unless you know what you’re doing.
Performing Test Prints to Verify 3D Printer Settings
Whenever you make significant changes to the print settings, you may want to print a small test piece to monitor how the changes affect the results. Doing so also allows observing the material's shrinking properties and whether large, flat prints tend to curl or warp while printing or during cooling.
 Test prints can help adjust the settings before manufacturing more intricate and detailed parts. Image Source: https://pixabay.com/photos/printer-3d-print-3d-printing-white-2416269/
Aside from a simple visual inspection, you can utilize tools, such as calipers, to verify the printer's dimensional accuracy using the new material. Lastly, consider keeping a list of options you’ve tried while tuning and how they affect the finished parts to ensure you find the best possible settings.
Summary
Adjusting the print process for new types of filaments always starts with performing general maintenance and cleaning the printer, as doing so can prevent many problems before they even have the chance to arise.
Next, you should buy high-quality materials and source them from a reliable supplier. Then, always follow the manufacturer’s recommended settings when trying out new materials. Many slicer programs include viable presets you can try.
When swapping filaments, it’s recommended that you clean the nozzle by extruding some of the new material until it has the chance to fully purge the old material from the extruder. Then, store the old filament according to the manufacturer’s recommendations, which is typically away from direct heat and sunlight.
However, sometimes tweaking the presets is necessary, and you should start the process by ensuring that their prints stick to the printer’s build plate. Then, adjust the print temperature, followed by the flow rate, and, finally, the print speed.
Whenever you make significant changes to the settings, you can print a small test piece to observe how the changed options affect the results. Always take notes of the settings used and how they affect the results for later reference.


