Advanced 3D Printing Infill Tips and Tricks
2021-08-25 | By Maker.io Staff
A recent article discusses different 3D printing infills supported by Cura and when to use them. However, there are a few more settings related to the infill that you can change when slicing a model. This article explains how those additional settings can help you tweak the generated infill structure to perfectly match the requirements of your model.
Infill Positioning and Direction
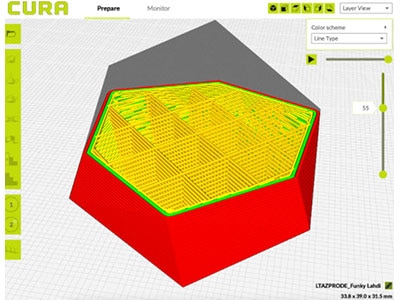
Tweaking the infill direction is one way to optimize print speed and the strength of the final 3D-printed component. By default, the infill direction is 45°, which produces diagonal infill patterns. Note that the concentric infill patterns, commonly used when manufacturing flexible components, are an exception to this rule, as those patterns completely ignore the infill direction. The default setting works fine for most 3D printers and models. However, it can be advantageous for the print speed if you change this setting. Setting the direction to zero degrees produces vertical patterns, and changing it to 90° results in horizontal lines:
 Different infill-pattern angles. The fourth image shows what happens if you supply a list of angles.
This setting is especially useful if your model has a lot of diagonal walls, as changing the infill direction to either zero or ninety degrees will result in a more stable end result. Cura also allows you to define a list of values to use for the direction.
Similarly, to the direction, you can also instruct Cura to offset the infill pattern within the model. By default, the infill pattern is centered for each object. However, it can be beneficial to move the infill pattern within a model, especially when using a low infill density to increase the stability of the manufactured object:
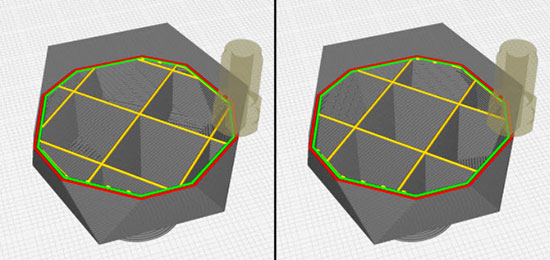 The left example has no offset applied to the infill. The right one uses an x-offset of 10mm.
Note that you’ll need to enable the infill offset settings in the Lulzbot Cura settings. Furthermore, not all infill patterns support this setting.
The last important setting that influences the infill position within the model is the infill overlap percentage. This setting determines how far the inner pattern reaches into the inner shell of the model. You can think of this setting as the overlap between the infill and the walls of the component. Higher overlap values generally increase the model's strength while sacrificing the appearance of the outer shell. Selecting a too-large value might cause the infill to protrude through the walls of the model.
Infill Pattern Thickness and Dynamic Density
By default, Cura generates the walls that form the infill pattern to have the same layer height as the exterior walls. Users often opt for using small values for the layer height, especially when printing decorative objects as smaller values produce better-looking results. However, a small layer height setting also increases the print time. Therefore, it makes sense to increase the layer height used for the inner structure, as it doesn’t need to be pretty. Consequently, increasing the layer height of the support material can dramatically cut down the print time. Note that it’s critical to select a layer height for the infill structure to be a multiple of the external layer height.
It’s possible to further cut down the print time and decrease filament usage by enabling the gradual infill option in Cura. When activated, Cura will generate support material so that the infill density is lower at the bottom of the model and increases the higher the model gets. Note that currently, Cura doesn’t support gradient infills. With this type of dynamic infill, the density of the infill pattern is large next to the walls of the model and decreases toward the center of the object.
Utilizing Infills for Better Overhangs
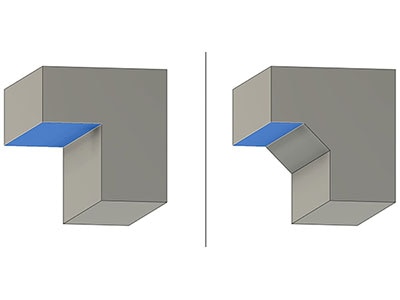
Usually, a 3D printer starts each layer by laying down the walls of the model before filling them with the select infill pattern. However, you can also utilize Cura to instruct the 3D printer to generate the infill material first before attaching the outer walls to it. This technique results in stronger walls and better overhangs, as the walls have something they can stick to. Therefore, this option is particularly useful when using a material known to be problematic when printing overhangs, such as ABS. Unfortunately, this setting has the advantage that the exterior walls of the 3D printed piece usually don’t turn out looking perfect, as the infill layer might protrude through the walls.
Summary
There’s more to perfect 3D prints than selecting the right material and using slow print speeds. Choosing a fitting infill pattern and density can also greatly affect the finished product, the print time, and the manufacturing cost of a part. In addition, you can further tweak Cura to produce perfect results in specific situations. Note that typically, you don’t have to fiddle with these settings, as they work fine in most cases. However, if you’re a more advanced user who needs more control, or you have a particularly difficult-to-print 3D model, it’s worth taking a look at the advanced infill options available in Cura.
The infill position and direction can hugely affect the stability of a 3D printed part, especially when the model has diagonal walls or when using a low-density infill. Tweaking the infill layer height and gradual infill settings can drastically decrease the manufacturing time of components without sacrificing structural strength. Lastly, it can be advantageous to print the infills before the walls when trying to print overhangs with materials such as ABS.


