Tips and Tricks for Perfect 3D Prints
2021-07-28 | By Maker.io Staff
Over the last few years, 3D printing has become a common manufacturing technique for prototyping and small production runs. Unfortunately, it is often not as easy as buying a 3D printer and getting perfect prints right away. As with any other tool, users will first have to get accustomed to using a 3D printer. However, there are a few tips and tricks that can massively affect the quality of your printed parts, and this article discusses some of them so that your prints turn out perfect every single time!
Getting Started: Basic Tips and Tricks
The print process can fail for many reasons, and it is often a mystery to beginners why their prints turn out bad. Many failed attempts occur within the first few layers, typically because of a few reasons I will discuss in this section, together with the tips and tricks to address them.
First, check whether the print bed is clean before starting a print process. Residue from earlier manufacturing runs or grease and oils from your fingers may prevent the first layers of a new print from adhering to the print bed. When cleaning the print bed, remove any sticking agent using an appropriate method. Typically, it is enough to use a slightly damp microfiber cloth or damp paper towels to remove any leftover agents. Then, use some glass cleaner or diluted isopropyl alcohol to remove any oily residue from the print bed. Please refer to your printer’s manual if your print bed uses a special coating to ensure that you do not damage it.
Next, ensure that the print bed is as perfectly level as you can get it before starting a print. Typically, a slightly tilted print bed is not much of a problem when printing small parts. However, a tilted print bed might cause problems relatively late in the print process, especially when manufacturing large components. Refer to your printer’s manual to learn more about leveling the print bed.
Lastly, I recommend you calibrate your printer regularly. Usually, I try to calibrate it after around 50 hours of printing, as some parts might slightly move out of position due to vibrations. When you are done calibrating the printer, I recommend that you visually inspect all the bearings and moving parts of the device and apply some grease to them, if necessary. Finally, check the nozzle and clean it with a metal wire brush and some fishing line or dental floss if necessary. You can also use acetone to dissolve some materials, such as ABS, to get rid of stubborn residues.

Getting Prints to Stick Each Time
As mentioned earlier, it is typically the first few layers that cause a print to fail. Often, the material does not adhere to the print bed properly, or the part starts lifting off the print bed over time, which leads to undesirable results.
The first tip for ensuring good adhesion to the print bed is to turn on the heated bed if your printer has one. The exact temperature depends on the material and the manufacturer. Have a look at the spool or the box in which the filament came in, as you will typically find a sticker there that informs you about the correct temperature. However, I have found that 165°F to 175°F (75°C to 80°C) works for most materials.
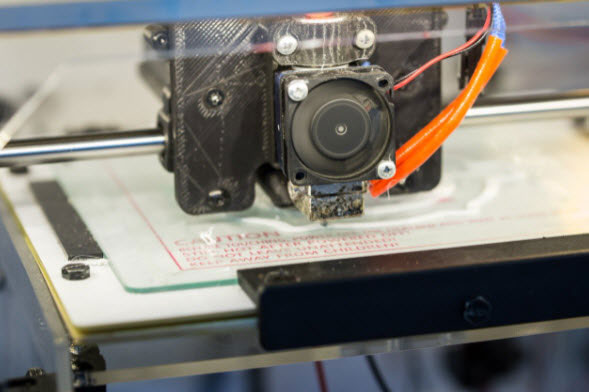
There are numerous methods of ensuring print adhesion to glass beds, and everyone might have a different favorite. I have found hair spray to be the cheapest and most effective solution throughout the last few years. Clean the print bed, carefully apply two to three light coats to the cold print bed, and make sure not to spray it on any rods, belts, or the print head. Apply a sticking agent to the print bed each time you clean it. Do not worry if the print bed does not feel sticky after applying the hair spray. Alternatively, you could also use a non-toxic glue stick or blue painter’s tape instead of the hair spray.
Placing the Parts and Removing Them After the Print
Typically, I place the parts in the center of the print bed in the slicing software. The print bed gets the warmest in its center. Getting the corners of the print bed perfectly level is difficult. The center of the surface, however, is easier to level out. Also, place the part flat on the print bed and make the part’s largest surface touch the print bed to ensure proper adhesion during the entire print process.
Once the printer finishes, let the bed cool down until it almost reaches room temperature. I normally turn off the heated print bed around five minutes earlier to save energy and reduce the cooldown time after the print. Once the parts are cooled down, they should come loose with no effort. If necessary, you can use a plastic scraper or spatula to lift the prints off the bed. Poke the tool under one corner of the part and slowly push it between the print bed and the part until the latter comes loose. Note that it is normal for the part to adhere very well to a freshly cleaned glass print bed with hair spray.
Some materials, such as PLA, are very flexible when they are warm. Be careful when removing parts printed with such materials, as you might easily deform or damage them in the process.
Summary
Getting fantastic quality prints every time requires some experience, lots of experimenting, and failed 3D printing attempts. Clean your printer regularly, especially the print bed and the nozzle. Also, apply a sticking agent to the freshly cleaned print bed if required. Perform a visual inspection of all moving parts in regular intervals, and also take your time to lubricate the moving parts if necessary. Before you start a print, lay the part flat on the print bed in the slicing software. Do not forget to turn on the heated bed if your printer has one. After the print, let the part cool down to room temperature before attempting to remove it. Hopefully, these tips can save you from some frustration and allow you to move forward with your project.


