Advanced 3D Printing Tips and Tricks
2021-09-01 | By Maker.io Staff
FDM 3D printing is an incredibly versatile method for manufacturing all kinds of custom components at home or in a small workshop. While the method itself is typically easy to pick up, and often yields good results without lots of effort, more advanced makers can further improve the results by following a few tips and tricks. This article summarizes some techniques that can help you improve your manufacturing results when 3D printing.
Getting Started
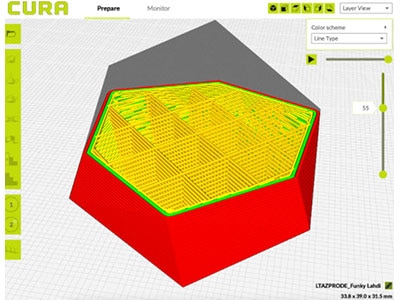
The tips and tricks in this article assume you know the basics of 3D printing. Ensure that you also have a good understanding of the most commonly used materials and the pros and cons of different infill types and support structures.
Identify Common Problems While 3D-Printing
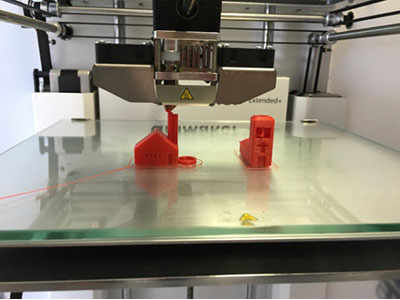
Many failed manufacturing runs go wrong within the first couple of minutes. However, this doesn’t mean that everything will turn out fine once the printer puts down the first couple of layers. Once you print a few parts, you develop a feeling for emerging problems. Sometimes it begins with a slightly lifted-up corner or a clicking noise coming from the extruder. Either way, these minor signs can quickly turn into problems further down the line and result in a failed print. Therefore, my first tip is to regularly check in on the 3D printer, especially on prints that stretch over longer periods. Closely listen for unusual sounds such as scraping, clicks, and banging noises, and try to identify where the problem comes from.
Scraping sounds might indicate clearance problems or poorly lubricated parts. Clicking noises from the extruder may imply problems with the nozzle or the filament tensioner wheels or bearings. When the tension is too high, the wheel might scrape some filament off and leave plastic dust all over its teeth or the adjacent bearing. This problem might lead to clogs or filament snapping.
Once you identify the problem, check whether you can fix it right away and inspect the printed parts. Sometimes, it’s better to restart a print as early as possible instead of waiting for it to fail in one hour.
Choose the Correct Settings in Your Slicing Software and Printer Firmware
Most 3D printers allow you to set the z-offset freely. This value determines how far the nozzle will be away from the print bed when putting down the first layer. Usually, the printers also come pre-calibrated from the factory with the correct value already set. However, different materials have different requirements when it comes to the z-offset. I’ve found that some materials such as ABS and PLA work best with a relatively large z-offset. A large z-offset will leave more of a gap between the print bed and the nozzle when printing. Other materials such as PETG work better with a smaller offset value. Note that you shouldn’t set the offset to extreme values. When the nozzle is too far away from the print bed, you risk layer-adhesion problems. If you move the nozzle too close to the bed, it might regularly get clogged.
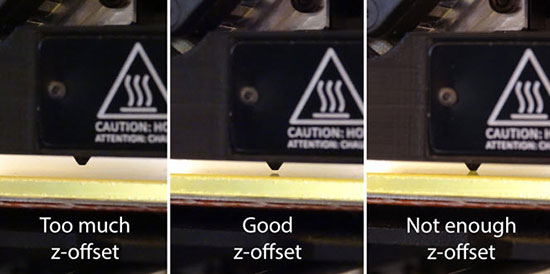 A comparison of different z-offset values. If the value is too large, the nozzle gets too far away from the print bed. If the z-offset is too small, the nozzle scrapes against the buildplate and it will likely clog after a while. A good z-offset leaves an ever so small gap between the nozzle and the printbed.
Another tip involves the layer height. In addition to the tips and tricks mentioned in the previous articles, you should also select a layer height that’s smaller than the nozzle diameter of your printer. Choosing too large of values can quickly lead to a clogged extruder, as the mechanical components have to work harder to push enough material through the nozzle.
Rethink the Model Orientation and Design
If you run a small or medium-scale production, and you constantly find that your printer has problems manufacturing a component, it might be worthwhile to re-design the part. Try to split the problematic model into multiple parts if possible. You can also try to print fewer components in one go.
Besides that, think about how you orient the parts in the slicer software. This step is crucial when manufacturing functional parts that will have to endure a lot of stress. Think about the forces that will act on the printed component and orient it so that the layers run perpendicular to the direction of the greatest force, as 3D-printed parts often break along the lines where two layers meet.
Further Steps You Can Take Before Printing
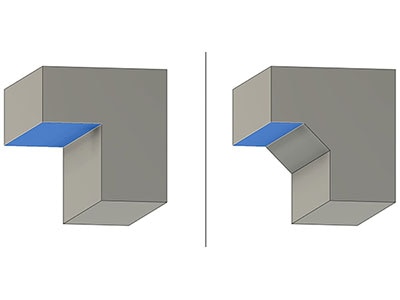
You should wisely utilize support structures, as you can often omit unnecessary supports by optimizing a part’s orientation in the slicing software. Note that supports can add a significant amount of time to the overall manufacturing process, as the printer will not only have to print them, but you’ll also have to remove them once the printer’s done. Try to use soluble support materials if possible to cut down on the re-work time.
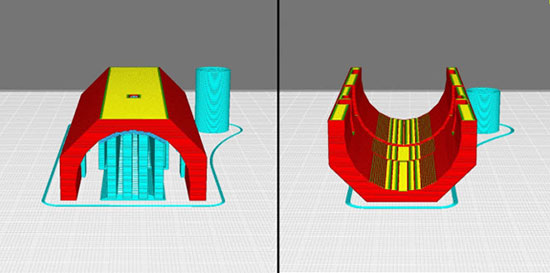 The same part can be printed without a support structure by rotating it.
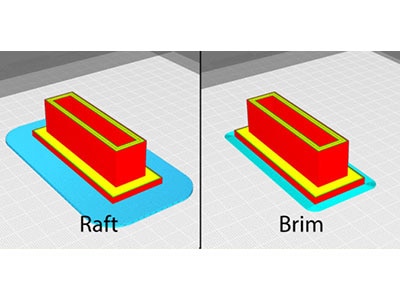
Finally, try to use skirts and brims if you suspect that a part is prone to warping. A skirt is a single layer that doesn’t touch the component itself. Instead, the skirt helps you detect problems with the filament before the print process itself starts. When printing a skirt, the printer lays down a single line around the outline of the future part before working on the components themselves. Doing so primes the extruder, and it also helps you detect adhesion problems and a clogged nozzle early in the print process. In contrast, brims touch the edges of the model, which increases bed adhesion, especially at the corners of the part.
Re-Working Printed Parts
Sometimes, you need to re-work a 3D-printed component. This could be due to support structures you need to remove, or clearance issues caused by shrinking. Either way, you can typically use simple woodworking tools and sharp knives for re-working plastic 3D-printed components. Make sure to always wear appropriate PPE so that you don’t cut yourself or breathe in any harmful dust.
Some materials, such as PolySmooth, allow you to remove visible layer lines typical for FDM 3D-printed parts. This technique is especially useful for art projects and decoration pieces, as the lines might destroy the aesthetics of a part.
Summary
It’s easy to get started with 3D printing. However, it can be quite a challenge to make sure that the manufactured parts turn out just the way you want. Make sure to check back on your 3D printer from time to time. Listen for any unusual sounds or noises, as they might indicate problems early on. Furthermore, choose the correct settings in your slicing software each time you start a new print. These settings include the layer height. Try to select one that’s smaller than the nozzle diameter of your 3D printer. Check that your 3D printer is still calibrated properly and adjust the z-offset if necessary. Before printing, you should also evaluate whether you could split a model into smaller parts to make them easier to manufacture. Orient the components wisely to achieve maximum strength. Skirts and brims can increase the bed adhesion and prevent warping.


