制造商零件编号 SC0193(9)
RASPBERRY PI 4 B 2GB
Raspberry Pi
Single Board Computers Raspberry Pi SBC
Running a Raspberry Pi in a headless setup can offer numerous benefits, like reduced wiring effort and no need for an external display. However, a headless setup has some drawbacks, especially for beginners and makers generally more familiar with graphical desktop environments. Working with the Linux bash can feel alien and daunting for some people, and simple tasks may be more challenging to execute at first. However, a VNC server offers the best of both worlds by allowing you to access the Raspberry Pi’s graphical desktop environment remotely without the need to plug in any input devices or a monitor.
Before installing a VNC server to allow remote access to the desktop environment, make sure that a viable desktop environment is installed and running on your Raspberry Pi. Usually, that is not an issue, as the default complete Raspbian package already includes a functioning desktop environment.
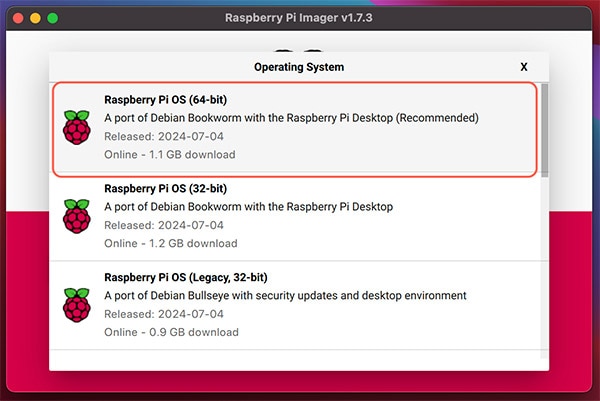 Choosing the full installation during setup ensures that all required components get loaded onto the Pi’s SD card.
However, if you installed the Light OS version, you have to download and install a supported desktop environment before continuing, for example:
sudo apt install lxde-core
The more recent versions of Raspbian already include an installation of the open source wayvnc VNC server. Alternatively, makers can choose from many different alternative VNC server options if they prefer to.
In either case, it’s worth applying system updates to guarantee that the program and all its dependencies get installed and configured successfully. Doing so also ensures that the system is not missing any required dependencies and thus helps prevent configuration problems further down the line.
sudo apt update sudo apt upgrade
Once the updates process concludes, VNC needs to be enabled in the raspi-config application, which can be started using the following command:
sudo raspi-config
In this program, first you will need to navigate to the interface options entry:
 Choose the interface options menu to enable VNC.
Next, select the VNC option in the submenu that opens the following screen:
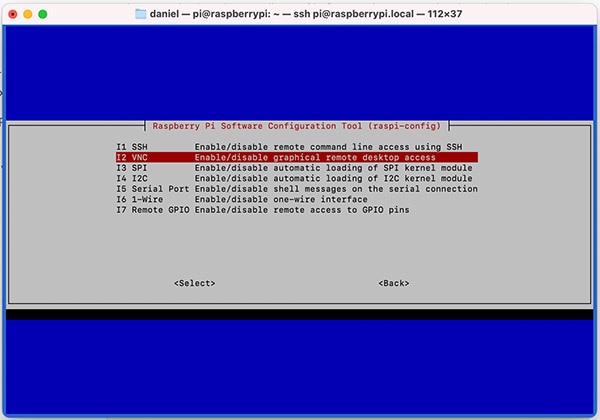 Highlight the VNC option and then choose ‘enable.’
The VNC service can be enabled by hitting the ENTER key and selecting the appropriate option. The system confirms the change with a dialogue popup:
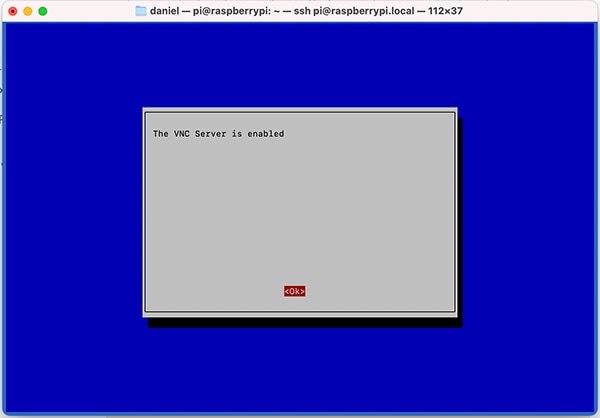 The system reports the current VNC server configuration.
It’s worth noting that the program checks for any missing dependencies and programs at this point, so users get prompted if the prior installation steps have missed anything. The VNC server should be ready after a system reboot, and you can use your favorite VNC client on any other computer within the same network to connect to the Pi using the raspberrypi.local hostname or the SBC’s IP address:
 Use any VNC client program to operate the Raspberry Pi’s desktop remotely.
Despite multiple checks during the installation and activation of the VNC server program, you might still face problems connecting to the Pi. Usually, these problems manifest in the VNC client program running on a different computer, showing an error similar to the following one:
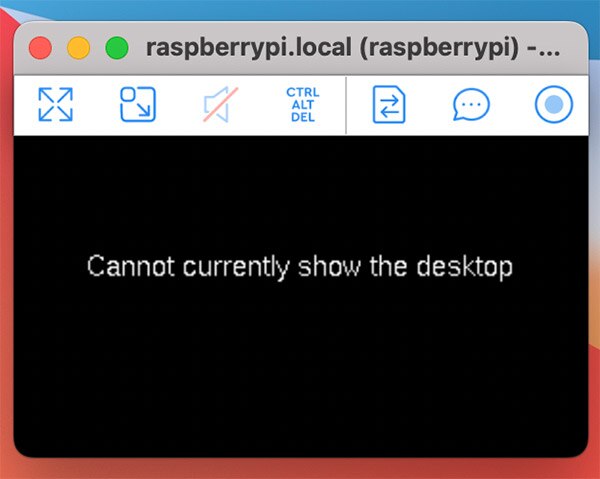
This screenshot shows a common error message that indicates that something is not set up correctly. However, this error typically does not hint at networking issues.
In these instances, you can usually resolve issues by following a few straightforward troubleshooting steps.
First, double-check that you have installed a suitable desktop environment. This problem usually occurs when users initially set up a headless Raspberry Pi using the minimal OS option. It’s worth re-installing the default VNC server when switching from a minimal headless setup to a desktop environment.
Next, verify that the correct options in raspi-config have been set. The VNC server setting must be enabled in the interface options menu. Next, the desktop environment needs to be started when the system boots. Usually, this is not an issue, especially when using the complete installation. However, in headless text-only mode, you must enable desktop autostart in the system options menu:

The desktop must be loaded for VNC to work. This screenshot shows how to auto-load the desktop environment during startup.
Auto-login is optional, but I like to activate it to save a few steps before using the Pi remotely. On headless Raspberry Pi systems, users can find a VNC resolution option in the display settings. Opting for a lower resolution can also help mitigate video stream issues, for example, dropped frames:
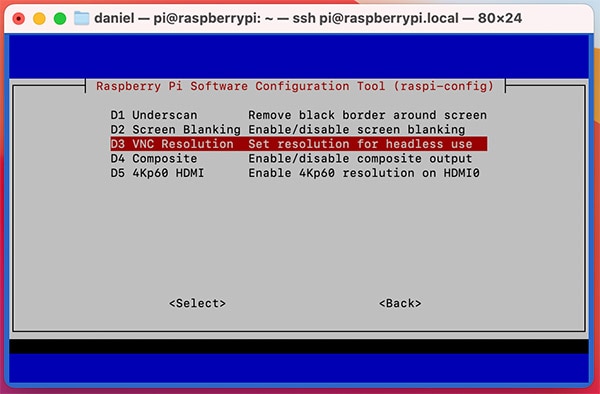 Changing the VNC resolution can help mitigate display and connectivity issues.
Finally, adjusting network settings can also help resolve connectivity issues. It’s worth temporarily turning off a router’s firewall for the Raspberry Pi or allowing port 5900 to test whether doing so resolves connectivity problems. Connectivity issues can also arise if the Pi’s hostname is not set up correctly. In those instances, use the IP address or set up the hostname manually before connecting.
A VNC server can help bridge the gap between using a headless setup and working with a graphical desktop environment, which offers many benefits. It provides a familiar interface while simultaneously cutting down the number of wires and external devices required to work with the Pi.
Setting up a VNC server on the Raspberry Pi is straightforward, especially when using the complete Raspbian package. The desktop version includes wayvnc, a user-friendly and free VNC server. However, it’s recommended that users update the software on the Raspberry Pi before trying to use the VNC server.
Once the installation is complete, enable the VNC server in raspi-config. This program also provides numerous helpful configuration options when troubleshooting VNC connectivity problems.