How to Boot to Command Line and SSH on Raspberry Pi
2018-04-05 | By Maker.io Staff
Using the Raspberry Pi as a desktop machine can be handy for some projects, but other projects may not require it. So, in this how-to, you will learn how to turn your Raspberry Pi machine into a command line system—and how to connect to it over a network!
Using the Raspberry Pi as a desktop machine can be handy for some projects, but other projects may not require it. So, in this how-to, you will learn how to turn your Raspberry Pi machine into a command line system—and how to connect to it over a network!
Why Scrap the GUI?
While the Raspberry Pi can run an OS with a GUI interface, that does not mean it should. The GUI is useful when making programs or writing documents, but if you are using the Pi as a processing unit, then scrapping the GUI could be hugely beneficial. It will save a lot of CPU processing time and RAM usage.
Disabling the GUI is rather easy, and it only requires the use of the terminal. Firstly, open a terminal window and enter “sudo raspi-config”. This should bring up a menu option, as seen below.
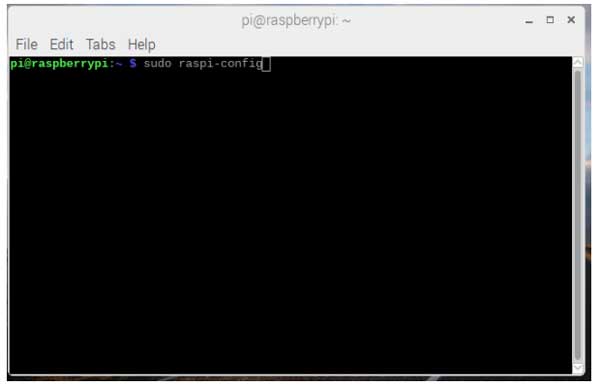
The raspi-config command
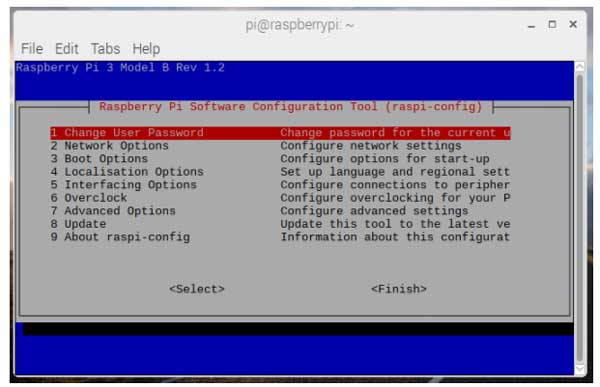
The menu that appears after executing the above command
Once the menu loads, select item 3, which should be called “Boot Options”.
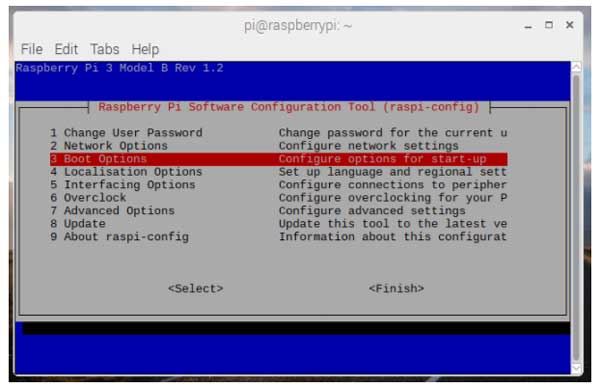
The various boot options
Select the first option in the list called “Desktop / CLI”.

Select the Desktop CLI option
In the boot option, select the second option, which will force the Pi to boot in command line mode and automatically log in using the default user “pi”.
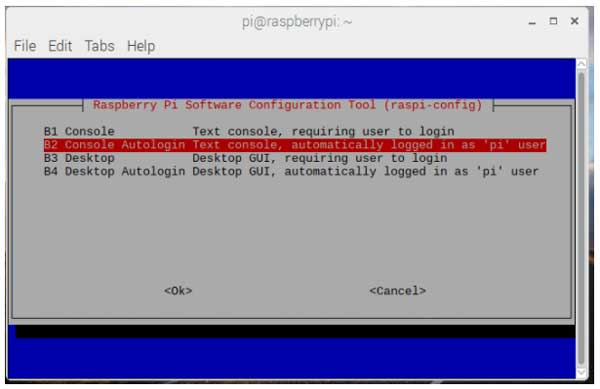
Option B2 will boot the Pi into the command line
When you select the boot option, you will return to the main menu. At this point, click “Finish”.
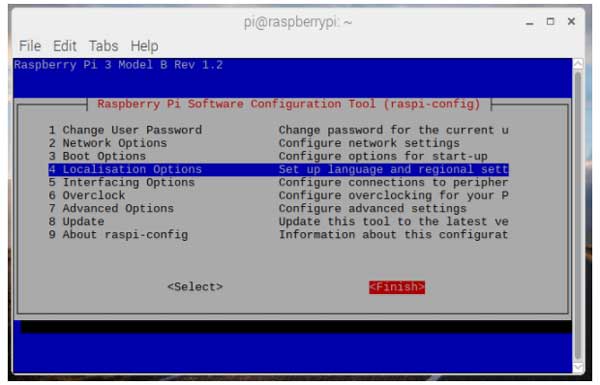
Returning to the main menu automatically
At this point, you will be asked if you want to restart the Raspberry Pi; click “Yes”.

Reboot the Pi at this point
When the Pi reboots, you should be presented with a command line that looks similar to the one shown below.
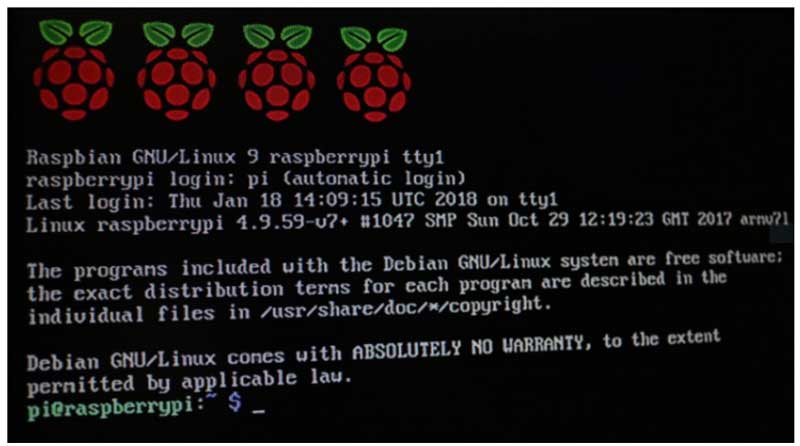
The Raspberry Pi command line boot mode
Getting back to a desktop environment is very easy. Like before, use the “sudo raspi-config” command, go to the boot options in the menu, and, this time, select option B4, which will boot into a graphical environment instead!

This image was taken with a camera because screenshots are unavailable in command line mode
Configuring SSH
So, now that our Pi is using less CPU and RAM to process the GUI, it's time to control the Pi from a remote terminal (PC, MAC, or even another Linux system). But do note that this section of the tutorial will only consider Windows-based machines.
First, we must enable SSH on the Raspberry Pi. To do this, run the raspi-config command as before, and in the config menu that loads, select “Interfacing Options”.
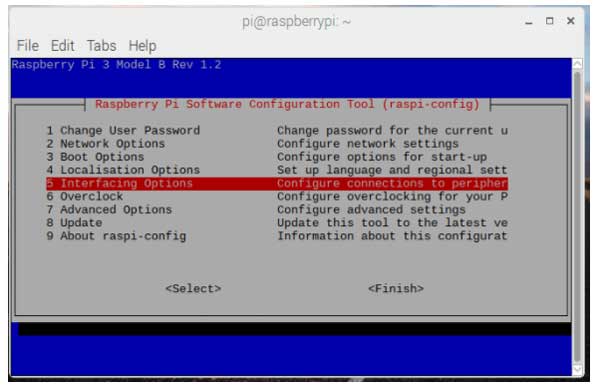
The interface option in the raspi-config menu
In the list that loads, select the line with “P2 SSH”.
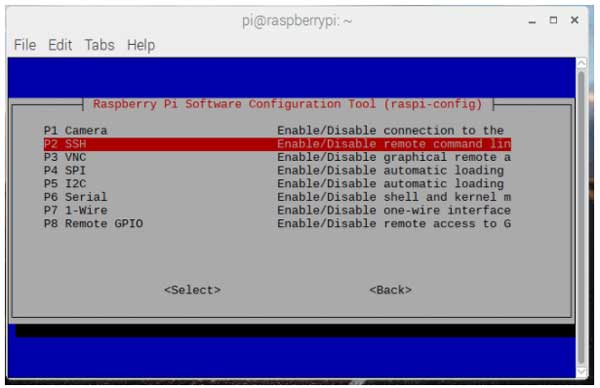
Select the SSH option
The menu will prompt you if you want to enable SSH or not; select “Yes”.
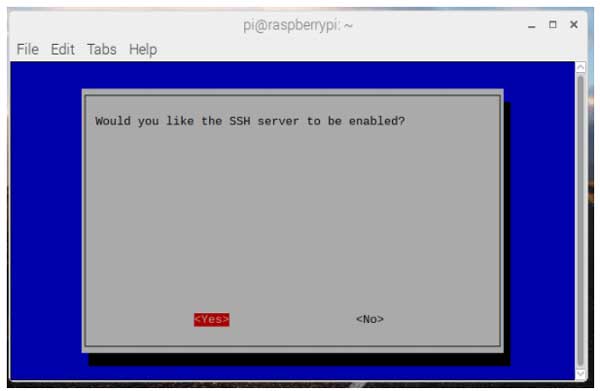
The SSH option
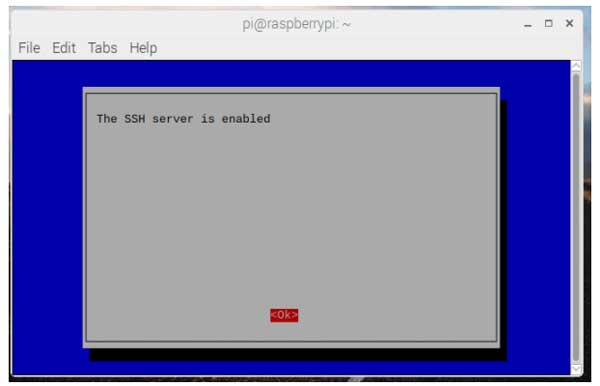
The result of selecting “Yes”
Next, you need to find out your Raspberry Pi’s IP address. To do this, you first need to connect to a network, either via LAN or WLAN. In my instance, I connected my Raspberry Pi to my WLAN. Then you then need to find out the IP address by running the command “sudo ifconfig” and looking through the bulk of outputted text. In my case, the IP of my Pi was 192.168.1.74. Be sure to write this down!
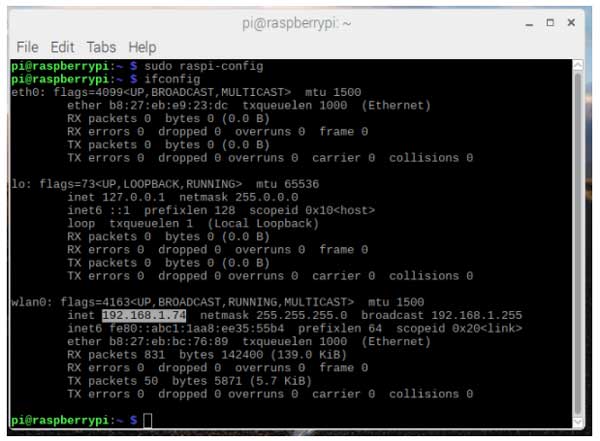
Running the ifconfig should return network details about your Pi
Connecting to the Pi Via SSH
Lastly, you will use a program called PuTTY to connect to the Pi via SSH. In case you didn't know, SSH stands for Secure Shell! So, now, we need to download PuTTY, which can be found through a quick Google search. Feeling lazy? Let this link Google it for you! Want to head straight to PuTTY’s website? Click here.
When the program finishes downloading, run the installer and keep all the default options. Once installed, launch PuTTY and enter the details into the program, as shown below. Be sure to change the IP to the IP of your machine! Once done, click “Open”.
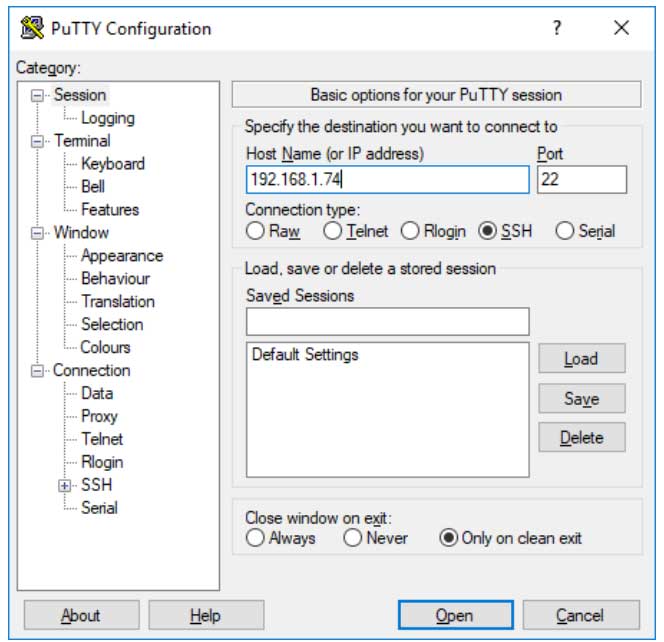
The PuTTY Application
You should see a login page, and you will be asked for a username and password. The Raspberry Pi, by default, uses “pi” and the username and “raspberry” as the password. If all goes well, you should see the following.
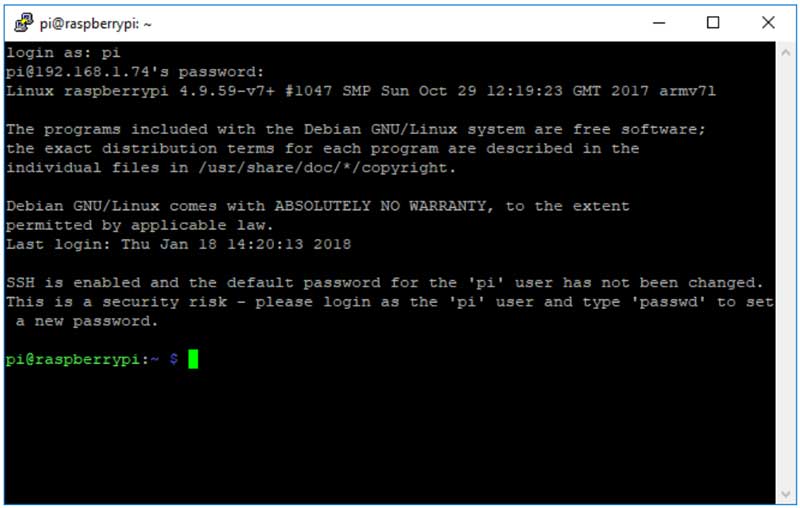
Logging in via SSH
Conclusion
The advantage of SSH may not seem obvious at first, but imagine if you used the Raspberry Pi in a situation where you could not get physical access to it (if it was, say, installed inside a wall). Instead of needing to get a monitor and keyboard, you can just connect to it over the network and send over commands, save files, and update firmware for the Pi to run at startup.
Have questions or comments? Continue the conversation on TechForum, DigiKey's online community and technical resource.


