How To Back Up a Raspberry Pi SD Card
2023-03-22 | By Maker.io Staff
Lost data can be frustrating and cost quite a bit of effort, time, and money in the worst case. Unfortunately, these mishaps happen for various reasons, whether due to a hardware fault, power outage, or simple user error. That’s why creating regular backups and storing them on redundant physical machines or storage devices is crucial, as everyone who’s experienced data loss at one point might agree. Luckily, creating a full backup of a Raspberry Pi’s SD card is a fast and straightforward procedure. This article outlines why you should create backups and two ways of accomplishing the task so that you can be on the safe side regardless of your Linux skill level.
Why Worry about Backups?
Data loss can have significant effects, depending on where the problem occurs. In most cases, however, the problem will luckily not be quite so dramatic. However, a Raspberry Pi’s SD card might hold valuable data, such as a custom program or script that took hours to write or family photos if the Pi is used as a regular computer.
Most people will run the operating system off a standard, consumer-grade SD card, which was not made for this task. Like USB sticks, these storage devices were not primarily meant to run an OS. That’s due to the operating system regularly shuffling files around and writing many entries into log files and other temporary locations, which may wear out the storage modules on an SD card or USB thumb drive. Therefore, hardware failure is just a matter of time, and it will occur with a greater probability and in a shorter time than it would with a storage solution made for running an OS, such as an SSD or HDD.
Creating Backups Using the Desktop Environment
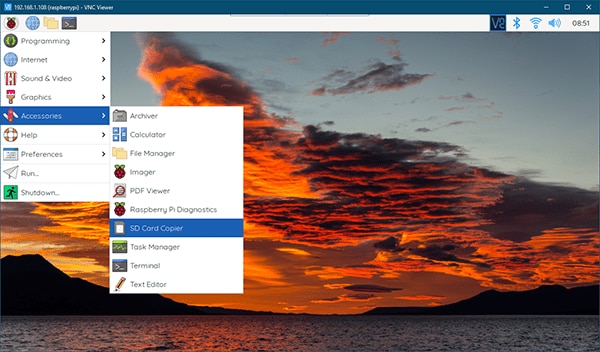
Suppose you use your Raspberry Pi with a monitor, keyboard, and mouse. In that case, you can utilize the Raspbian operating system’s built-in SD Card Copier utility program, which lets you select the source and target devices before making an exact copy of all the contents on the source SD card and storing it on the target device. To start, plug in an external storage medium - for example, a USB thumb drive or a second SD card connected via an external card reader - and open the utility program from the desktop’s program menu.

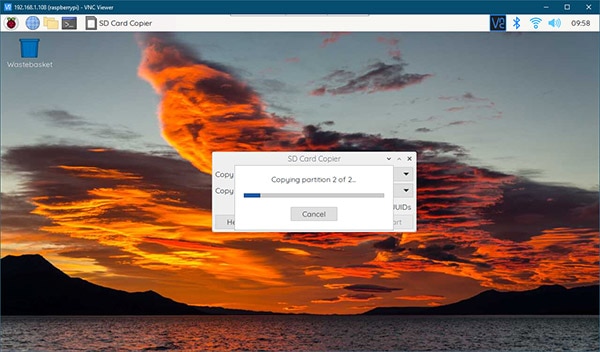
Then, select the correct source and target devices in the UI.:

The tool will then copy the entire SD card with all its partitions to the selected target device.

Backing Up a Headless Raspberry Pi
Many makers use the Raspberry Pi without a keyboard, mouse, and display attached. However, that doesn’t mean you can’t back up the SD card, as there’s a handy command line tool that can create exact copies of all disks attached to a Linux-based system, such as the Pi. To get started, connect the external target device to the Raspberry Pi and then use lsblk to list all drives and their partitions:

Look for the external thumb drive or SD card reader you want to use as the target device. Typically, you can use the name or size of the storage medium to identify the correct one. Do the same for the source device (the system’s main SD card) and write down both devices’ names. Make sure to use the disk name and not one of the partitions, as highlighted in the image above. Next, run the dd tool using the following parameters:
sudo dd bs=4M if=/dev/mmcblk0 of=/dev/sda status=progress
Doing so copies the entire source disk to the target disk, including all partitions and data. In my case, the destination disk has less capacity than the source. However, that’s not a problem since the Raspberry Pi OS only takes up around 3GB on the SD card. However, you should always use a sufficiently large destination drive when creating backups to prevent data loss or corruption.
Summary
Regularly backing up any computer’s storage media is a good idea, as hardware failure can always occur, and with a more or less recent backup, you at least don’t lose all your data. However, backups are critical when working with storage media not made for constant use, such as an SD card or a USB stick. On the Raspberry Pi, you can choose from various options when creating full backups of the system’s main SD card. First, you can use the graphical desktop environment, which can create backups with only a few clicks. On the other hand, the command-line tool dd is particularly practical when creating backups of headless systems, such as media servers. Whichever option you use, you end up with an exact copy of the original SD card, meaning no restoring is necessary should the original card fail. The copy is fully bootable and contains all partitions, programs, files, and other data of the original. Finally, testing the created backup right away is recommended by trying to boot the Pi using the backup device.

Have questions or comments? Continue the conversation on TechForum, DigiKey's online community and technical resource.
Visit TechForum


 中国
中国