制造商零件编号 ABX00023
ARDUINO MKR WIFI 1010
Arduino
Connected projects have become common in the maker community over the last few years. While IoT devices used to be an exotic new thing, you can now find them in almost every home and many offices. However, with an increased number of connected devices comes the need to collect, aggregate, and monitor the data from these connected nodes. Implementing a custom web-based interface that is reliable, scalable, and secure is a non-trivial task. Therefore, this article explains how you can use the Arduino IoT cloud in your projects, which lets you develop, deploy, and monitor all your connected Arduino projects from a single easy-to-use website.
You need to link each Arduino board before using it with the Arduino IoT cloud. Start by navigating to the Arduino cloud website and signing into your Arduino account. Create a new account if necessary. Then, select the IoT cloud option from the app’s launchpad:
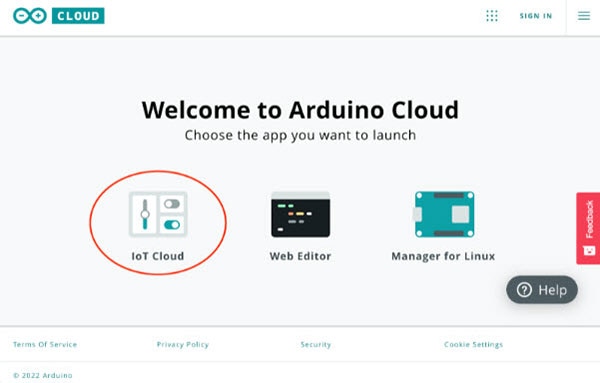 Choose the IoT Cloud option to get started.
Once the dashboard loads, click the devices tab in the top menu bar of the web application. Then, click the green button that lets you link a new device:
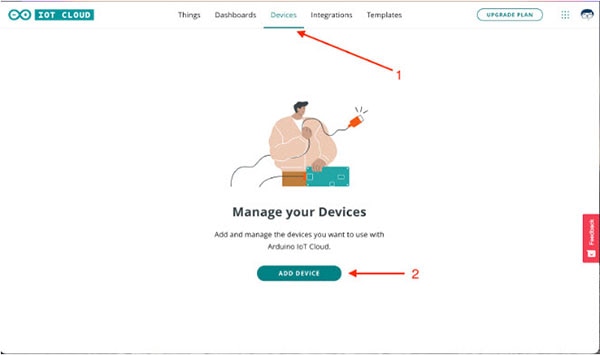 The list of connected devices is empty when you first visit the website. Use the highlighted button to link a device.
When you first add a device, the website will let you know that you need to install the Arduino Create Agent to use the IoT cloud service. This browser extension acts as a communication bridge between the web application and your development boards. You’ll see a dialog similar to the following image. Click the download button, execute the downloaded program, and follow the on-screen instructions in the installer.
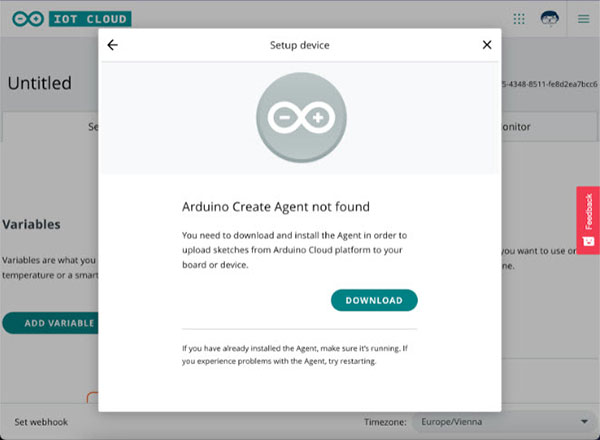 The website lets you know that you need to install the Arduino Create Agent to use the IoT cloud web application.
After you install the companion app, you should see the following dialog. Try restarting your browser or rebooting your computer if you still see a message that asks you to install the Create Agent.
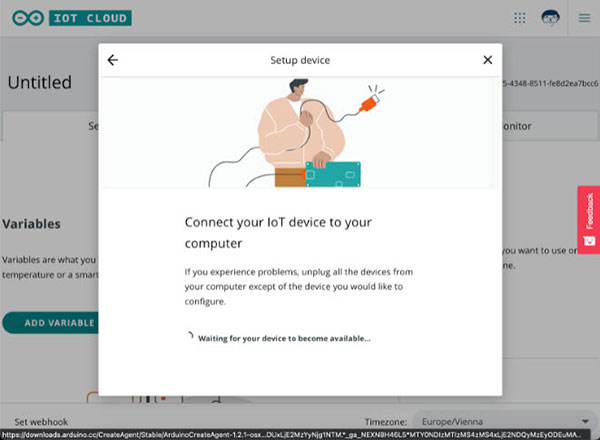 Once you install the Arduino Create Agent, the website will detect connected devices.
Next, connect a compatible device to your computer using a USB cable. The website will automatically refresh once it detects a compatible device:
 The website detected a development board connected to my computer.
Start the configuration by clicking the button in the updated dialog window. Next, you’ll have to assign your board a name. The website will then perform some automatic configuration on your Arduino board. Note that this process might take a while. However, it shouldn’t take longer than ten minutes:
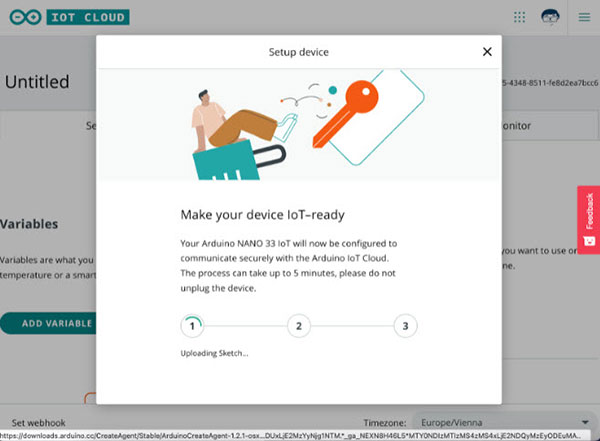 The website will automatically configure the selected development board.
Once the process finishes, the website lets you know that the device is now ready to be used with the Arduino IoT cloud.
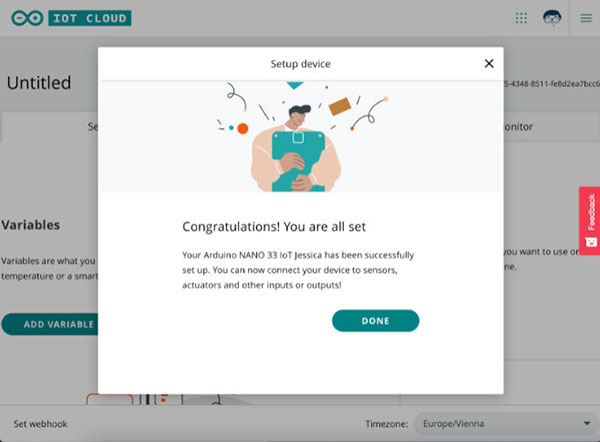 The website informs you once it successfully links a device to your account.
However, this dialog only confirms that the website successfully linked the device to your Arduino account. At this point, the development board will not be able to communicate with the cloud over a network connection. For that to work, you have to configure a “thing” in the Arduino IoT cloud. Then, you can enter your network credentials in the thing's dashboard.
Once you link a device to the IoT cloud, the website displays it in the list of known devices. Here, you can tie each device to a so-called thing. Such a thing represents an IoT project within the Arduino IoT cloud web application. Start by creating a new thing and linking it to the newly added device:
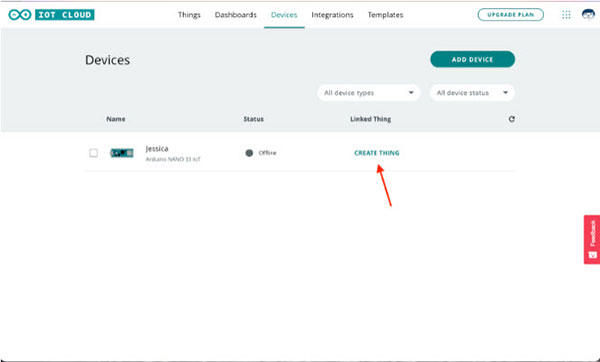 Click on the highlighted link to create a new thing.
After a short delay, the website takes you to the newly created thing. You can see that it has also linked the selected device to that project. However, there’s not much else to see yet:
 This image shows the new thing’s dashboard. From there, you can add variables, link, and unlink devices, and enter your network credentials.
From there, you can add managed variables to your project. The Arduino IoT cloud generates code around these variables that pass their values and change events to the IoT cloud dashboard. Therefore, you can use the IoT cloud to manage, update, and view variable values from anywhere in the world using various widgets. For now, you can start by creating a simple new variable by clicking the add variable button:
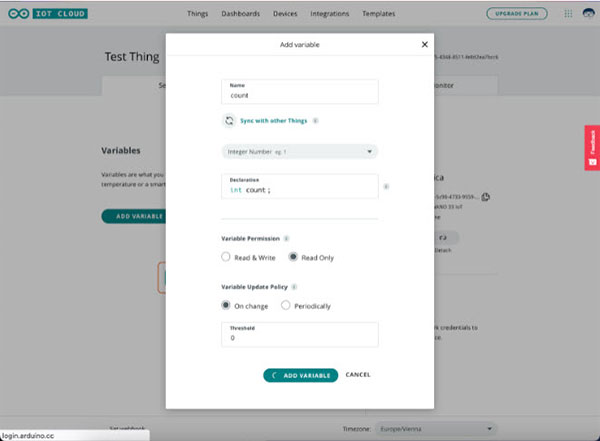 This image illustrates how you can create a new managed variable.
In this example, I created a simple integer variable and named it count. Then, I set the variable permissions to read-only, which means that the IoT cloud dashboard can only read the variable’s value. However, you won’t be able to change the variable on the dashboard. Next, I set the update policy to “on change” and the threshold to zero. Once you add the new variable, you can also configure the network options for this project:
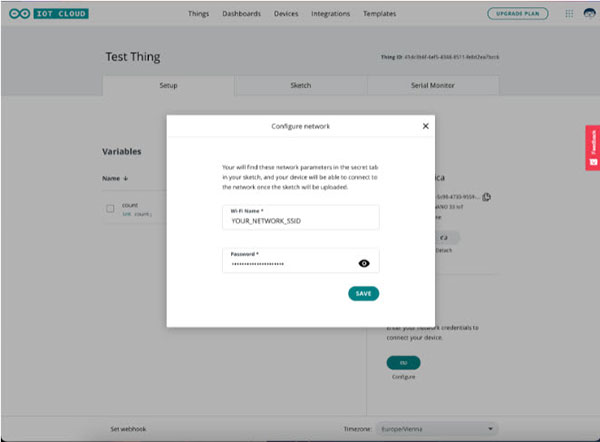 Don’t forget to enter your network credentials!
When done, the thing should look similar to the following image. Note that the variable doesn’t yet have a value and the device is also marked as offline. That’s perfectly normal, as you have to upload the code to your Arduino first so that it can connect itself to the cloud.
On the newly created thing’s page, click on the sketch tab to open the website’s code editor:
 Note that the device is still offline and not connected to the cloud, even after entering valid network credentials and adding the device to the IoT cloud website. You have to upload the auto-generated sketch to get the device online.
In the text editor, you can see that the IoT cloud application has already created quite a bit of source code for you. This code includes the network credentials you entered earlier as well as the managed variables you defined in the thing. However, the source code doesn’t include any functionality apart from the variable synchronization logic. Therefore, I added a few lines of code that increment the count variable once every second. Then, I uploaded the sketch to the Arduino board:
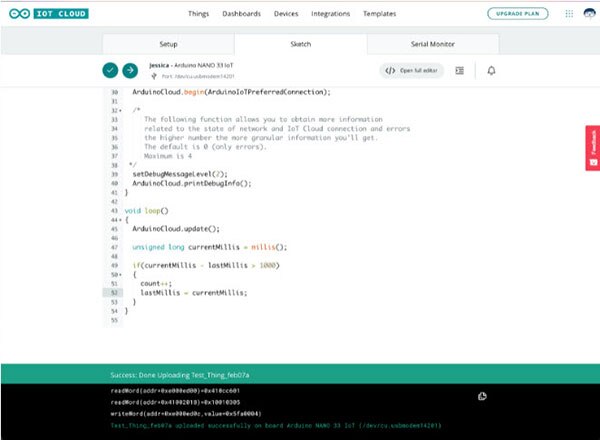 Use the web IDE to upload the sketch to your Arduino board.
As you can see, the upload was successful. However, I noticed that the board remained offline, and that the website didn’t update the variable’s value. A look at the serial monitor of the web IDE revealed the problem:
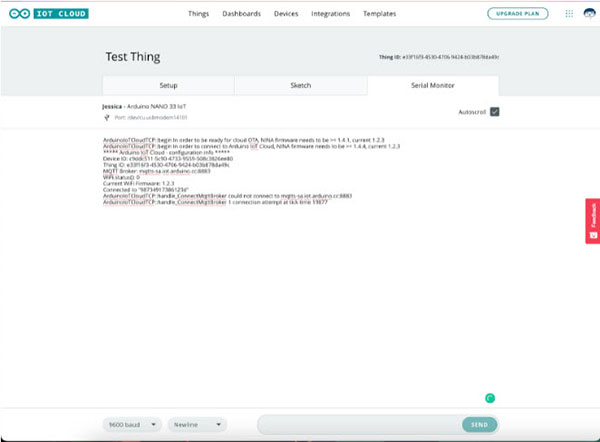 Check the serial monitor if your project encounters a connectivity problem. In my case, I needed to update the Arduino’s firmware.
As you can see from the console output, the Wi-Fi module’s firmware needs to be updated to a minimum version in order to connect the board to the Arduino IoT cloud. You can read all about updating the firmware in another article. Once you update the firmware and re-upload the sketch, you should see that your Arduino board has now successfully established a connection to the Arduino IoT cloud.
Next, you can create a custom dashboard in the Arduino IoT cloud to display and update managed variables in your IoT projects. For that, navigate to the dashboards tab and click the button to create a new dashboard for your project:
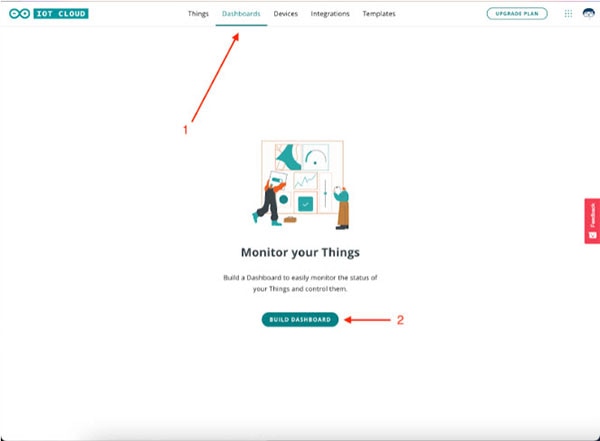 Navigate to the dashboards tab and click the highlighted button to create a new custom dashboard.
You can use dashboards to monitor the variables in your IoT projects in a visually pleasing way with little to no effort. All you need to do is drag-and-drop widgets into your custom dashboard design and link them to a variable in your sketch. Start by adding a simple “value” widget to the dashboard:
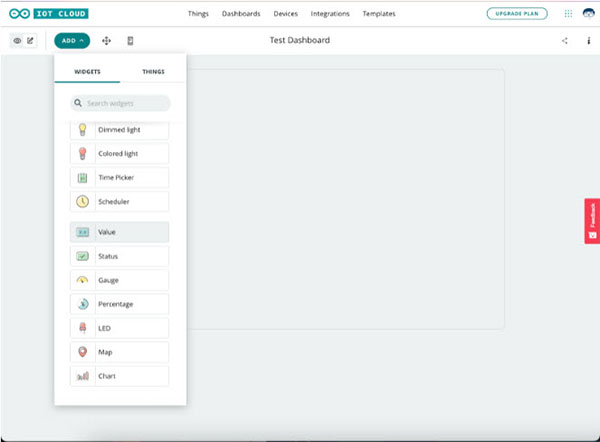 Add a simple value widget to the dashboard. This widget displays a managed variable’s current value.
Once you select the new widget, the website displays some options you can change. In this example, I only added a simple widget that displays the current value of the previously created count variable. Click the link button in the widget options to link the widget to the count variable. Then, click the done button to add the widget to your custom dashboard:
 Use the widget settings to link an existing managed variable. Then, click the button in the bottom right corner to add the widget to the dashboard.
Once you add the widget to the dashboard, you should see the displayed value update once every second as long as the Arduino remains connected to the Internet:
 This image shows how the dashboard displays the newly added widget.
From here, you can add as many variables as you want and track each of their values by adding various widgets to your custom dashboard.
The Arduino IoT cloud lets you set up and monitor many complicated IoT projects. The workflow always includes the same simple steps. First, link a new device to your Arduino account. Don’t forget to update the device’s firmware if necessary. Then, create a new “thing” and connect it to an existing device. A thing represents an IoT project in the Arduino IoT cloud. Next, add new variables to your thing.
The IoT cloud application will generate a code that automatically tracks and synchronizes these variables with the cloud. You can then use the code editor to add custom functionality to the automatically generated sketch. Next, upload and test the program using the website’s built-in IDE. Lastly, add a dashboard that lets you conveniently monitor and update variable values in your IoT projects.