Beginner Methods for Post-Processing FDM 3D Printed Parts
2022-04-27 | By Maker.io Staff
A previous article investigated a few methods that help you prepare your 3D printer and ensure that the printed parts stick to the print bed. Some other articles discussed a few strategies for choosing the correct infill pattern and density for your prints and also some properties of popular 3D-printing materials. For some, though, the real fun starts here: once the printer finishes building your part, it’s up to you to ensure that the printed components are perfect. In addition, you can get creative and experiment with different tools and materials to achieve various effects. Therefore, this article introduces you to a few beginner methods and tricks you can use to rework 3D-printed parts.
Cooling, Part Removal, and Visual Inspection
Seeing the printer lay down the last few lines of a part is exciting, and you’re probably eager to remove the printed component as soon as possible. However, you should let them cool to allow the printed structures to solidify and create a strong bond between the layers. Premature part removal might damage or warp parts due to internal tension or uneven cooling. Generally, parts will also be easier to remove once they cool, as the plastic shrinks and often detaches itself from the build plate in the process.
You can use a plastic spatula to carefully remove parts from the build plate once they cool down completely. Be careful not to damage the print bed surface. Once removed, inspect the component for blemishes and damage. For functional parts, use calipers to check diameters and clearances. Take note of the problems you find, as you might want to rework these areas later. You can also apply some force to test the part’s stability.
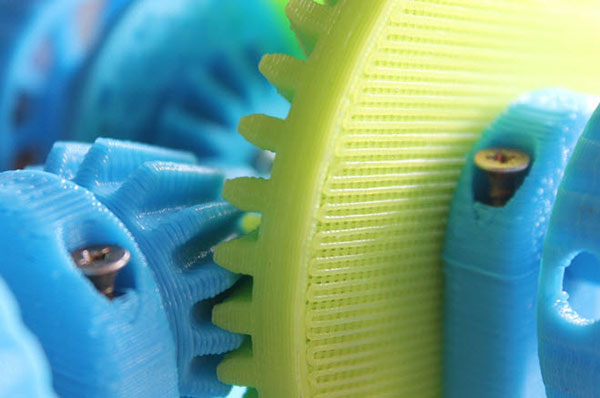
 At this point, you can also inspect the printed part for problems such as gaps between the lanes that form a surface. This is an example of a problem you can fix by changing the print settings in your slicer program. Image source: https://pixabay.com/photos/the-mechanism-of-differential-418198/
Basic Mechanical Rework Methods
The most basic rework you can do is to remove any additional support structures introduced by the 3D-printing process. In most cases, which means breaking off the support structures. However, sometimes you may need to use a sharp knife to remove more stubborn supports. Alternatively, you can also buy material specifically designed to be used for printing support structures. Such material can either be removed easily or dissolved, for example, using plain water.
Next, you can inspect your model for burrs. You often find a pretty noticeable burr along the surface that sits on the build plate during the printing process. The uneven edge might impact the appearance of the finished part. I typically run the blade of a pair of scissors or a deburring tool along the burred edge until I remove enough material. I don’t like using a knife for this task, as the risk of accidentally cutting yourself is too high. Equally, employing more aggressive methods, such as sandpaper, might easily remove too much material and cause severe visual problems.
 You can use a pair of dull scissors to file away the burr that often forms around the bottom of 3D-printed parts. The exaggerated drawing in the circle illustrates the burr.
However, sandpaper is perfect for creating a smooth finish on flat surfaces. Sanding can help prepare a part for further processing, such as priming and painting. While you can sand practically all non-flexible 3D-printed parts, the technique is not ideal for smoothing small components and parts with many fine details, nooks, and crannies. In addition, remember that sanding is a subtractive process. This means you remove material from the printed part, which might affect its dimensional accuracy. Make sure to wear appropriate personal protective equipment (PPE) to avoid getting dust in your eyes or breathing in any harmful particles.
In contrast to sanding, filling is an additive method where you use a thick epoxy compound to fill in small holes and imperfections in 3D prints, similar to how you’d apply filler to a wall with holes in it. Note that this technique is suitable for large, flat surfaces only. In addition, the filler typically doesn’t create a very strong bond with the printed part. Therefore, this method is only viable for decorative elements rather than functional parts.
You often need to drill out holes and widen cutouts in mechanical parts to ensure that other components, such as screws, fit. You can use simple woodworking tools for these tasks, such as drills and files. I typically use a sharp knife for reworking small cavities and cutouts.
Chemical Surface Rework Techniques for Beginners
Lastly, you can employ local melting, a technique for removing light surface scratches and discolorations introduced by sanding the surface of a printed part. Scratches that result from sanding are prominently visible in darker-colored plastics. Use a hot air gun to apply heat to the overall surface of a printed part. However, apply the heat only for a few seconds, as heating the plastic too much could cause it to warp. You can also try using a hairdryer if you don’t have a heat gun. Note that this technique is not suitable for removing layer lines that are a natural side-effect of the FDM manufacturing process.
Summary
Once the printer finishes its work, you can get creative with various tools and techniques. Reworking printed pieces can improve their quality and appearance. Start by letting the parts cool down before removing them to prevent the components from getting damaged in the removal process. Carefully remove any support structures next. Then, inspect the part for blemishes and problems.
You can use woodworking tools and household equipment for reworking 3D-printed parts. Use sandpaper to achieve a smoother surface finish, drills to widen holes, and a sharp knife to rework cutouts and cavities. I like to use dull scissors to remove any burrs that I find on the part. Lastly, you can restore the color of dark plastic and remove scratches introduced by sanding the surface by utilizing a heat gun.


