制造商零件编号 PIM510
GROW KIT
Pimoroni Ltd
License: See Original Project Raspberry Pi SBC
An indoor planter is fantastic for growing vegetables and herbs without a garden or balcony, but plant care can be challenging in a busy life. This article explains how to build an automated system that monitors soil moisture and water plants as needed. Once set up in a sunny spot, all that's left is to harvest the produce.
Bill of Materials for this Project
This project only utilizes a small number of electronic components, and to build it, you’ll need the following items per automated planter box:
Qty. Part
1 Raspberry Pi 4
1 MicroSD Card
1 Small 5V Pump
The pump already includes the matching silicone tubing, and the Pimoroni Grow kit comes with three sensors to accommodate different planter sizes and setups—from a single large planter to three individual flowerpots. In this instance, I decided to build a medium-sized planter box with wood and screws from the hardware store.
Preparing the Planter
The planter box can be as plain or fancy as you want. In my case, I opted for a straightforward wooden frame that accommodates a standard-sized rectangular flowerpot commonly used on balconies. Other materials like concrete or clay can make more waterproof planters. Irrespective of the material, the central aspect to consider is that the planter must have a drainage hole at the very bottom to prevent moisture buildup that could result in root rot or mold growth. The finished planter should provide a spot for mounting the electronics at a reasonable distance from the soil, plants, and water to prevent short circuits while still being close enough for the sensor wires to reach the Raspberry Pi HAT. Finally, if you want the planter to hydrate the soil automatically, you must also consider mounting spots for the silicone tubing.
This image explains the wooden frame’s dimensions. It also shows the mounting holes for the silicone tubing and the Raspberry Pi.
After deciding on a design, fill the pot with slightly moist soil. Leave some space to add the plants later if you don’t sow and sprout new ones from seeds. Then, add the plants to the soil or use the seeds according to the manufacturer’s recommendations. Once done, push the sensors into the soil, ensuring the earth reaches the line printed on the sensor PCBs for ideal results.
Push the sensor deep enough into the earth so the black mark sits around the soil level. Don’t push it down too deep to prevent corrosion from forming on the electronic components.
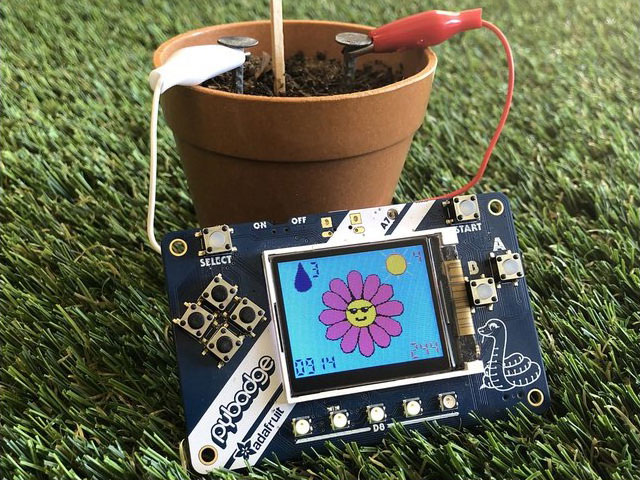
A Look at the Pimoroni Grow Kit
The Pimoroni Grow kit contains a central unit with processing logic, four buttons, and a display informing users about various aspects of the system, such as the current soil moisture. The sensors come on three separate PCBs, and each connects to the head unit via a small plug and the wires included in the kit. The Grow’s central unit has three additional connectors for attaching external low-power pumps. The grow board can switch them on or off to maintain a preset soil moisture level.
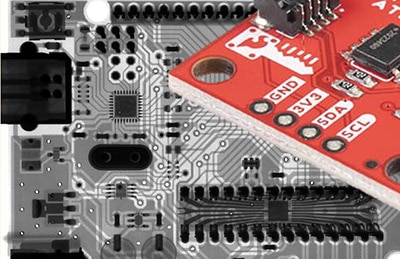
The Grow kit’s central unit connects to the Pi via the 40-pin GPIO port. While the Grow HAT was primarily designed for the Raspberry Pi Zero, it also works with every 40-pin Raspberry Pi (as of the time of writing, the most recent Raspberry Pi 5 is not yet supported). Since the GPIO pins are inaccessible after installing the HAT, the Grow kit exposes the I2C interface on its left side for communication with other devices:
The Grow HAT Mini also contains breakout pins for adding other I2C devices, such as sensors or development boards.
Connecting the Electronics
When using a Raspberry Pi Zero without preinstalled headers, the first step in the electronics assembly process is to solder a male 40-pin header to the SBC. You can skip this step when using a full-sized Pi or a Zero with preinstalled headers. The Grow display unit pushes onto the GPIO pin header. Pay close attention to avoid installing the board the wrong way, to prevent damaging the HAT or the Raspberry Pi. The HAT should line up with the SBC board edges and at least two mounting holes (on the full-sized Raspberry Pi models) or all mounting holes (on the Pi Zero variants).
The Grow HAT pushes onto the 40-pin GPIO header of any modern Raspberry Pi
Next, separate the individual sensor boards by breaking the small, perforated sections on the connecting PCB. Then, plug the included wires into the boards. Do not force the plug into the socket if it doesn't go in without much effort. They are designed only to fit one way around, and applying too much pressure may damage the connector. Once done, attach the wires to the head unit's top side in the same way.
Use some spacers and appropriate screws to firmly mount the Raspberry Pi to the frame, making sure that none of the electronic components touch the screws. You can also use nuts instead of spacers if you don't have them. The Grow HAT doesn't need to be secured using screws since it's such a small and light board, and the friction fit alone holds it in place securely.
Use spacers to mount the electronics to the frame.
You should mount the electronics to the planter away from water and soil to prevent moisture from damaging the components. Finally, attach long enough wires with a matching plug to the pump and plug it into the underside of the Pimoroni Grow PCB. Cable ties can help secure the wires to the frame and keep the installation neat:
Cable ties help organize the wires and keep them away from moisture and dirt.
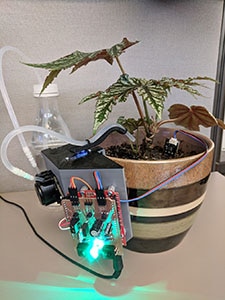
Preparing the Water Reservoir and Pump
A suitable water reservoir accommodates the pump and is sealable to prevent spillage. A milk bottle works well since the bottleneck is wide enough to comfortably fit the pump and hose through the opening. The resealable lid allowed me to drill a hole for the hose to fit through so the bottle could remain closed, even with the pump inside. I also made sure to seal the hole with some hot glue. However, don’t forget to add a small air hole so that air can replace the water pushed out by the pump:
Drill holes into the reservoir to fit the hose and wires through. Don’t forget to provide a way for air to rush in when the pump transports water through the hose.
Remember to place the reservoir so the water level always stays below the planter to prevent the siphoning effect from drawing all the water through the hose and overflowing the planter.
Two 3D-printable clamps attached to the wooden frame hold the other end of the watering hose in place on the planter. Instead of utilizing multiple pumps and hoses, I used a single pipe and plugged the planter-side end with hot glue. I drilled some smaller holes into the tubing to create a sprinkler system along the entire planter’s length:
This image illustrates how the flexible tube attaches to the frame and how small holes spread the water evenly across the whole planter.
That way, I ensure that the soil gets watered along the entire surface instead of only in certain spots where the hose happens to point. However, you can also use multiple tubes and reservoirs to spread the water evenly.
Installing the Necessary Software
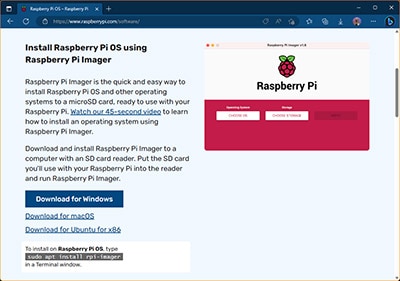
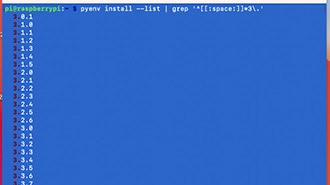
Once everything is assembled, prepare the Raspberry Pi software by flashing a clean Raspbian image onto the SD card. If you need a refresher on how to get started with the Raspberry Pi imager software, you can find a detailed guide here. It’s worth noting that the Pimoroni Grow software does not yet work on the Raspberry Pi 5, and it also does not work out of the box with the most recent versions of Raspbian OS (Bookworm) without modifications due to how Python environments are handled in newer releases. Therefore, running a legacy version is recommended until Pimoroni updates the code and releases a new installation script.
In the Raspberry Pi imager, scroll down the list of other Raspbian OS installations until you find the Bullseye version with security updates.
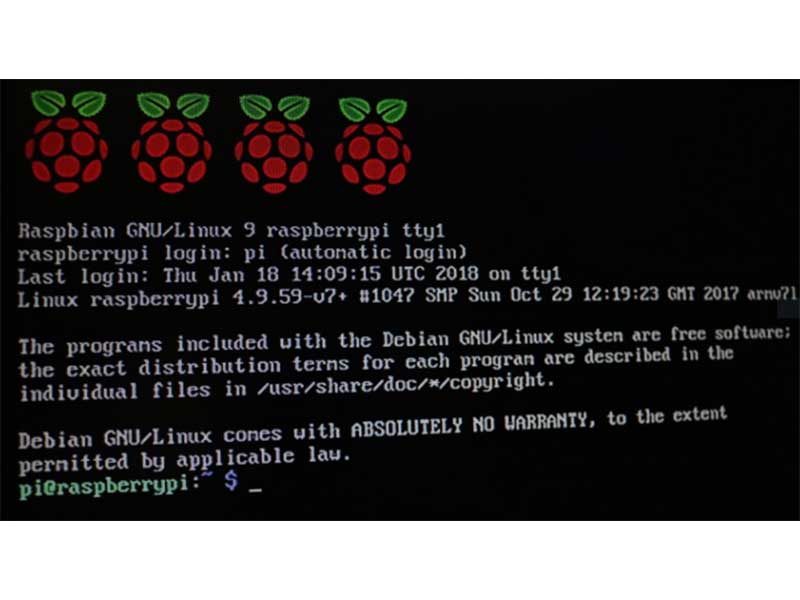
Once the setup concludes, boot up the Pi and log into a terminal. Then, type the following commands to update the package index and pre-installed software before proceeding:
sudo apt update
sudo apt upgrade
Next, use the following command to download and install the Pimoroni software:
curl -sSL https://get.pimoroni.com/grow | bash
Choose ‘y’ when asked whether to register the plant monitor as a service to make the software start up automatically after each reboot:
This image illustrates how the installer asks users whether they want to install the examples and register the program as a startup service.
Finally, finish the installation by rebooting once the installer concludes, either by typing ‘y’ when prompted by the program or by using the reboot command:
sudo reboot now
You can also use the following command to turn off the service auto-start feature on boot:
sudo systemctl disable grow-monitor.service
Finally, the following command enables auto-start on system boot:
sudo systemctl enable grow-monitor.service
Calibrating and Configuring the Pimoroni Grow
After installing the software and rebooting the Pi, the Grow head unit should display a bar graph, with each on-screen bar indicating one of the readouts of the plugged-in moisture sensors. The black line indicates when the Grow’s built-in alarm will sound. Note that this alarm can be turned off, and the onboard light sensor prevents it from going off in the dark.
This image shows the startup screen with one sensor attached. It also explains what the two primary buttons do.
On the main start-up screen (which shows up to three bar graphs – one for each active sensor), the top-right button (labeled X) changes global settings. Here, the alarm can be adjusted and deactivated.
The A button at the top left cycles through the three moisture sensor channels. Pressing the X button on one of the channel's detail pages lets you adjust each channel's settings individually. This menu allows you to activate or deactivate each channel, set its upper and lower moisture threshold values, and turn auto-watering on or off for each channel.
Use the on-screen display and the four buttons to reach the auto-watering options and activate the feature for each required channel.
While the Grow software comes with reasonable default values for detecting dry and wet soil, calibrating the sensors during the first few days of use is recommended. A simple method is to let the soil dry out to the point where you would manually water the plants. At this point, you need to set the lower detection level. Then, water the soil as you would normally and wait for the sensor readout to stabilize. After a few minutes, you can set each sensor's upper level. This way, the system always knows when it should sound the alarm or activate the pump, and at which point it should stop.
Finally, it's worth noting that the Grow board stores all the settings in a config file on the Raspberry Pi. Therefore, you can also adjust these settings using any text editor, which may be more convenient than changing the settings using the buttons on the Grow board. The file can be accessed by typing the following command:
sudo nano /etc/default/grow
After saving the file, the Grow software service needs to be restarted for the changes to take effect:
sudo service grow-monitor restart
Adjusting the Auto-Watering Pump Settings
The Grow software provides some tweakable settings that adjust how the pumps behave. The automated planter system works best if watering is as gradual, gentle, and slow as possible. Ideally, water would trickle out of the tube continuously to keep the soil at the perfect hydration level. Conversely, setting the pump volume or speed too high may lead to a flooded planter, as the soil can only take up a little water at a time. Therefore, it’s best to start with low values and gradually adjust them upward over multiple days, if necessary.
Start with low settings and adjust them as needed during the first few days of operation.
There are five settings related to auto-watering:
On/Off: activates or deactivates the feature for a channel
Level: sets the threshold at which the system turns on the pump. For example, choosing a threshold of 0.6 means the system starts watering if the moisture level drops below 60%
Delay setting: adjusts how much time has to pass between waterings
Speed setting: adjusts how fast the pump runs
Time option: changes how long the pump runs when triggered
Ultimately, there’s no one-size-fits-all solution to finding the perfect settings, as each planter will be different. The ideal values also depend on the plants and the soil. Therefore, it’s best to ensure accurate calibration and closely monitor the moisture levels during the first few days of operation.
Summary
Building an automated planter reduces the hassle of caring for indoor plants, ensuring you never forget to water your herb garden again! The planter base itself can be as fancy or plain as you like. I decided to utilize some wooden planks and a standard-size plastic flowerpot in this build.
The electronics for this project are straightforward and require little to no assembly, making it ideal for newcomers. When using a pre-assembled Raspberry Pi, all that’s left to do is separate the individual sensor PCBs, stick them in the soil, and connect them to the Grow’s central unit using the included wires. The Grow board itself attaches to the Pi via the 40-pin GPIO header.
The software installation process comprises only three steps: First, install Raspbian OS on a suitable SD card. Unfortunately, only legacy versions are currently supported out of the box. Then, update the software on the Pi and conclude the process by installing the Pimoroni plant-monitor software. Finally, calibrate the sensors and fine-tune the auto-watering settings during the first few days of operation.