制造商零件编号 SC0194(9)
RASPBERRY PI 4 B 4GB
Raspberry Pi
The field of object detection is still relatively young and fast-moving, so when I found myself searching for resources on implementing object detection on my Raspberry Pi, I noticed that most information on the internet was either out of date or just incorrect. After trying to follow a couple of guides, I quickly found myself in a pit of dependency despair, as many libraries have not been updated for the Raspberry Pi in what feels like an eternity. This guide was created in July 2024 and will likely remain relevant for a while, as it utilizes Google’s Mediapipe library, which is relatively new.
Before we start, let’s talk about how it works and some of the terminology behind it. If you already know this, feel free to skip to the next section where the guide starts! Object detection is an application of neural networks. We won’t go too far into the details of things, but neural networks are machine learning structures that use layers of neurons to interpret patterns in data and provide an output. If that sounds vague, it’s because it is! The beauty of neural networks is that they can easily be extended to perform predictions on many kinds of data. If you’d like to dive deeper into what exactly a neural network does behind the scenes, IBM has a great article providing a beginner-friendly explanation.
Normally, the usage of neural networks is divided into training and inference. The training phase is self-explanatory, it’s where you train a neural network on data you provide it so that it can recognize patterns in your data. The inference phase is where you use your neural network to infer what the output would be based on new input data. In this guide, we’ll be using a pre-trained object detection neural network and performing the inference step on a Raspberry Pi. In another guide that’s coming soon, I’ll show you how to retrain an existing neural network to detect custom objects!
A 4GB or 8GB Raspberry 4 or 5 running the 64-bit Bookworm OS (I’ve found the Pi 5 to be around 3 times faster than the Pi 4 in this application). I’ve fully tested everything with a Raspberry Pi 4 and Pi 5 running the latest Bookworm version as of July 2024.
Note: It is absolutely critical that you are using the 64-bit version of Bookworm as many packages do not have Python wheels for the 32-bit version. It’s worth taking the time to check your system before proceeding. Type the following into your terminal:
getconf LONG_BIT
If you see 32, you have a 32-bit OS. If you see 64, you have a 64-bit OS.

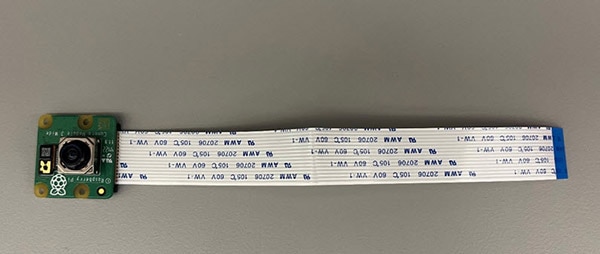
You will also need a Raspberry Pi Camera Module 3 and the correct ribbon cable for your board.
It’s always highly recommended to use virtual environments when installing Python packages. Virtual environments isolate program dependencies to a specific runtime or environment in order to prevent conflicts that may arise if you install packages to your whole system. For example, let’s say a program depended on version 1 of a package, but another program depended on version 2. Installing one version could overwrite the other version, leading to broken dependencies. Instead, we could use a separate Python environment for each program, allowing both versions of that package to coexist.
When we create a virtual environment, we basically create a folder with all the packages that we want along with the version of Python that we want to use. When we run a program with a virtual environment, it references only the packages installed inside that virtual environment.
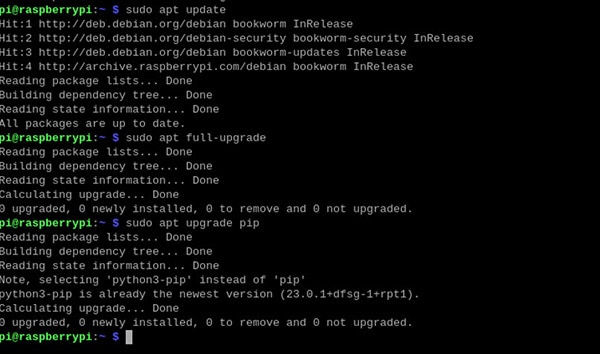
Before proceeding, it’s always a good idea to update our local packages and our OS. Open a terminal window and run the following commands:
sudo apt update
sudo apt full-upgrade
sudo apt upgrade pip
To create a virtual environment, first use the terminal to navigate to the directory you want to put your virtual environment files in. Every user has their own preference for where they like to put their virtual environment folders, but I like to store my virtual environment separately from my project folder. That way I can keep my project folder backed up with GitHub separate from the virtual environment. Once you’ve navigated to the folder of your choice (I’ll be working on my desktop), run the following command in the terminal:
python3 -m venv “Environment Name” –system-site-packages
Note: The system-site-packages command is critical because it includes the packages that are already installed in your system in your virtual environment. This will prevent you from having to install a bunch of other packages, making the installation much easier! I also recommend making your environment name short and easily identifiable. A long name can easily become annoying to type in the terminal repeatedly...I speak from experience.
Using the ls command, you should now see a folder in your directory with the same name you gave the virtual environment.

This is the folder where your virtual environment files are stored. To activate this virtual environment, pass the following command.
source “Name of your virtual environment”/bin/activate
Your virtual environment is now active! You should see the name of your environment in parentheses at the left of the command line, which indicates which environment is active. From here, installing the packages is straightforward. All we have to do is pass the following command:
pip install mediapipe
and voila! Mediapipe will install all the packages and dependencies it needs (most of which should already be installed if you passed the –system-site-packages command earlier).

Note, once your environment is active, you can be in any directory and install packages! If you want to deactivate an environment to switch to another one, simply write deactivate into your terminal and it will deactivate the virtual environment. Pretty simple huh?
Now that we have our packages installed, we can install the demo files I prepared for this guide! Using your terminal, navigate back to your project directory. Once you’re there, pass the following command:
git clone https://github.com/RamadityaK/PiMediapipeObjectDetection.git
This will copy the demo I have prepared to your project directory. It may take a second depending on your internet speed. Once the demo installs, you should see a folder called “detect”. Navigate inside this folder to find all the resources you need for object detection. You should see a file called “efficientdet.tflite”. This is the file that contains all the neural network information. Next is the “VideoFeedObjectDetection.py” file. This program file includes a demo of running object detection from your Raspberry Pi Camera. Finally, there’s a file called “ImageObjectDetection.py” that runs object detection on a single image. This is a useful program to debug issues with your programs or just test your neural network.

Go ahead and open “ImageObjectDetection.py” with Thonny. At first glance, this program may look intimidating, but it’s actually pretty simple! Most of the work is done for us behind the scenes in the libraries we’ve imported. Implementing and optimizing a neural network is a difficult task, but thankfully we have researchers and engineers to take care of that for us!

Before we can continue with the guide, we have to configure Thonny. Remember all the work we went to in order to create a virtual environment? Right now, Thonny has no idea it exists and is just using the packages installed in the system already. This means that if you try to run the program without this step, you will likely encounter an error along the lines of “___ package does not exist”. To tell Thonny where to look to find the packages we’ve installed follow these steps.

First in the top right of the window in Thonny, hit the button that says, “switch to regular mode.” Restart Thonny.
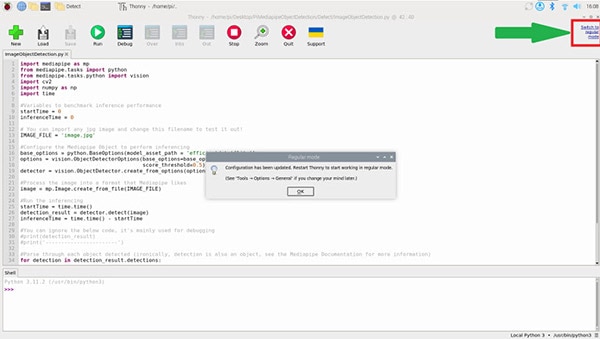
In the top menu go to run>>configure interpreter.
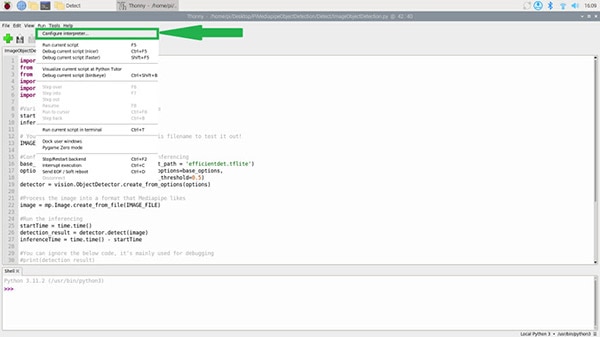
Click the 3 dots next to the python executable field and navigate to the folder where you made your virtual environment. Go into the bin folder and click on the activate file. Click ok to close the menu. The shell should now show the path to your python executable (this path should match the path when you activate the environment with source). Voila, Thonny is now configured to run your program.

If you’d like, you can also run the program through the terminal, though I won’t be covering that here.
You should already have the “ImageObjectDetection.py” pulled up in Thonny from the last section. Hit the run button in Thonny and you should see the output. Right now, the image included in the folder is a picture of a dog and a cat. Your output should tell you what is in the image (dog and cat), the probability for each, and the center of the bounding box where they’re located. If you’d like to verify this for yourself, just open the image file in the directory. You should see that the centroid roughly corresponds to the center of the dog and cat! I’ve also displayed the inference time, which shows how long it takes to perform inference.

Note: Your program may also show a warning like mine. You can ignore that error. It has to do with the internal workings of Mediapipe and is not relevant to us.
The program is simple and well annotated, so I highly recommend reading through it to gain familiarity with the general flow of the program and what things do!
Now, open the “VideoFeedObjectDetection.py” file in Thonny. This example uses the Raspberry Pi camera to take images and perform inference on them. At first glance, it may look more complicated, but if you really think about it, the only difference between the previous example and this one is that we perform multiple inferences in quick succession.
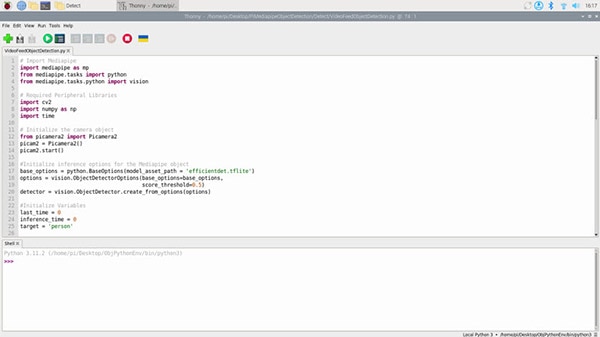
Let’s briefly walk through the program. Again, it’s well documented, so I highly recommend sitting with the code for a while and understanding it. We first initialize the camera and the Mediapipe object. The Mediapipe object is what performs inference. You may notice that the inference is initialized with a couple of parameters such as the minimum threshold accuracy, and the location of the .tflite file. You can read up about these parameters here.

When an object detection program runs, it detects things that it thinks are certain objects and returns a confidence value ranging from 0 to 1. The higher the confidence, the more likely an object is correctly classified. The minimum threshold sets the lowest confidence a detection can have and still be reported.
Entering the super loop, we collect an image from the camera and convert it to a NumPy array. We modify this array using Open CV to be in the correct color format and in my case, flip it 180 degrees. How much you need to rotate your camera is entirely dependent on your Pi camera’s orientation. You can change the constant variable in the argument from FLIP_180 to FLIP_90_CLOCKWISE or FLIP_90_COUNTERCLOCKWISE. An image flipped the wrong way will confuse the model and ruin your predictions, so ensure your images are oriented the right way up!

Finally, encode the image in a way Mediapipe likes, and we ask the Mediapipe library to perform an inference on the picture. This section is essentially the same as the image detection example, except we are feeding the model a NumPy array from the Raspberry Pi camera rather than an image file.

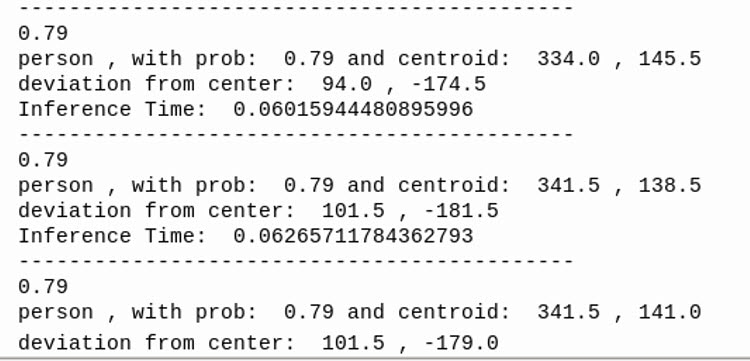
Mediapipe will store the results in an object contained inside the class. In the following code, we access those objects and display the results from them. I’ve got the code set up so that if it sees a person, it will display the center of the person’s bounding box and the confidence it has in its prediction. I’ve also printed the time it takes to perform an inference so that you can get an idea of how long it takes to perform each cycle of the loop. You can remove the if statement inside the for loop so that the object detector outputs all the objects it detects instead of just the target class.
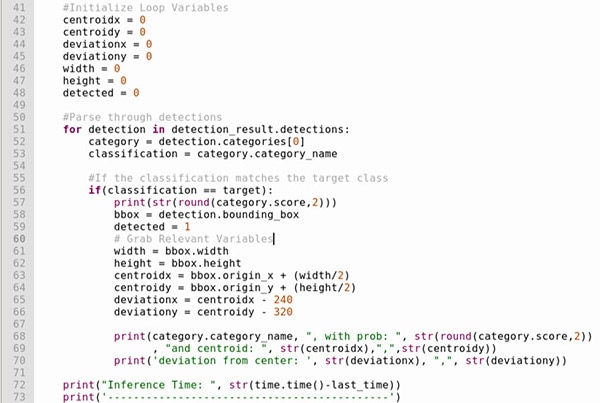
After all this, the loop repeats again, taking another picture and processing it. In the end, we get a continuous stream of data (about every 70ms on my Pi5), giving us information about objects detected by the camera.
Now that we know how everything works, let’s run the program! Stand in front of the camera, ensuring that your whole body is within frame. You should be able to see the detection result return “person”, and the centroid move around as you move around!
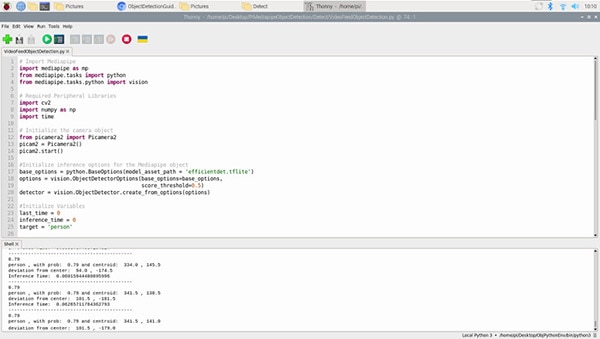
And voila! You have a working object detector! Gather different household objects and experiment to see which are detected. Alternatively, you could use the image detection model and try different images. The model we are using is the efficientdet-lite0 model. This model was designed and trained on thousands of images by a group of researchers. I find that it works great for detecting people, which could prove to be very useful for pranking people around the office…. I’ll be making a separate guide soon on how to use object detection data to track objects (or people) with an XRP robot.