3D Printing Basics: Bed Leveling, Filament Loading, Slicer Configuration
2024-12-05 | By ShawnHymel
3D Printing 3D Print Accessories 3D Printer
In the previous tutorial, we explored different types of 3D printers and recommended accessories to improve your experience. Now it’s time to print your first part. In this tutorial, we’ll walk through key steps including leveling the bed, changing filament, configuring your slicer, and printing your first 3D model. Once you’ve mastered these basics, you’ll be ready to tackle more advanced projects.
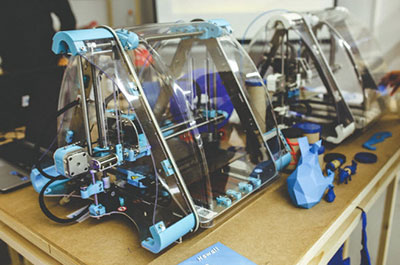
Note that the videos showcase a LulzBot SideKick 747, but the tips should apply to just about any Fused Deposition Modeling (FDM) printer.
Downloading Parts
3D printers build physical parts based on virtual 3D designs. Such designs can be constructed in a variety of ways, but the most common is through a CAD program (e.g., Fusion, FreeCAD) or a 3D graphics program (e.g., Blender). In a future video series, we will cover the basics of FreeCAD so you can start developing your own parts.
Virtual 3D objects can be exported in a variety of formats and shared on any number of sites, such as Printables and Thingiverse. For this tutorial, download the .STL files for 3DBenchy.
Leveling the Bed
One of the most critical aspects of 3D printing is making sure your print bed is properly leveled. An unlevel bed can lead to poor adhesion of your first layer, which is vital for a successful print. Some newer printers feature automatic bed leveling, but you’ll still need to calibrate the Z-offset, which is similar to the manual leveling process.
Manual Bed Leveling
If your printer has four knobs underneath the bed (one in each corner), you’ll need to adjust these to manually level the bed. First, ensure the nozzle is positioned in the center of the bed, then home the Z-axis so that the nozzle is set to its zero point. Take a piece of standard printer paper and slide it between the nozzle and the bed.
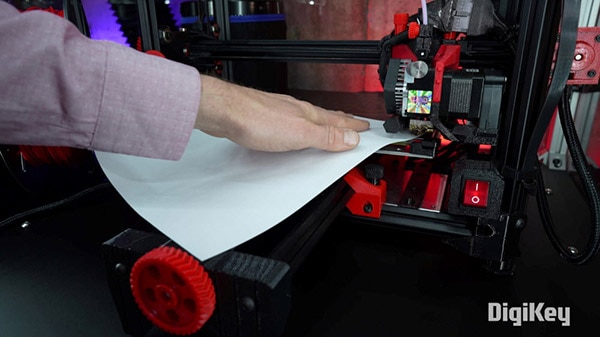
Start by adjusting one corner at a time. Turn the knob until you feel slight resistance when moving the paper back and forth under the nozzle. You’re aiming for enough friction to feel a little drag, but not so much that the paper can’t move. Repeat this process for all four corners of the bed, making sure the nozzle height is consistent across the entire surface.
Adjusting the Z-Offset
If your printer comes with an auto-leveling feature, you still need to calibrate the Z-offset, which tells the printer where the nozzle should start in relation to the bed. The process is similar to manual leveling, but instead of adjusting knobs, you’ll fine-tune the Z-offset through the printer’s control panel. Move the nozzle to the center of the bed, set the Z-axis to zero, and adjust the Z-offset until you feel the same slight resistance with a piece of paper under the nozzle. Save the settings, and your printer will use this new zero point for future prints.
Changing Filament
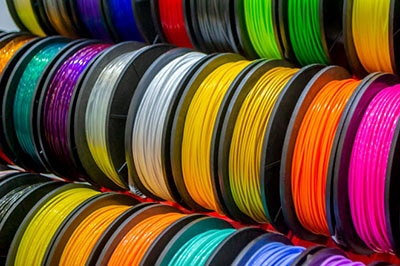
Filament is the material your printer uses to create 3D objects. Unless your printer has a printhead that can automatically change the filament, you’ll need to manually change filament every time you want to switch to a different color or material.
When choosing a material, you should always make sure that your printer is capable of working with that material! Consult your printer’s manual for guidance. Simplify3D has a great guide on the pros and cons of each of the popular materials. We recommend starting with PLA, as it is inexpensive and easy to work with.
1. Preheat the Nozzle
Before removing the old filament or loading new filament, you’ll need to preheat the nozzle. This ensures the filament is melted and can be easily pulled from the hot end. Navigate to the preheat function in your printer’s control panel, setting the nozzle temperature to match the filament you’re currently using.

2. Remove Old Filament
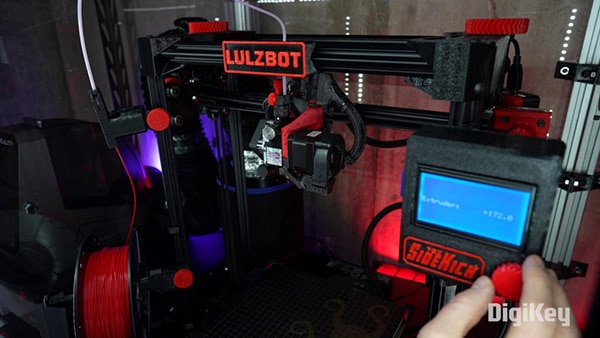
Once the nozzle has reached the target temperature, use the extruder control on your printer’s interface to retract the filament. In some cases, you may need to manually release tension from the extruder by pulling a lever, allowing you to easily pull out the filament by hand.
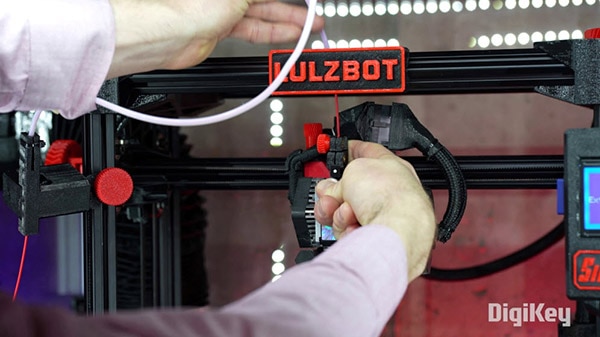
3. Load New Filament
To load new filament, begin by placing the spool on the holder. If you notice the end of the filament has balled up, snip off a centimeter or two before inserting it back into the extruder. If your printer has a filament runout sensor, make sure the filament passes through it first. Insert the filament into the extruder, guiding it through the Bowden tube (if applicable) until it reaches the hot end.
Use the extruder motor controls to push the filament through until it starts oozing out of the nozzle. This step ensures the filament is properly fed and ready to print.
Configuring the Slicer
A slicer is software that converts your 3D model into instructions (usually in G-code format) that your printer can understand. The slicer calculates everything from layer height to print speed and generates a toolpath for the printer to follow.

1. Selecting Your Printer Profile
Most slicers come with profiles optimized for specific printers. If your printer’s profile isn’t included in the software, you can usually download it from the manufacturer’s website or set it up manually. Make sure to select the correct printer model before proceeding.

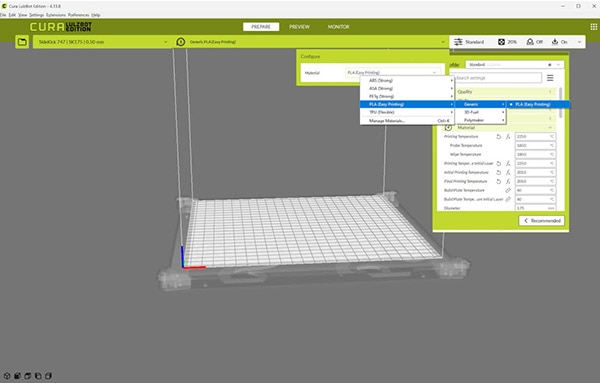
2. Select Your Material
Many slicers have pre-loaded material profiles that determine the initial settings, such as the bed and hot end temperatures. You can tweak these settings, but we recommend starting with the profile for the particular material you plan to use. For example, if you plan to print with PLA, select the PLA material profile.
3. Loading the 3D Model
Next, import your 3D model into the slicer. Most models come in STL format, which is widely supported across slicers. Once you’ve imported the model, it will appear on a virtual print bed. You can move, scale, or rotate the object if needed.
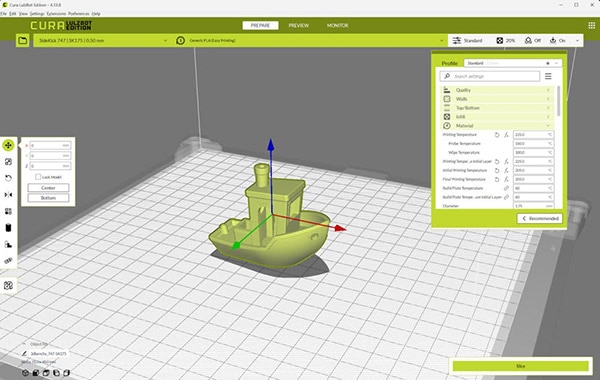
4. Setting Parameters
The sheer amount of settings in most slicers can be overwhelming. As you continue to tinker with your 3D printer and find ways to troubleshoot errors, you’ll become more familiar with the individual settings. For now, let’s focus on the following key settings:
Layer Height: Determines the thickness of each printed layer. Lower values (e.g., 0.18 mm) result in higher-quality prints but take longer, while higher values (e.g., 0.25 mm) print faster but with less detail.
Wall Thickness: Sets the number of perimeter lines that form the walls of your print. A higher wall thickness adds strength but uses more material.
Infill Density: Controls the internal structure of your print. A lower infill percentage (e.g., 20%) uses less material, while higher infill adds strength.
Print Speed: Adjusts how fast the printer moves while printing. Slower speeds generally result in better print quality, while faster speeds reduce print times but may introduce errors.
Temperature Settings: Set the nozzle and bed temperatures based on the filament type. PLA typically prints around 200°C for the nozzle and 60°C for the bed.
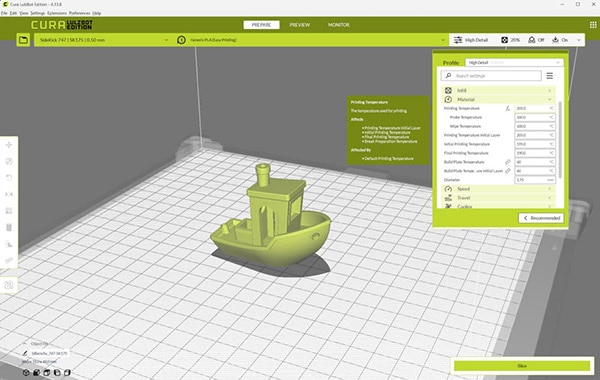
Leave the settings for your material at their defaults for your first print. You can try adjusting them later.
5. Support Structure
Some parts have overhangs that can be problematic for most FDM printers. The first few layers of these overhangs will often droop or sag without any sort of support structure or scaffolding. As a result, many slicers offer the ability to add such scaffolding. In your settings, enable support. Feel free to try different types of structures (zigzag, tree, etc.) to understand how each type is generated with your model.

If your printer supports multiple materials, you can print the support structure with special break-away or water-soluble filament.
Feel free to leave support structure disabled for your first print to see how the printer behaves without it.
6. Adding a Skirt or Brim
A skirt is a disconnected, single-layer outline around the object to ensure the filament is flowing properly before the actual print begins.
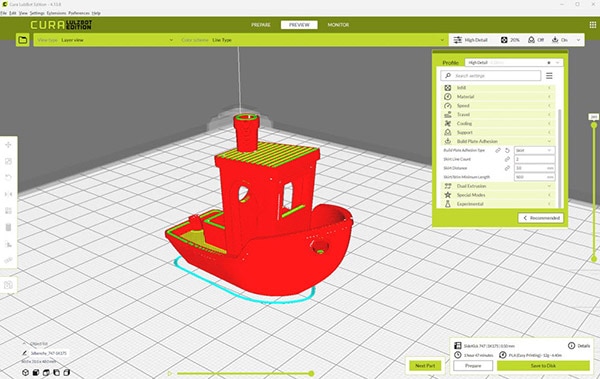
A brim is similar to a skirt, but it is connected to the object. This helps keep the first layer stuck to the bed and helps prevent warping. You will have to manually remove the brim from the part after printing.
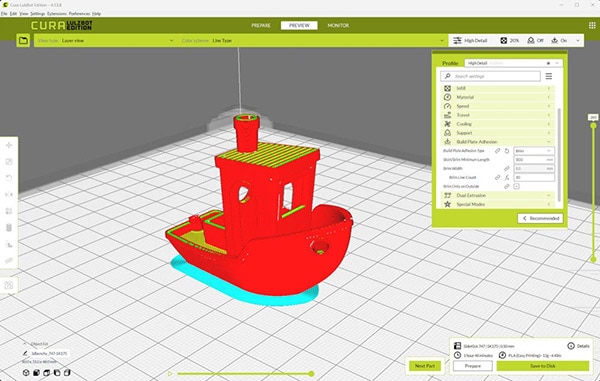
A raft is a few layers of material built up from the bed. The part sits on the raft. This can help with uneven parts or beds, but it often makes the part difficult to remove from the raft.

We recommend printing a skirt by default and only using one of the other options if you run into issues with first-layer adhesion.
7. Slicing the Model
Once you’ve adjusted the settings, hit the slice button. The slicer will process the model, creating the toolpath for the printer. You’ll be able to preview the individual layers and check for any potential issues.
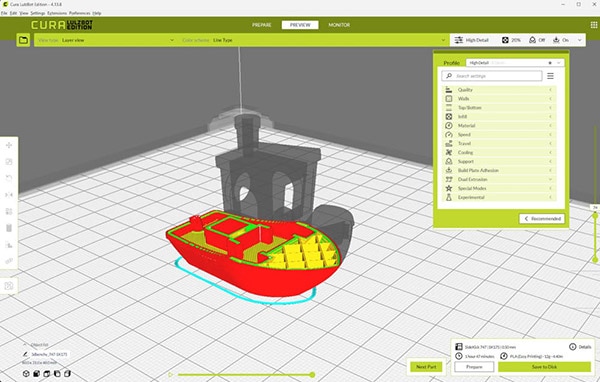
Once you are happy with the sliced model, save the GCode to your disk or SD card.
Printing Your First Part
Now that your model is sliced and the G-code file is ready, it’s time to print your first part!
1. Transferring the File to the Printer
If your printer supports SD cards, copy the G-code file to the card and insert it into your printer. Alternatively, some printers offer network-based portals for uploading files. Once the file is loaded, navigate to the print from SD option in your printer’s menu.

2. Starting the Print
Before the print begins, the printer will heat the nozzle and bed to the specified temperatures. If your printer has auto leveling, it will perform that procedure now. Once preheating is complete, the printer will start laying down the first layer.
3. Monitoring the Print
It’s always a good idea to monitor the first layer to ensure good adhesion. If the filament isn’t sticking to the bed, try adjusting the Z-offset slightly or applying some adhesive (like glue stick) to the bed. After the first layer is complete, you can leave the printer to finish the job, but check back occasionally to ensure everything is running smoothly.

4. Removing the Print
Once the print is finished and the bed has cooled, you can remove the part. Some printers have flexible beds that make it easy to pop the print off by bending the surface. If your printer doesn’t have a flexible bed, use a thin metal scraper to gently lift the part.
Congratulations—you’ve just printed your first 3D model!

Troubleshooting
Unfortunately, 3D printers are not out-of-the-box, fire-and-forget tools like inkjet printers. They have come a long way in recent years, but they still require some tweaking and babysitting to get reliable prints. Be prepared to spend some time calibrating parts, adjusting slicer settings, and researching issues. First-layer adhesion and stringing, for example, are common problems that can be mitigated through such tweaking.
We highly recommend using the following pages as reference guides for troubleshooting printing issues. They even have handy photos to help you identify the problems!
- Simplify3D’s Print Quality Troubleshooting Guide
- MatterHackers’ 3D Printer Troubleshooting Guide
- All3DP’s Common 3D Printing Problems Troubleshooting Guide
Final Thoughts
As you continue to experiment with different prints and materials, you’ll get more comfortable with the process of bed leveling, filament changing, and slicer configuration. Remember, 3D printing often requires some trial and error, so don’t be discouraged by the inevitable hiccups. Each print will help you better understand your printer’s capabilities.


