The Basics of 3D Printing Calibration Shapes
2024-05-01 | By Will Siffer
Some background
The purpose of this blog is to detail some of the 3D printer calibration shapes, what each one can be used for, and when you should print one for your printer. Typically, it is best to run calibration shapes whenever you change something about the printer, add new modifications, move it across the country, or drop it down the stairs when moving it into your new apartment. It still works, and my bed has never been more level!
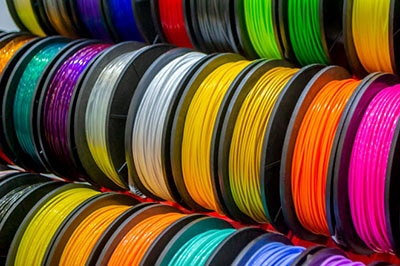
The other reason you could run calibration shapes would be to determine the proper settings for a new filament. Not all PLA filaments are created equal since adding colors changes the chemical makeup of the material. Other more exotic filaments even have chopped carbon fiber, bits of metal, sawdust, or even glow-in-the-dark material to change how the filament looks or structurally behaves post-print.
Every journey starts with a single step...
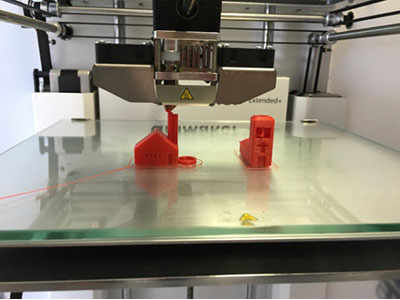
Suppose you just opened your 3d printer and you leveled your bed. Excitement is high, you are about to print the most beautiful DigiKey logo. As the first layer goes down, the printer whirring ever so slowly across the bed, the material isn't sticking, and your dreams of the best DigiKey logo in the land diminish into a mound of red plastic spaghetti.
You aren't alone, this happens to a lot of printers on their first try. All you need to do is print the first calibration shape in this blog, the "First Layer Test" made by Thingiverse user Can-am3.

This first layer test is awesome, especially if your printer isn't equipped with auto bed leveling. I relied on this model for weeks while I used the paper trick to level my bed manually to try to achieve the perfect first layer. This faster print only takes about a half hour and uses less than 5g of material, so you can focus on tuning the printer rather than waiting for the print to complete, allowing for more time adjusting and less time waiting!
I also like this print because when it completes it leaves you with 5 little discs that can tell you a lot about your first layer quality:
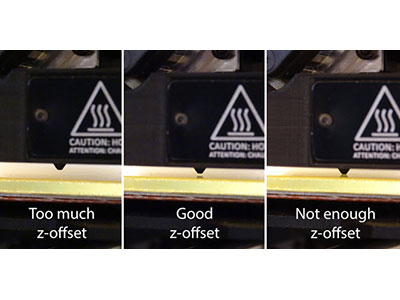
- Are there gaps between the print lines? Your bed is too far away from the nozzle in that location.
- Does it feel like there are ridges across the print disc? Your nozzle is too close, and the material is squishing up over the adjacent passes.
- Is the print smooth? Did it adhere well? You have a good height in that location!
But what about dimensional accuracy? What if you know you can print a solid first layer but struggle to get parts to fit?
The calibration cube, it's simple and effective!

The Calibration Cube, this one by iDig3Dprinting on Thingiverse, is a 20x20x20mm cube that has X, Y, and Z printed into 3 of the sides. This print is also pretty small, and with 20% infill at a 0.2mm layer height, it only takes 30 min to print using less than 5g of plastic filament.
Once completed, use your digital calipers to measure the width across the X face, Y face, and Z face. If you find that the dimension is off across the X/Y faces, check your belts and ensure that they are not too tight or too loose. If they look good, then make sure that the gantry and print head can easily slide without much resistance. The wheels may be too tight, or the linear rails may need to be lubricated.
If the Z axis is off, then you will want to check your lead screw or Z belt, depending on which you have on your printer. Z screws need to be lubricated lightly. If that is not the issue, then check that the vertical supports are plumb and parallel.
The classics, CaliCat and 3DBenchy.

Now it's finally time to have some fun. Both of these should be printed WITHOUT adhesion or support material since they are designed to be printed as calibration shapes to test the abilities of your printer. Both the Calicat by dezign on Thingiverse and 3DBenchy by CreativeTools combine overhangs, bridges, sharp angles, and adhesion in a whimsical model.
For the CaliCat, you can see that the body sits directly over the feet, testing your printer's bridging capabilities. From there the tail and the head and neck section test overhangs as the printer slowly creates the model one layer at a time. Finally, the ears are a great stringing test since the printer has to go between the ears, testing retraction.
The 3DBenchy operates similarly. The front of the hull acts as an overhang test, as well as the curved doorways and portholes. The front window is square, acting as a bridging test, and the gaps between the doors test stringing and your retraction settings.
So, what do you do if these fail? There are a lot of reasons why any of these things could be causing you and your printer problems, but here are some of the most common:
- Bridging sagging could mean that your fan isn't properly cooling the material coming out of the nozzle, you are printing too hot, or the nozzle heat is not properly insulated with a silicone sock.
- Overhang issues are usually temperature and cooling related.
- Stringing can either be a material fault, printing too hot, too fast or your retraction settings being too low.
Let's get technical! The Temperature Tower

The SmartTemperatureTower by gaaZolee on Thingiverse is another way to test your printer, but this one works best on a well-tuned printer and is used as a way to evaluate filament performance. The temperature tower design incorporates overhangs and bridging, and the spike on each level can evaluate stringing. What makes this calibration model so special though is the involvement of a temperature gradient. As I mentioned above, some materials have different inclusions in the filament, and that causes them to print better at different temperatures. Each level should be printed at the corresponding temperature as the model prints and once completed, will tell you the best temperature for the filament you are printing.
I hope this guide was helpful to you in tuning your printer. There are many other models available to tune different aspects of a 3D printer, so this is by no means an exhaustive list.
I take pride in learning something new every day, even if that something is small. I hope this guide was useful to you and that you were able to learn something from me today. 3D printing is a hard hobby and can be tough to get better at, but with practice, anyone can 3D print! Until next time, my name is Will Siffer, and as a DigiKey brand ambassador, I hope you have a great time making!