制造商零件编号 SC1223
RASPBERRY PI CAMERA 3
Raspberry Pi
Our adventure to build our community's most requested - Fallout's Power Armor - continues!
In the Fallout universe, Power Armor is a wearable exoskeleton that augments the wearer's strength, endurance, and resilience, protecting them from the unforgiving nuclear wasteland and its belligerent residents. It lets you run faster, go further, carry more, and survive everything from radroach bites to gunshots.
In episodes one and two, we built the structure for the upper body of the armor, leaving a super powerful exoskeleton torso ready for business. If you haven't seen those episodes, you can watch them here:
In this installment, we tackled the next challenge: a fully functional helmet with Heads up Display and packed full of useful gadgets for keeping you alive at nighttime in a nuclear wasteland. Here’s what we are going for:

So how are we going to make this? Well like most things at Hacksmith, it starts with a 3D model in Solidworks. Luckily, we have a great starting point from our friends at Thangs. The trick is to then find a place inside the helmet for all of the components to fit. With the design complete, we 3D printed everything, cleaned it up, and gave it a quick paint job. For bonus points, we added a set of actuators to move the visor of the helmet up and away from the wearer as seen in the game. Testing found that this motion interfered with the camera and lighting boom sticking out from the right ear of the helmet, so a second set of actuators was needed to swing the boom out of the way of the moving visor. This used the last two valves that were provided back in the first episode. Later on, we are going to Nanovate the entire suit to make it bulletproof but for now, the paint looks pretty good.
With the helmet built, it was time to add in all the electronics. Everything feeds into the Nvidia Jetson Xavier NX which acts as the brain of the helmet. The Jetson then adds an overlay graphic that is displayed on the augmented reality glasses. This shows the wearer basic operating stats of the suit, as well as their own vital signs. We are using sensors like a MAX30101 heart rate sensor and pulse oximeter mounted in the user interface, a battery voltage monitor ADC, a pressure transducer reading out the pressure of the compressed air reservoir, a nine-axis IMU which is processed to provide a compass heading - a critical navigation tool! - and an ionizing radiation sensor to detect the true unseen hazard of a nuclear wasteland, the nuclear waste.
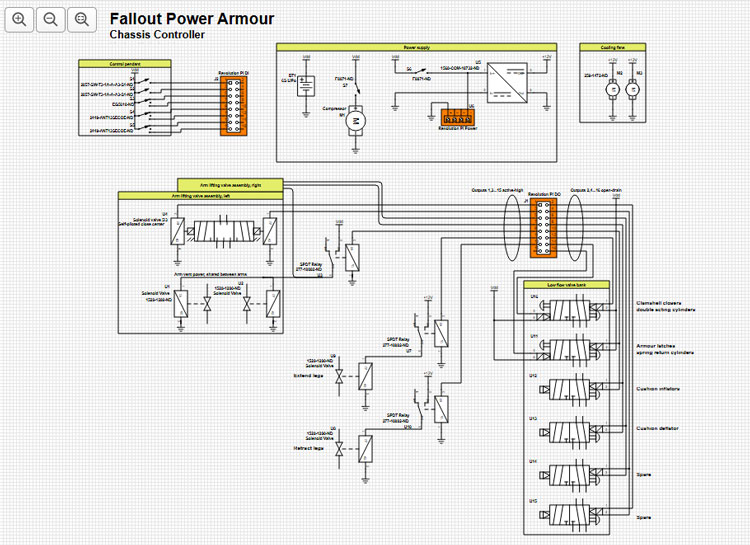
Integrating all of this was quite the adventure, and if you want to see how we put it all together, check out the full schematic here:

To aid with nighttime navigation or combat, an array of cameras can be superimposed on the HUD. There is an optical zoom camera, a thermal camera, and an infrared night-vision camera. An infrared and a visible light illuminator are provided, built into the camera boom arm on the helmet. These provide extremely bright lighting for the cameras - so bright that the infrared light needs a small warning LED to be included to avoid eye damage to onlookers from the intense infrared radiation! These two lights can be switched on or off according to the needs of the user.
Of course, to build any of this, we need a robust model of the armor as a whole, and ours is available for download via Thangs - fully 3D printable for cosplay!
In the grand finale of the video, Bogdan tested out the entire system by going on a little scavenger hunt to find a radioactive relic of the wasteland.
This project is only getting started, so subscribe and tune in next time to see the Fallout Power Armor really take shape!