制造商零件编号 A000067
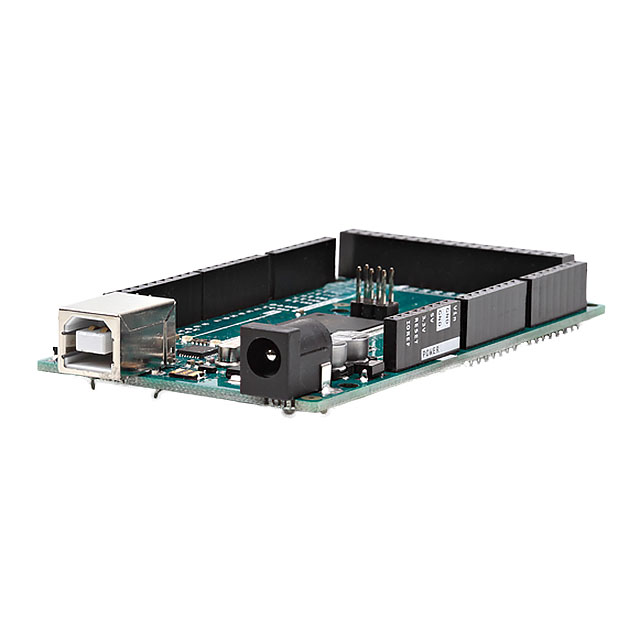
ARDUINO MEGA2560 ATMEGA2560
Arduino
The brain of your project can take many forms, and it can be overwhelming to pick one from the vast selection available. In this video I’m going to show you how to navigate the process, introducing the tradeoffs you’ll have to make along the way.
Identify your project’s key features, inputs, and outputs to determine requirements related to voltage, current draw, communication protocols, number of pins you need to connect everything, processor speed, and overall size.
If any of those terms are new to you, I suggest you revisit a few previous episodes in this series introducing Arduino basics including a detailed guide to building your first project.

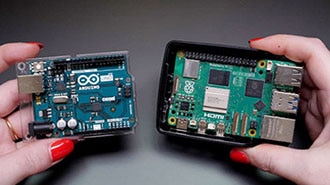
Beginners often start with an Arduino Uno or something very similar. It has labeled i/o pins along the edges, and female headers to easily plug wires into it. It runs at five volts, conveniently the same voltage as the USB ports on your computer, charging brick, and USB battery bank. This board is designed for beginners- and it shows. You don’t have to do any soldering to connect or disconnect components, and there is plenty of space for your fingers and to read the reasonably-sized labels.
Products mentioned in this article:


The Arduino Uno R3 has an 8-bit processor, the ATMega328, and you can program it using Arduino software.
Using the Uno as a starting point for comparison, we can start to change the properties one at a time, either the features onboard, the form factor, or both. Compared to this board, how does the proposed board in your project need to differ?


These days there isn’t a huge price difference if we speed up the processor to 32 bits, and that’s why there are so many 32-bit boards available using the ARM Cortex-M0 microcontroller. For example, my favorite SAMD21 board is the Gemma M0 from Adafruit and my favorite RP2040 board is the Xiao RP2040 from Seeed Studio. These faster boards can run Arduino but also a flavor of Python. If you want to code in Python or use one of the kid-friendly blocks-code environments like MakeCode, that’s a good reason to pick a 32-bit microcontroller for your project.


The next big category of microcontroller boards is SOCs, which stands for System On Chip. These include boards using the ESP32, ESP8266, nRF52, and other familiar names you might recognize. A System On Chip device is engineered to take care of a special feature, often wireless, while letting you run your own code too, all in one package. All the ones I mentioned and show here also happen to be 32-bit microcontrollers, though the term SOC doesn’t refer to the processor speed.
My best advice is to match up the features and requirements of your project, as well as your abilities, with those of your board. Don’t pick a microcontroller with extra functionality you don’t need, but consider how your project needs might evolve in the future, and at what point you might need to graduate to a bigger and/or more powerful board.

There is no way to compare all the available boards out there, but the Make: Boards Guide comes close. In addition to the print and .PDF versions, there’s a handy site that lets you compare two boards side by side, and it has a big database of popular microcontroller boards across brands. If you’re not finding what you’re looking for, maybe you actually want a single-board computer. I made a video about how they’re different from microcontrollers, so check it out if you want to learn more.
The best way to get good at choosing a brain for your project is to practice, so I’ll use some of my past projects as examples to demonstrate microcontroller selection in action.

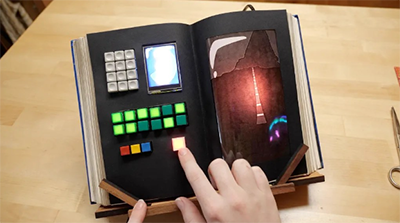
For my prop replica computer book from Inspector Gadget, I needed to host a lot of buttons as digital inputs, and a bunch of those were illuminated buttons, so each of those LEDs needed its own digital output. An Arduino Uno has 14 digital i/o pins, which is not enough, so I could have added some shift registers, or upgraded to an Arduino Mega, which has 54 digital i/o pins.

Remember the iron triangle, which weighs against one another the opposing forces of speed, quality, and cost– you can have two, but not all three. So using the Mega was the fast and good solution. Using shift registers would cost the extra time to change up my wiring and the code to use them, but they are inexpensive, so that’s the cheap solution, and how fast and good it is depends on your skill level.
For my LED beaded curtain, I wanted to use a platform- somebody else’s software, to control a big LED grid. This is a solved problem, and I might as well start with a leg up from folks who’ve thought about this before me instead of reinventing the wheel.

So rather than investigating the specs of specific boards, I browsed community projects, talked to my knowledgeable friends, and discovered that a couple of projects– WLED and PixelBlaze are doing just that. Both have firmware for your microcontroller and a web or app control interface. WLED can run on a bunch of different ESP8266 and ESP32 boards detailed on its website, while PixelBlaze sells its own proprietary hardware. This example shows that wanting to use a particularly cool platform is a totally acceptable reason to choose a particular microcontroller.

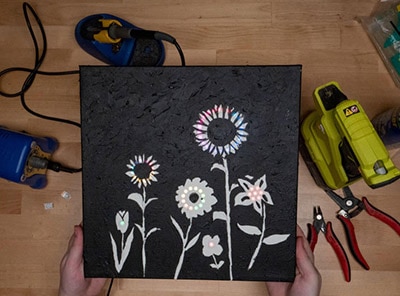
Take a look at my LED painting project– I needed a microcontroller that was shorter than the thickness of my frame, was able to easily connect to a board with permanent soldered connections, and could drive NeoPixels. There are a lot of boards that satisfy this list of requirements, but I already had this one in my stash, which is another perfectly acceptable reason to choose a particular microcontroller.
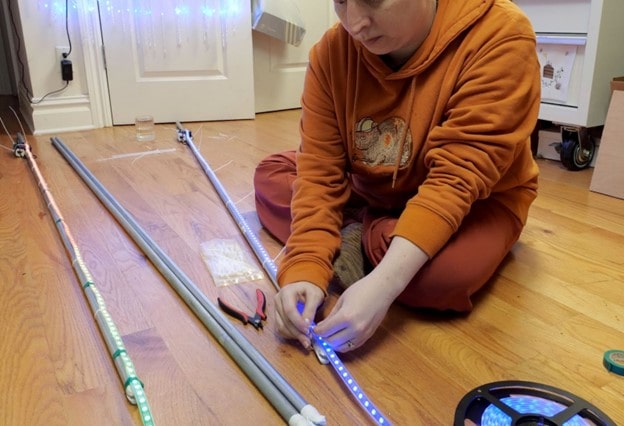
I also used only what I had on hand for my LED Poles project, which mostly happened to be the classic Uno shape. This was not the absolute best for the project, but in this case, I was optimizing for the fastest and cheapest option available to me. (Which was no longer that Micro because I had already used it for my painting).
For my LED Mermaid Hair project, I wanted something small enough to clip into my hair, with a sturdy USB-C port for connecting my battery pack, and that could also drive my fixed-address pixel LEDs. The Xiao RP2040 board is one of the least expensive options that satisfies these requirements, though it runs at 3V - so it’s technically at the edge of compatibility since the pixels really want 5V but will also work at 3V in this case. If I wanted to run this same project with a li-poly battery instead, I might go for a Gemma M0, which already has a port for one on board and a handy on-off switch.
The Gemma M0 is also the board I recommend my students use for their LED Halloween costumes. It doesn’t give you access to very many i/o pins, but it’s perfect for soldering beginners because the few pins that are there are far apart with big pads that are hard to mess up.
I hope those examples help you understand how to put the concepts into practice.