Use OctoPrint to Monitor Prints, Create Time-Lapse, and More
2022-02-14 | By Kevin Walseth
For those that love 3D printing and are looking for new ways to upgrade their printer, here is one of my favorite upgrades! OctoPrint allows users to control their printer right from any network connected computer or smart phone. It will not only give access to start and stop the print, but it will allow for many customizations along the way. OctoPrint will communicate with your slicing software of choice and allow you to send the print directly from there. Once OctoPrint is set up and running, there are hundreds of add-ons that can make your experience ideal for your 3D printing journeys, such as custom lighting, time-lapse images, remote viewing, and many more.
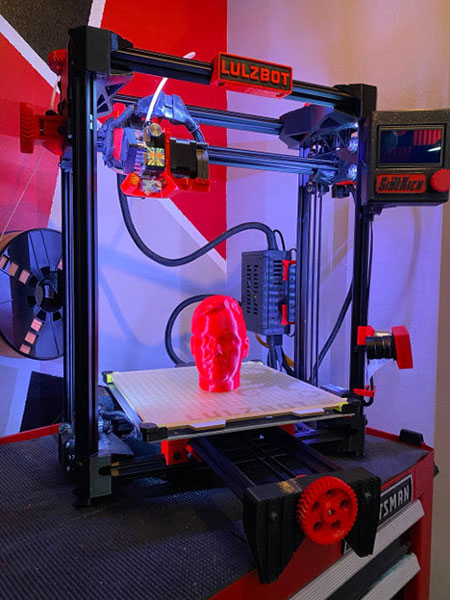
Here is how I got everything set up on my Lulzbot Sidekick 747 printer, starting with installing OctoPrint to Raspberry Pi Zero W2.
Necessary products to order are as follows:
- Raspberry Pi Zero W2 (Raspberry Pi 3B and Raspberry 4 models will also work)
- Raspberry Pi Camera
- Raspberry Pi Zero Camera cable
- Raspberry Pi Power supply
- Micro USB to USB A adapter
- Micro SD card (8GB min)
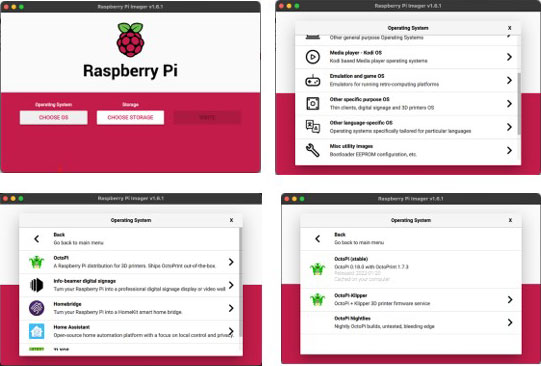
Once the parts have been procured, download Raspberry Pi imager to your computer. This is the easiest way to write OctoPrint or any other Raspberry Pi image to the SD card. Once this is installed, insert the SD card into your computer and open the Raspberry Pi imager software. Choose “Other specific purpose OS”, then “OctoPi”, and finally “OctoPi Stable”. Then select “Choose Storage” and navigate to your SD card. Be sure you are selecting the correct SD card, or you could accidentally write over something important.


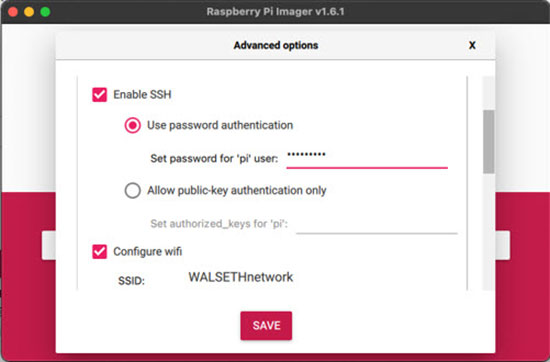
Once you select storage, you will need to open advanced options by using the keyboard sequence “CTRL+SHIFT+x”.

Check Enable SSH and add a password for your pi. You will also need to configure Wi-Fi with your SSID and password. Be sure to select the correct keyboard layout for your country.
Enabling SSH can add a few different benefits. It can allow you to log into your Pi remotely to make modifications to the software or even update the underlying Pi OS. Otherwise, you can omit SSH and just configure Wi-Fi.
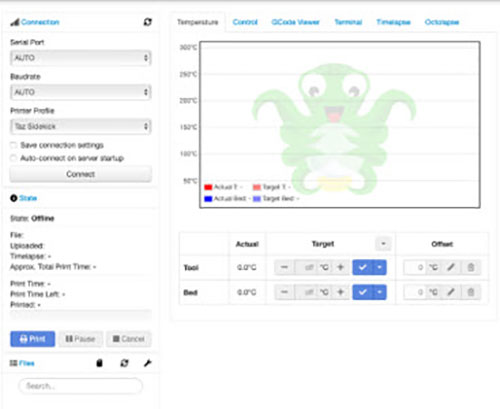
Install the image to your SD card by clicking write. Once complete, plug everything into your Raspberry Pi (including the camera) and boot it up. Give it a few minutes to boot up and connect to your network. Once it is ready, navigate to OctoPi.local (make sure your computer is connected to the same network). The OctoPi page will load with a quick tutorial to set up your printer. Be sure to enter your printer's bed dimensions.
Now plug in your 3D printer via USB using the micro USB adapter (not needed if using a Pi3 or P4) and click connect.

You are ready to drag and drop your prints. But if you want to go further, you can connect Cura to automatically send your prints to OctoPrint.
Open Cura and navigate to your printer’s information page.

You will see the connect OctoPrint button. All you will need to do is add your OctoPrint Application key. This can be found on the OctoPi.local page. Click the wrench on the top of the page to find the OctoPrint Settings.

Click Application Keys to enter a name for your key and generate the application key. Copy this key and paste it into the Cura settings. Now, once you have sliced your print in Cura, you can send it directly to OctoPrint.


Next, you can use add-ons inside OctoPrint to make your experience even better.
A few of my favorite add-ons for OctoPrint are:
- Octolapse – This feature is a fully functional time-lapse setting for your prints. It will automatically create an eye-catching time-lapse by moving the print head out of the way at every print layer. This creates a very high-quality video. Once this is set up, it will automatically work on every print.
- WS281x LED status- Bringing light to your prints is a must! With this add-on, you can mount an LED strip around the frame of your printer and control the lights. It has options to create different LED settings for each stage of the print. For example, I have a rainbow setting anytime the printer is idle. During the print, all lights are white to create good lighting for the time-lapse camera. There is one single red LED that travels around the strip to show the print time remaining. If the print is half-done, the red LED will be at the top middle of the frame.
- OctoEverywhere – This feature allows me to check the status of my print from anywhere! I can be sitting at one of my kids’ sporting events and check on my print. I can even stop or pause it if I see an issue.
There you have it; enjoy printing with OctoPrint! You won’t be disappointed. With the small form factor of the Raspberry Pi Zero W2, I was able to hide it inside the control box of my Sidekick 3D printer to give it a sleek, professional look.


