制造商零件编号 937-SP-3088
CONN MOD PLUG 8P8C UNSHIELDED
Stewart Connector
Terminating an Ethernet RJ45 connector is a critical skill for anyone involved in the installation or maintenance of a Local Area Network (LAN). This process, essential for creating reliable network connections, involves attaching RJ45 connectors to the ends of an Ethernet cable, and the procedure requires precision and understanding of the cable's structure and the connector's pinout. This article explains everything you need to know about cable termination, and how to properly terminate an Ethernet RJ45 connector.
Termination, in the context of Ethernet cabling, refers to the process of fitting the ends of an Ethernet cable with connectors, typically RJ45 connectors, to facilitate connection to network devices such as routers, switches, and computers. This procedure is crucial for establishing a physical infrastructure for data transmission over a network. The term "termination" essentially means completing the cable's ends in a manner that makes them ready for use, ensuring they can be plugged into network devices or outlets.
Ethernet cables, such as Cat5, Cat5e, Cat6, and newer versions, consist of four pairs of twisted wires covered by a protective jacket. The RJ45 connector, a modular plug, connects these cables to network devices. Proper termination of Ethernet cables is paramount for several reasons:
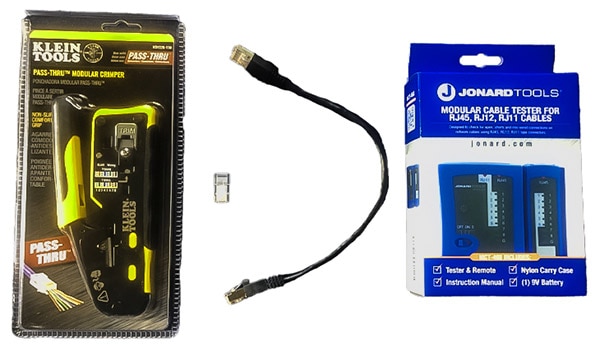
 Materials needed for this project.
Before starting, ensure you have the necessary tools:
1. Preparing the Cable
2. Arranging the Wires
This standard is widely used and recommended for generic network installations.
 T-568A and T-568B pinouts (Image source: Same Sky)
 Wires cut to even length and arranged to the T-568B Standard.
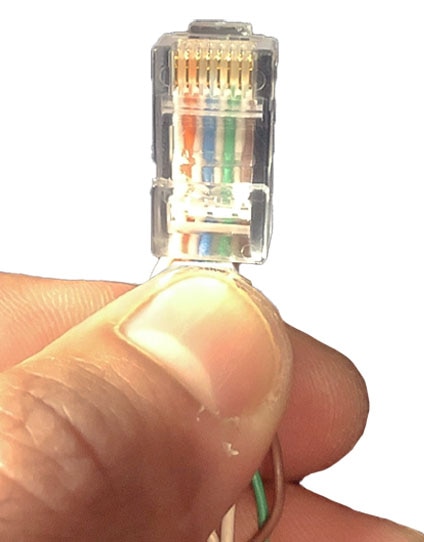
3. Inserting into the RJ45 Connector
 Wires inserted into an RJ45 connector.
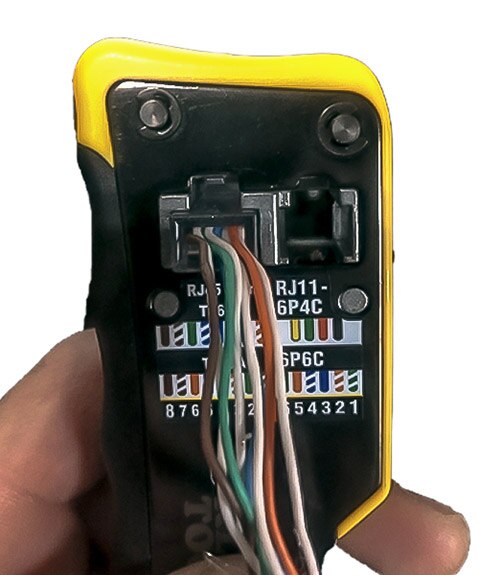
4. Crimping
 Connector with wires inserted into the crimper.
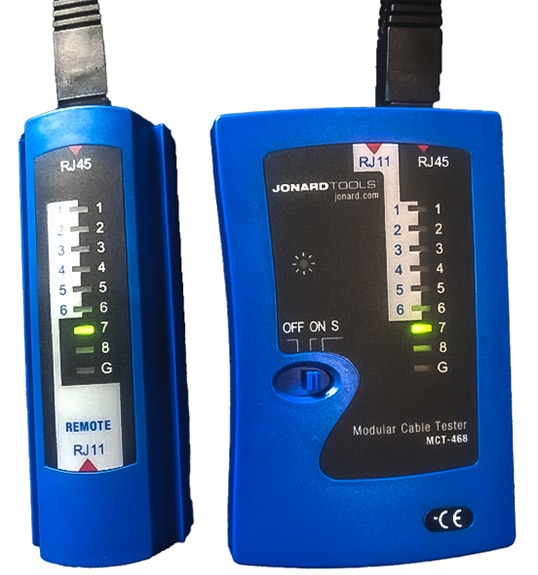
5. Testing the Cable
 Running an Ethernet wire through a cable test.
Even experienced professionals sometimes make mistakes when terminating their Ethernet RJ45 connectors. Here are some of the most common mistakes you might encounter, and how to solve them.
1. Problem: Miswiring
Even with experience, it's easy to arrange the wires in the wrong order before crimping. This mistake compromises the functionality of the Ethernet cable.
Solution: Always verify the wire color sequence according to the T-568B or T-568A standard before proceeding with the crimping process. If you discover a miswiring error, the only remedy is to cut off the RJ45 connector and redo the termination from scratch.
2. Problem: Incomplete Crimp
A frequent issue arises when the crimp tool does not fully compress the connector, resulting in a weak and unreliable connection that may fail under normal use.
Solution: To avoid this, make sure to apply sufficient force with the crimp tool until the connector is fully compressed. This ensures a secure and stable connection.
3. Problem: Exposed Wires
Leaving the wires unevenly cut or too long can lead to exposed wires, which are not only unsightly but can also affect the performance of the connection.
Solution: Carefully trim the wires so they are even and flush with the surface of the connector. This not only improves the aesthetic but also ensures a strong and effective connection, minimizing the risk of disconnection or signal interference.
Properly terminating an Ethernet RJ45 connector is fundamental for setting up a reliable network. By following these detailed steps and utilizing the right tools, you can ensure a high-quality connection that supports optimal network performance. Regular practice and attention to detail will make this process second nature so that you can make your network installations more efficient and reliable.