制造商零件编号 CN0295D
1602 I2C LCD
SunFounder
A big part of projects is, of course, making sure that you can receive input and process data--but what comes after that is possibly more fun: outputting that data! One of the ways to do such is to display it on an LCD: whether that's the "status" of your project, the current temperature, or a simple "Hello World!", using an LCD will open up your world.
If you're curious about how an LCD works, see my previous article here!
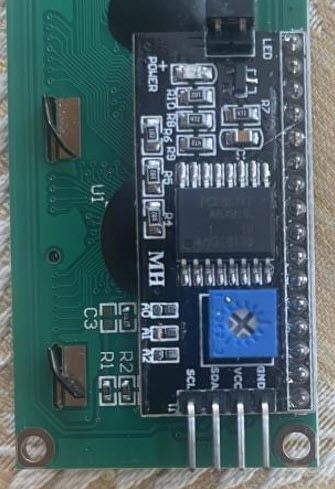
Today, we'll be working with an I2C Backpack connected to an LCD. The LCD itself is just that: a display. In order to interface the display with our Arduino without using a ton of pins and wires/components, you'll need a backpack--a PCB that reduces the number of pins needed and ultimately opens up the capability of your LCD.

You can see it mounted right behind my PCB. Something cool that you might notice is that there's a potentiometer built in--this will adjust the brightness of your LCD when you turn it!
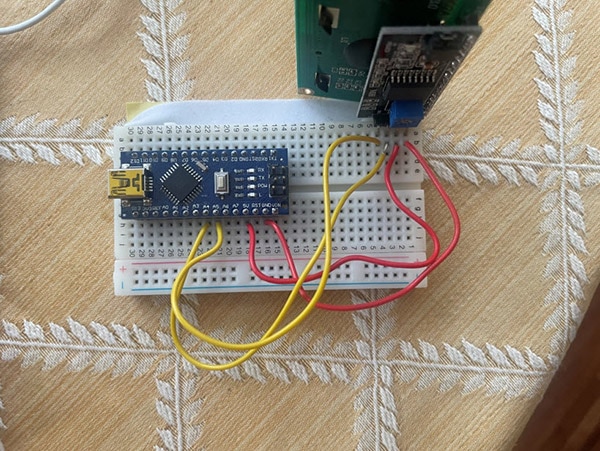
The pinout on the bottom is simple: SCL, SDA, VCC, and GND. VCC and GND are self-explanatory--simply the power pins for the LCD. VCC typically would connect to 5V on your Arduino, and GND to, you guessed it, GND. SDA and SCL are the pins used for the I2C protocol, which will allow the Arduino to communicate with the LCD chip. You'll connect these with the respective I2C pins on your Arduino, which in my case since I'm using the Nano, will be A4 and A5.

Here's my build with slightly way-to-big wires. I had to improvise since I didn't have any cables--so I took off the rail of the breadboard in order to fit the LCD directly onto the board. It's a big makeshift, but it'll do the trick for this demo!
For today's demo, we're going to go ahead and do a simple "Welcome to the Makerspace!" After plugging it in, your LCD should light up and the backlight will be turned on automatically. Let's go ahead and get some programming into the Arduino to show something fun.
The first thing you'll want to do is install the LCD library, mine is called LiquidCrystal_I2C.h. I'm then going to instantiate the LCD with the I2C address of the backpack (0x27) and the dimensions of the LCD. This will depend on your LCD! Then, within the setup() function, I'm going to initialize the display and the backlight.

We can now add text to the LCD. The way that it will output text is similar to how you do it on a computer: you place your cursor and then type your text. We'll need to code in where to place the cursor, and then what text to type. After that, you'll have to move the cursor if you wish to put it in a new place and then type the text again. The way that it will detect the cursor is through the rows and the columns, in a coordinate-like format (columns, rows). See how I did it below!


Notice how, in order to go to the next row, I need to move the cursor. It won't go automatically.
And there you have it! A quick introduction to using an LCD with a backpack. It's simple and opens a world of possibilities for outputting data or whatever you may need to do!