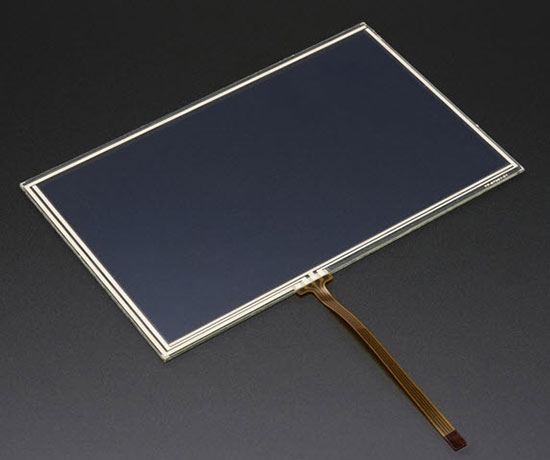
制造商零件编号 333
TOUCH SCREEN RESISTIVE 3.2"
Adafruit Industries LLC
The preceding part of this series discussed a few different commonly used touchscreen technologies. That article also highlighted the pros and cons of each technology and when to use each. This article summarizes a few readily available touchscreen options for DIY projects that are available to order today.
The last article mentioned resistive touchscreens are perfect for environments where people commonly wear non-conductive gloves, such as in industrial settings. One of the most straightforward options to add touch-sensing capabilities to an Arduino project is to use a resistive overlay that sits on top of a regular display.
 A resistive touch overlay without a display.
These plastic-film overlays are translucent, and you can combine them with just about every other display as long as the overlay physically fits. The benefit of using this overlay is its simplicity. Resistive touch overlays typically use four wires that tell an attached microcontroller where a user touches the screen. Clever algorithms can also detect how hard somebody presses down. In addition, you can also use these overlays without an electronic display, as you can place the plastic layers on top of just about everything, for example, a printed sheet of paper with custom buttons and areas on it. Doing so allows you to incorporate professional-grade custom touch panels into your next Arduino project.
These resistive touch overlays come in a wide variety of sizes, and you can find them in the DigiKey store. However, I recommend using one of these two models due to their competitive price and ease of use:
I recommend that you also get an external breakout board that converts the touch overlay’s ribbon cable to a simple four-pin header that you can easily incorporate into your Arduino or Raspberry Pi projects.
Resistive touch overlays are a fantastic addition to a project that either already has an electronic display or doesn’t require one at all. You can, however, also buy fully assembled resistive touchscreens for your DIY projects. These components come with previously discussed plastic-film overlays and an electronic display.
 This 2.4” resistive touch display HAT perfectly fits on a standard 40-pin Raspberry Pi.
Luckily, it’s still relatively easy to find fully assembled resistive touch displays compatible with Arduino and Raspberry Pi boards amidst current electronic component shortages. Here are a few products that you can use for your DIY projects:
So far, all the displays featured in this article have used resistive technology to detect user input. However, as stated in the previous article in this series, capacitive touchscreens have become far more common, especially in consumer applications. If interested in adding a capacitive touch display to one of your Arduino or Raspberry Pi projects, have a look at the following products from the DigiKey catalog:
Many modern devices use touchscreens to allow users to make inputs. Even more so, you’ll have a hard time finding handheld consumer devices that don’t use touchscreens. Therefore, many makers are interested in adding touch input capabilities to their DIY projects. However, choosing a display that’s user-friendly and easy to work with on the selected maker platform is not as easy as it might seem at first glance. Many professional-grade touchscreens do not easily integrate with Arduino and Raspberry Pi projects. Therefore, this article summarized a few readily available and cost-efficient options for makers looking for ways to incorporate a touch display in their Arduino or Raspberry Pi projects.
Resistive touchscreens are readily available, simple to work with, and very affordable. In addition, they also detect inputs made with non-conductive objects, such as pens. These features make resistive touchscreens a fantastic choice for industrial settings and custom-built machines such as 3D printers. Capacitive touchscreens are very accurate and easy to operate. In exchange, they are a bit more expensive, and it’s often more challenging to get capacitive touch displays to work as intended. Ultimately, you have to evaluate your project requirements before choosing a touchscreen.