Build an Arduino Opta DC Motor Controller with HMI
2023-11-22 | By Don Wilcher
License: See Original Project
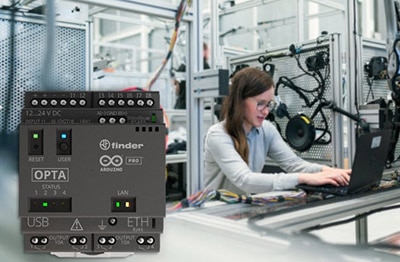
The Arduino Opta Micro–Programmable Logic Controller (PLC) provides a unique entry point into the automation field. Smart homes, process controls, robotics, and other automation fields are all project areas that you can explore with the Arduino Opta — which, due to its small size of 88.8 mm x 70 mm x 56.8 mm, makes it convenient to fit industrial panels. Like other PLCs, the Arduino Opta has mechanical provisions on the back that allow it to mount easily inside a control panel or board using DIN rail. In this project, we will build a DC motor controller with a pushbutton switch and an M5Stack Core. The M5Stack Core will work as a programmable Human Machine Interface (HMI), thus extending the Arduino Opta’s control capabilities with the DC motor.
The Arduino Opta micro PLC.
Arduino Opta Electrical Specifications Overview
The Arduino Opta is a powerful micro-PLC capable of managing a variety of digital, analog, and electromechanical devices and automation systems. The device’s STM32H747XI dual-core processor allows fast computation speeds for industrial or process control applications and has 2 MB of flash memory and 1 MB of programmable memory RAM. Further, the Arduino Opta can process analog and digital input data, with eight analog/digital inputs and four electromechanical relays (EMRs). For this project build, you will use one digital input and one EMR to operate a DC motor. The power supply voltage has a range of 12 – 24 VDC, but for this project, you can use a 12 VDC at 1 A to power the Arduino Opta.
STM32H747XI processor Block Diagram. Image courtesy of ST
Arduino Opta micro-PLC pinout. Image courtesy of Arduino.cc
The Arduino Opta has three versions of PLCs, consisting of the Lite, RS485, and connectivity (Bluetooth, Wi-Fi, Ethernet) units. This connectivity allows various communication approaches to control the Opta and the attached I/O devices connected to the PLC. The Opta Lite will be used in the DC motor controller project.
The Arduino Opta DC Motor Controller with an HMI: The Concept
The Arduino Opta DC Motor Controller with an HMI concept consists of several components properly connected to operate a DC motor. Two separate controllers are utilized by the system: the Arduino Opta PLC which receives input control signals and operates the DC motor, and the M5Stack Core, which provides the input control signal commanding the Arduino Opta PLC to operate the DC motor. Each programmable device's control software is independent, creating a Distributed Control platform. The interface method allowing the M5Stack Core and the Arduino Opta PLC to operate together is a physical hardware connection, and the Bill of Materials (BOM) for the Arduino Opta DC motor controller with an HMI project can be obtained from the below Scheme-it project:
The Arduino Opta DC Motor Controller with an HMI System Block Diagram concept.
Programming the M5Stack Core
The M5Stack Core is an ESP32 microcontroller-based device with three programmable pushbuttons, two Red, Green, Blue (RGB) LED bars, a mini audio speaker, and a Thin Film Transistor (TFT LCD). Three programmable ports are also present, capable of interfacing with various electronic modules. These ports are labeled A, B, and C — Port A is I2C capable, Port B supports digital general Input/Output electrical connectivity, and Port C provides UART communication.
The M5Stack Core.
The M5Stack Core's Port A sends a signal to the Arduino Opta's I1 input terminal. This is done using a UiFlow blockly code program and an M5Stack 2Channel Relay connected to Port A. The signal tells the Arduino Opta PLC ladder diagram program to start. The UiFlow software can be downloaded from the following site here.
UiFlow Software.
Connect the M5Stack Core to an available USB port on your computer using a USB-C cable. Once the software has been installed, you can open it and select the COM port where your M5Stack Core is connected. If the COM port is unknown, use the Device Manager to locate it — note that Silicon Labs CP210x will be the communication port driver. Click the OK button to open the UiFlow Blockly Code IDE.
Device Manager identifying the M5Stack Core COM port.
Selecting the COM port for the M5Stack Core.
With the UiFlow software open, you may begin selecting the blocks to build the Jog Switch UI. On the left side of the UiFlow IDE, select and drag the Label tag to the virtual M5Stack Core TFT LCD screen. Center the label tag and click it with the left mouse button. A box will display next to the virtual M5Stack Core, where you can type Jog Switch. Click the Font drop-down arrow and select DejaVuSans 40. The M5Stack Core will display the new text on the virtual M5Stack Core.
The M5Stack Core UI – Jog Switch text
Repeat the Jog Switch text steps to add the START text.
The M5Stack Core UI – START text.
The final step in programming the M5Stack Core is building the code blocks. For the M5Stack 2 Channel Relay to operate, its Unit must be added to the IDE environment. Click the + sign underneath the Units label, find, and select the 2-Relay Unit. Click the OK button to place the 2-Relay Unit onto the IDE.
2-Relay Unit added to the UiFlow IDE.
Next, Button A_was pressed and relay2_0 control blocks will be added to the Block Code. The Button A_was pressed code block is in the Events bin, while you can find the relay2_0 control block in the Units bin. Build the code provided in the diagram and set the operation parameters as shown. With the blocky code built, click the RUN button on the IDE to program the M5Stack Core. The Jog Switch and START text will then display on the M5Stack Core TFT LCD.
The M5Stack Core Blockly Code program.
Wiring the Arduino Opta DC Motor Controller System
Wiring the DC Motor Controller system is quite easy. Use the schematic diagram to wire the Arduino DC Motor Controller System and use appropriately-sized wires to connect the components. The M5Stack 2Relay Module is shown as a 2-channel SPST relay. The 2Relay Module will be attached to Port A of the M5Stack Core module using a Grove cable.
Arduino Opta DC Motor with M5Stack HMI Controller schematic.
Upon completion of the wiring, the Arduino Opta DC Motor controller with HMI system should look similar to the image shown below.
The assembled Arduino Opta DC Motor with M5Stack HMI controller
Programming the Arduino Opta micro-PLC
You can program the Arduino Opta micro-PLC using a Ladder Diagram (LD) or a sketch (a C++ programming language used within the Arduino microcontroller-based platform ecosystem). The traditional Arduino IDE can be used to program the Opta or the Arduino PLC IDE. To better understand the Arduino PLC IDE, an overview is discussed here. For this project, the Arduino IDE will be used to program the Opta PLC.
The Arduino Opta micro-PLC’s code is a basic sketch allowing the industrial controller to operate an EMR. The EMR will turn ON or OFF the DC motor upon receiving an input control signal from the Arduino Opta’s I1 terminal.
Arduino Opta DC Motor Controller C++ code.
With the C++ code uploaded to the Arduino Opta PLC, pressing the pushbutton switch will turn on the DC motor. The M5Stack Core allows the DC motor to jog or run for 5 seconds with every press of its UI-based START button. You can view a video clip showing the completed project in operation here. Congratulations on successfully building the Arduino Opta DC Motor Controller with HMI.
In addition, the Arduino Opta can be programmed using a Ladder Diagram(LD) or Ladder Logic(LL). The LD programming resembles a ladder with rungs of contacts and coils that provide instructions for the Arduino Opta to process and execute. Complex logic can be developed using a combination of basic control logic functions consisting of contacts and coils, and you can program and execute basic control logic functions like AND, OR, NAND, NOT, NOR, and Memory on the Arduino Opta.
Programming the Arduino Opta using these basic control logic functions requires an understanding of relay ladder diagrams and implementing control logic functions using basic electric switches and an LED circuit. For example, implementing an AND control logic function using relay ladder diagrams requires wiring two toggle or slide switches in series. Combining the two switches wired in series with an output LED circuit will impact the output only with closed contacts of the electrical switching components. The OR control function can be implemented with two switches wired in parallel. The LED circuit will turn on when either electrical switch is closed. With this wiring approach of either a series or parallel configuration of switching contacts, the Arduin Opta can perform these control logic functions using LD programs.
The LD is one of four functional programming languages aligned with the International Electrotechnical Commission (IEC) 61131-3 standard. The other four programming languages stated in the IEC 61131-3 standard are Instruction List (IL), Sequence Function Charts (SFC), Structured Text (ST), and Function Block Diagrams (FBD). With the IEC standard, industrial programs like automated conveyors and pick-and-place machines can be implemented using the Arduino Opta.
As a design challenge, modify the M5Stack Block code to provide an OFF-control function for the DC motor. Explore controlling the Opta’s other EMRs and LEDs by modifying the C++ code. Further, try programming the Opta using the Arduino PLC IDE to operate the DC motor. Happy PLC programming!


