制造商零件编号 SC0195(9)
RASPBERRY PI 4 B 8GB
Raspberry Pi
Recent articles investigated the main components of modern smart-home systems, and we identified the central hub as one of the main components in such an ecosystem. The hub is responsible for orchestrating actions between all connected devices in a smart home and communicates with external services like cloud platforms and I/O devices.
A second article discussed some useful SDKs for makers who plan to build a smart home system themselves, and Home Assistant emerged as one of the most popular solutions for running the center hub. With that in mind, let’s take a look at the installation and setup process of Home Assistant on a cost and power-effective x86 single-board computer (SBC)!
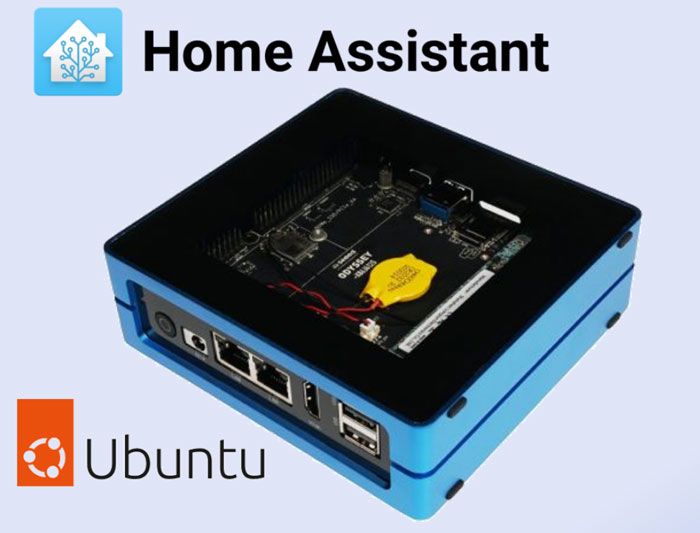
Home Assistant (HA) is extremely versatile in many ways, and that flexibility carries over to the installation methods. You can choose from a few ways of installing HA on your hardware of choice – and HA supports many different types and platforms. Some options include Windows computers, Macs, Linux PCs, and common SBCs such as the Raspberry Pi, and the Asus TinkerBoard. Moreover, the hub software can either run standalone or in a Docker container. For this article, we’ll focus on installing Home Assistant as a standalone operating system on a mini-PC that utilizes an x86 Intel CPU.
Installing HA as a standalone OS yields a few unique features that are otherwise unavailable, such as add-ons and the supervisor, which takes care of updating HA automatically. However, running Home Assistant in a container may yield better results for people who are uncomfortable with installing a Linux-based operating system or want to run HA next to other containerized applications.
You can choose from two installation methods. First, running the HA OS from an external storage medium, such as a USB flash drive, is possible without going through the whole installation process. However, that method is not recommended for a setup that will run 24/7, as the USB flash medium will likely fail quite soon in that scenario due to the OS constantly writing files to the memory.
Instead, installing the operating system on a dedicated internal storage device, such as an eMMC SSD or HDD, is the recommended way to go in most applications. However, booting from a USB pen drive is a good option for testing the OS on the target hardware.
This article focuses on installing HA permanently on a built-in SSD. However, for completeness' sake, this section outlines the most important steps for running HA from an external USB drive.
Start by downloading balena etcher and the latest HA OS image for your computer’s architecture from GitHub. Next, unpack the downloaded OS image and flash it to the USB drive using etcher. Finally, insert the USB stick into the computer on which you want to run HA, and select the USB drive as the boot device in the computer’s bios menu.
As mentioned previously, we’re using a Seeedstudio Odyssey x86 mini-PC with a built-in SSD for this tutorial. Therefore, we’ll install HA on that internal SSD for maximum efficiency and reliability. The easiest way of accomplishing this goal is by using a Linux-based OS, and more specifically, the dd program that comes with Linux, to copy all the data of the downloaded HA image directly to the target SSD in the x86-based minicomputer. For this process, you'll need an external USB drive for running a supported Linux distribution, such as Ubuntu, directly from the external storage medium in test mode. In this test mode, you can download the HA image from the project's official GitHub page and then use dd to copy the entire image to the built-in SSD.
To install HA using this method, start by downloading Ubuntu and balena etcher from each program's official website. Next, insert a USB stick into your computer and run the etcher software. In the program, select the freshly downloaded Ubuntu disk image:
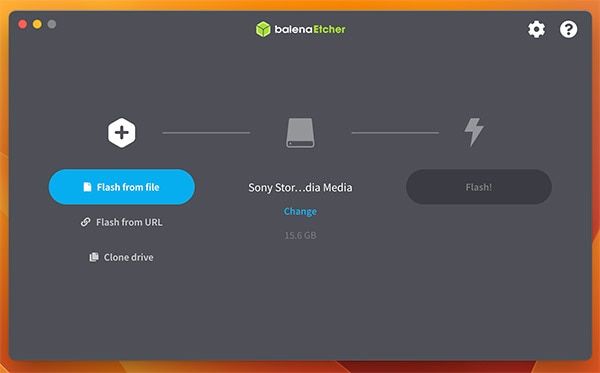 Select the image and USB drive in balena etcher
Then, select the USB stick you inserted. Make sure to choose the correct one, as all files will be deleted and overwritten on the selected device. Finally, click the blue flash button and wait for the process to finish:
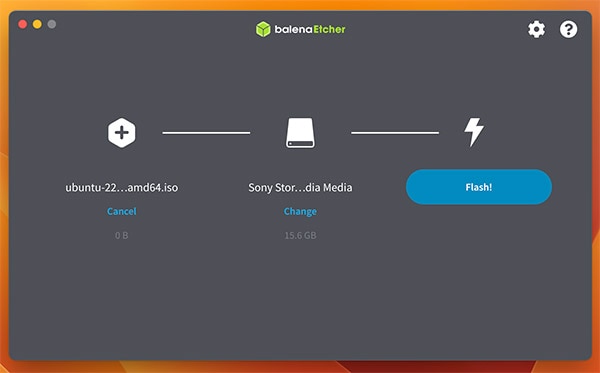 Double-check all settings before using the blue flash button to write the image file to the installation medium
Next, remove the USB stick from the PC you used for flashing the image and insert it into the target PC you want to use for running HA. Then, reboot that computer and enter its BIOS menu. In the case of the Odyssey, you can enter the menu by holding down the DELETE key right after powering on the device. In the BIOS menu, select the USB stick and then select the first option to try or install Ubuntu:
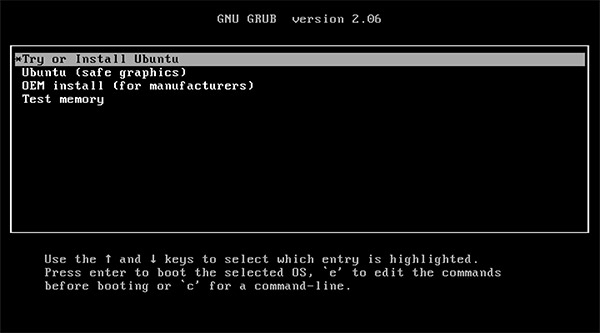 Select the installer option when booting from the installation medium
Next, wait until the installer lets you choose between trying and installing Ubuntu. On this screen, select the option for trying Ubuntu without installing the OS:
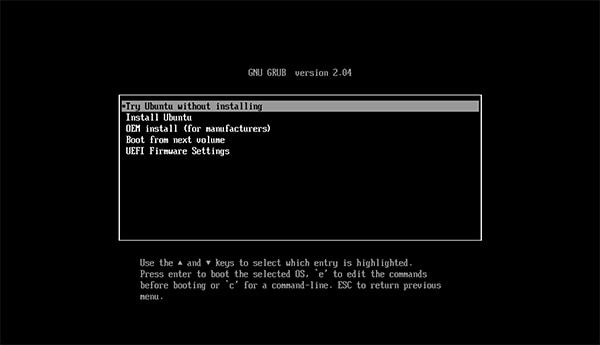 Select the option that lets you try Ubuntu without installing the OS. Note that this screen might look different depending on the exact version.
Then, wait for the demo OS to boot. Selecting this option gives you a fully usable Linux Desktop that runs entirely off the USB drive. Next, download the latest HA image from the official GitHub page and store it in the Downloads folder. Now, open a terminal window and type the following commands once the download finishes:
cd ~/Downloads
unxz haos_generic-x86-64-9.5.img.xz
The first command switches to the download directory, and the second one unpacks the downloaded archive that contains the HA OS image.
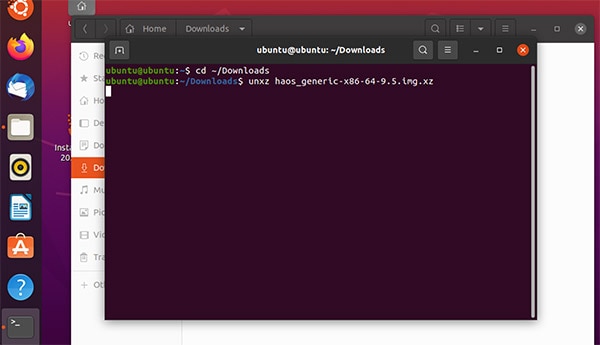 Type the two commands from above as shown in this image. Note that the file name might change when new versions of HA get released
Note that the file name might change depending on the most recent version and the hardware type. Next, use the following command to list all connected storage devices:
lsblk
Use the list to identify the built-in SSD and the USB stick used while booting into the test system, and take note of the SSD’s name:
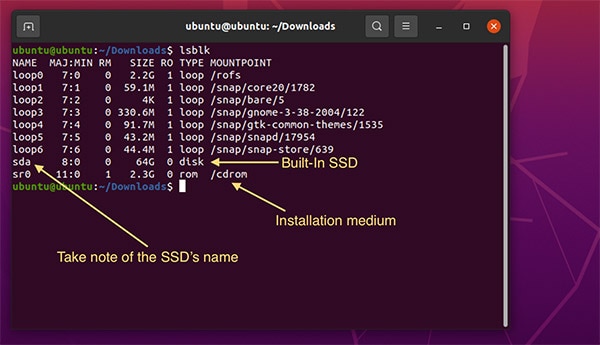 Use lsblk to identify the built-in SSD’s name
Finally, use the following command to copy the unpacked image’s contents to the built-in SSD. Note that this process will erase all data on the SSD:
sudo dd if=haos_generic-x86-64-9.5.img of=/dev/sda status=progress
Make sure to update the if (input file) parameter to match the downloaded image’s name and double-check that you’re using the SSD’s name you determined in the last step as the of (output file) parameter. Finally, wait for the process to finish, and then shut down the computer.
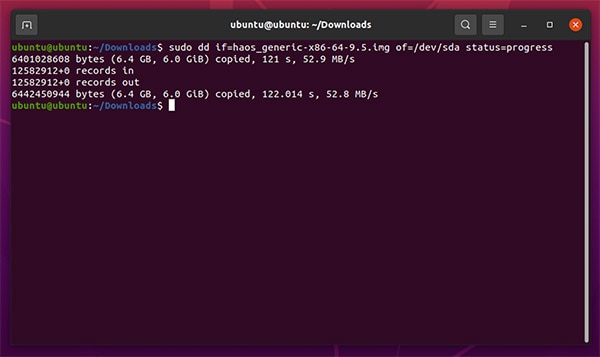 Wait for dd to copy all bytes from the HA image to the built-in SSD. The result should look similar to the output in this image
Finally, remove the USB stick before turning on the PC again, which should automatically boot into HA this time. If not, re-enter the BIOS menu and select the built-in SSD as the boot device. Once the system is up and running, it should present you with the URL you can use to access the HA GUI using any computer in the same network:
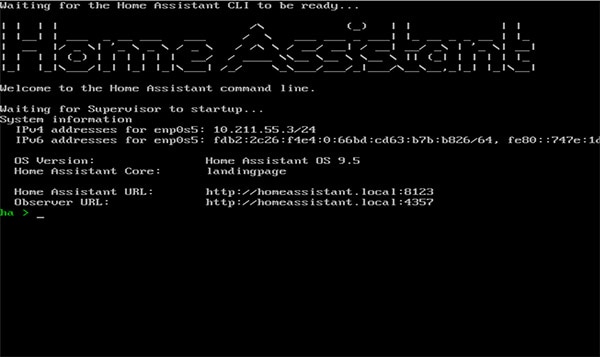 After a reboot, the computer should start HA OS
Once you see the screen shown in the previous image, use another device in the same network and navigate to the Home Assistant web UI:
http://homeassistant.local:8123
The website should require you to enter a few details before you can get started:
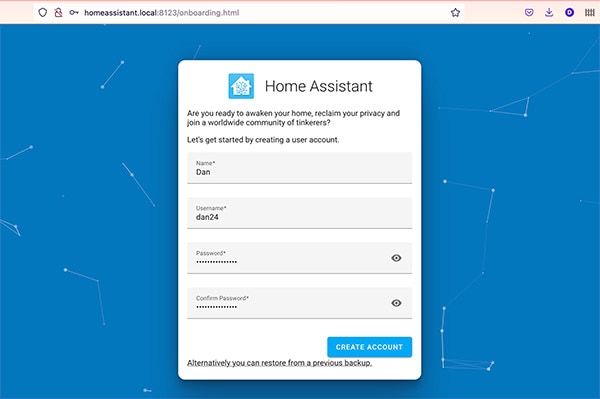 Enter your user details in the HA dashboard using any other device within the same local network
Once you fill in all the details, the UI should switch to the standard dashboard view. From here, you can onboard new devices and change settings:
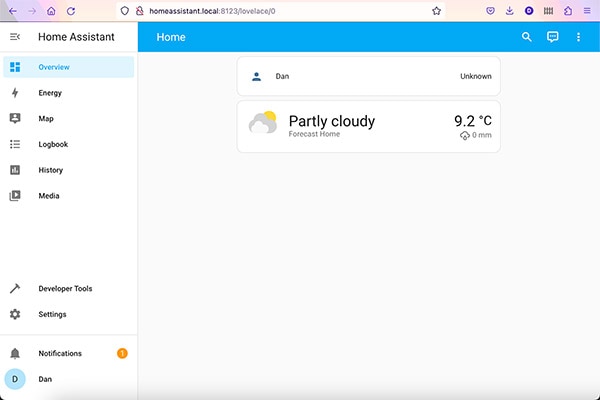 Once set up, you should be able to access the HA dashboard
Users can choose from a few different methods when installing Home Assistant on their hardware. The popular smart home hub software is not only compatible with an extensive range of devices, but it also offers flexible installation options that should suit everyone’s needs. However, it is recommended to download and flash the full HA OS image onto a built-in storage medium for maximum efficiency and reliability, especially in systems that run 24/7.
This article discussed how we can utilize a demo version of Ubuntu to download and copy the HA OS image to a built-in SSD in an x86-based mini-PC. Start by obtaining and flashing Ubuntu onto a large enough USB stick using balena etcher or any similar program. Then, boot the demo distribution and use it to download the latest HA OS image from GitHub. Finally, utilize the built-in lsblk and dd programs to copy the image data to the built-in SSD. After a reboot, the system should fire up HA, and the dashboard should be accessible from any device within the same local area network.