Adafruit Feather RFID Lock
2016-03-23 | By Maker.io Staff
License: General Public License Arduino Adafruit Feather
This project is all about how to keep your prised possessions safe using RFID authentication and some sort of locking device. This project uses a solenoid as the lock, which operates using between 9-24V power supply; the higher the voltage used the more reliable the solenoid will operate and lock into place. The project uses the Adafruit Feather board which is perfect for use with the PN532 breakout board as they both operate on 3V3 logic without using a logic 4040 IC convertor. I have used a Solenoid in this project but you can easily swap this out for a relay and a mains voltage maglock.
Step 1: Parts Needed
- Adafruit Feather Board - 1528-1514-ND
- Adafruit PN532 Breakout Board - 1528-1043-ND
- 3V3 Regulator - 497-1492-5-ND
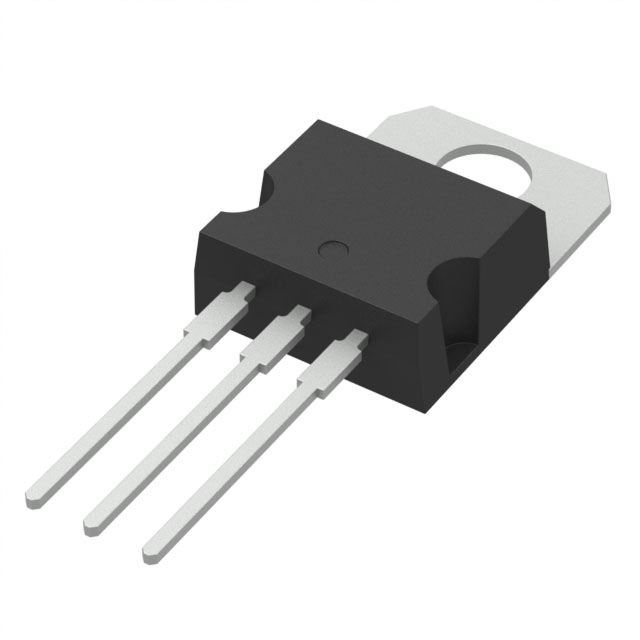
- Darlington transistor - TIP120-ND
- Solenoid - 1144-1299-ND
- 2x 100uf Capacitors - 1189-1300-ND
- 1K Resistor - 1.0KQBK-ND
- Breadboard - 438-1045-ND
- Jumper Wires - 377-2093-ND
- Diode - 641-1310-1-ND
- Screw Terminal DC Power adaptor - 1528-1386-ND
Add all items to the basket - http://www.digikey.co.uk/short/3qd4nv
Step 2: Building the circuit
Part A: Connecting the Feather board to the PN532 breakout board
Insert the Feather board into the breadboard and connect the PN532 breakout board to the Feather SPI pins using the following pin configuration.
- PN532 3V3 - 3V3 Feather Board
- PN532 SCK - SCK Feather Board
- PN532 MISO - MISO Feather Board
- PN532 SSEL - Pin 5 Feather Board
- PN532 GND - GND Feather Board
Below is a reference guide for the Adafruit Feather Pinout
Part B: Creating the power circuit
For this project I wanted to be able to power both the Feather board and the solenoid using one power source. Since the the solenoid requires between 9-24V, I decided to use a 3V3 regulator which takes a 2-15V input, therefore I can use a 12V DC power supply to power both the solenoid and the Feather board. Take a look at the following power circuit:
Before connecting the power and ground to the Feather board, test the circuit with a multimeter to make sure you are getting 3V3 output from the voltge regulator.
NOTE: Any voltage higher than 3V3 connected to the Feather board will damage the circuit
Go ahead and connect the 3V3 and GND from the Feather board to the power rails on the breadboard.
Step 3: Programming
Before you get started make sure you install the latest Arduino IDE and make sure to add the Adafruit AVR boards in board manager - https://learn.adafruit.com/adafruit-feather-32u4-basic-proto/setup .
The following code has been adapted from the Adafruit PN532 library, which you can download from their Github page - https://github.com/adafruit/Adafruit-PN532/ .
Add this to your Arduino library and open up the Mifare Classic example. Make the following changes to the sketch in order for it to work:
1. Change the SPI pins to the following
#define PN532_SCK  (15)
#define PN532_MOSI (16)
#define PN532_SS   (5)
#define PN532_MISO (14)
2. Add the authentication tag of your NFC card to the following line. If you are unsure of your tag then by default it should be programmed as shown in the sketch.
uint8_t keya[6] = { 0xFF, 0xFF, 0xFF, 0xFF, 0xFF, 0xFF };
3. Setup the solenoid pin and switch it to HIGH (locked) position when the sketc first starts.
pinMode(6, OUTPUT);
digitalWrite(6, HIGH);
4. For this project I'm using a 4 byte MiFare classic card. Once your RFID card has been authenticated you need to set the solenoid to LOW to unlock it and then set it back to HIGH to unlock it. Add the following global variable:
int state = 0;
Add the following lines after the card has been authenticated:
  if (state == 0){
        digitalWrite(6, LOW);
        state =! state;
      }
      else if(state == 1){
        digitalWrite(6, HIGH);
        state =! state;
      }
Finally compile and upload the code.
Summary
This is a great project that you can build-on into a real example, such as a draw or box lock for your office desk. You can easily swap the solenoid for a relay circuit or similar component.


