A Beginner's Guide to NanoEdge AI Studio Anomaly Detection-Part 1
2023-11-21 | By DWARAKAN RAMANATHAN
Introduction:
Welcome, readers, to an insightful blog post where we unravel the incredible world of audio classification using the groundbreaking NanoEdge AI Studio. In this article, we'll delve into how this cutting-edge technology is reshaping the way we understand audio data. From deciphering spoken words to recognizing intricate sound patterns, we'll explore the vast possibilities of NanoEdge AI Studio's advanced artificial intelligence. Whether you're a tech enthusiast, a data aficionado, or someone simply curious about the future of audio analysis, join us as we take a deep dive into the boundless potential of NanoEdge AI Studio in the realm of audio classification.
Note: Before starting this blog, you should have completed Part 4 of the STM32 Series. Discovering the STM32 CUBE IDE Part 4: Data logger.
But, I would recommend you complete all the parts of that series for you to understand the STM32 Cube IDE. The link to the First part of the series: Discovering the STM32 CUBE IDE: A Simple LED Blink and GPIO Project.
Downloading:
To download the NanoEdge AI Studio Click Here.

After registering yourselves, there will be only two versions of the software (Windows and Ubuntu). You can download the one you prefer. I am skipping over the Installation process in this blog.
Creating New project:
After installing the NanoEdge AI Studio, you will see an interface something like this:

Now, click on anomaly detection and create a new project.

After clicking on Create New Project, you will have to enter the details of the project as shown in the image. The description can be different, but I would recommend you keep the same title for your project.
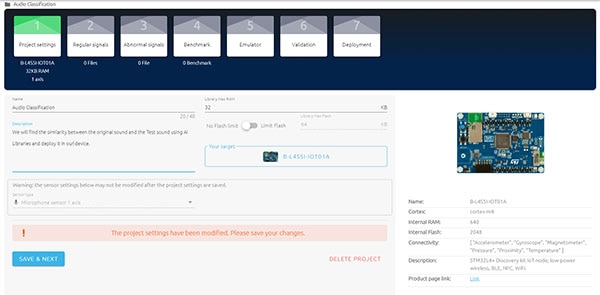
Click on the target selector to select the board that we are going to use in this project. It will be the same board that we have used in the previous series of the STM32 Cube IDE. Also, Select the sensor type. Here, we are using a microphone, which has only one axis of output data. So, select Microphone sensor 1 axis.


Now, Click on Save & Next. Here, you want to upload the original signal that you want to detect. In our case, it would be an ambulance sound that will be played near the microphone using any other device and collect the data of that signal. Download the audio here.
Note: You should have debugged the device with the code in Part-4 of the STM32 CUBE IDE series only then you can add the audio signal.
After clicking Save & Next, click on Add Signal and click From Serial (USB).

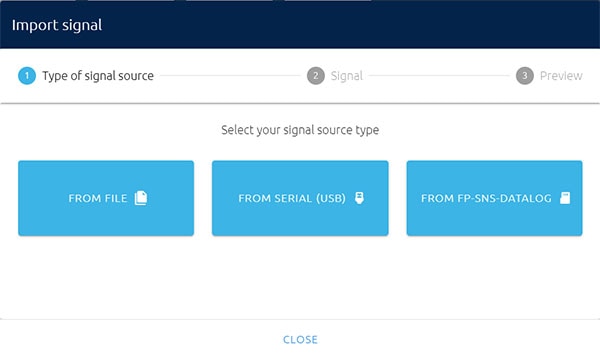
After clicking From Serial (USB), Select the COM Port and set the baud rate as 115200. Now, play the sound near the microphone in a loop and click on start/stop in the Software.

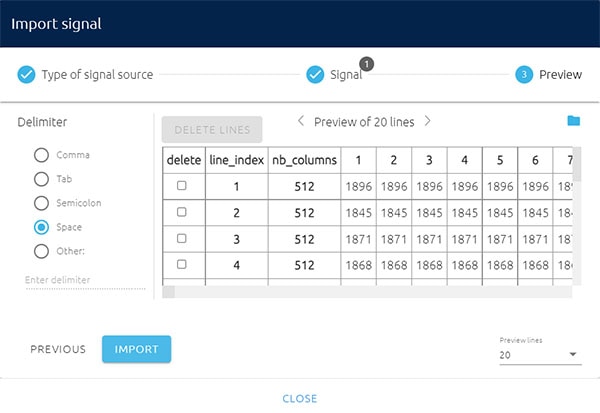
After starting, wait till you get the required number of lines (100 or 200). Stop after you get the required lines and click next.
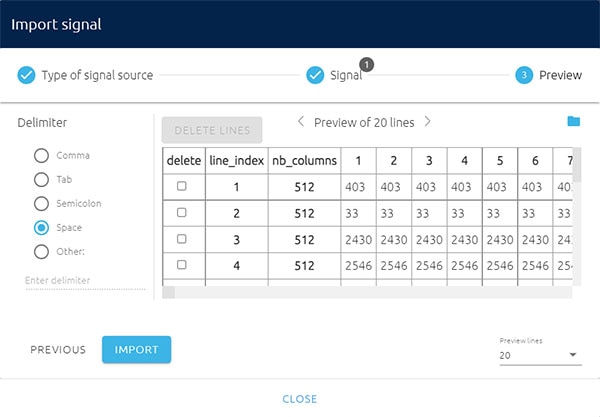
Click on import to import the signal.
Now, do the same for abnormal signal where you will have to upload an abnormal signal like your voice or anything other than the previous sound.
Benchmark:
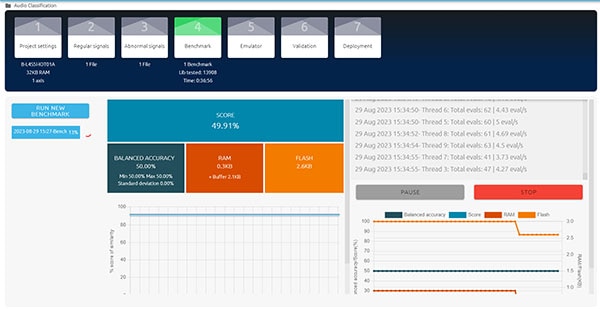
In this step, the software uses all the AI libraries to match your normal and abnormal signal and gives you the best learning model.
Click on Run Benchmark and stop if you reach a score above 90 (Recommended).
After the benchmark step, you have three main steps to complete:
- Emulator
- Validation
- Deployment
These steps will be explained in the next blog.


 中国
中国