NeoPixel Ring Lamp
2022-01-20 | By Adafruit Industries
License: See Original Project 3D Printing Programmers Raspberry Pi SBC Raspberry Pi MCU
Courtesy of Adafruit
Guide by Ruiz Brothers
Overview
This project is an LED lamp with NeoPixels.
It uses several NeoPixels rings to make a modern looking, functional lamp.
The led rings are held in place with snap fit diffusers designed and 3D printed as a single piece.
The rings are grouped together and arranged to look like they’re gravity defying.
To make the assembly modular, the project use PicoBlade molex cables so they can easily connect together.
The 3d printed holder features slots on the back that allow the cables to pass through.
In total, the lamp has 124 NeoPixel LEDs. It has one 60 NeoPixel ring, two 24s, and a 16 NeoPixel ring.
The LED animation library for CircuitPython is used to create this animation sequence.
It’s easy to modify the parameters so you can customize the animations to fit the feel of your project.
The animations are grouped together and, depending on the type, they can have their own speed settings and different colors.
It’s really the best way to get NeoPixel animations going in CircuitPython!
Parts
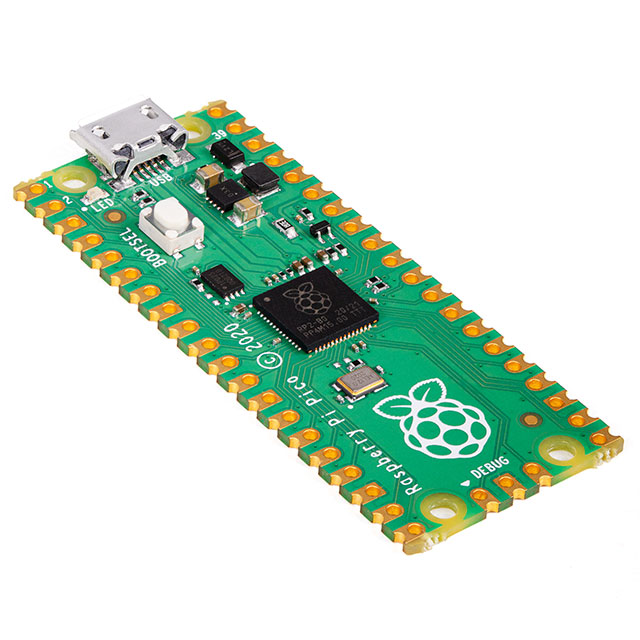
The Raspberry Pi Pico is powered by a USB wall plug.
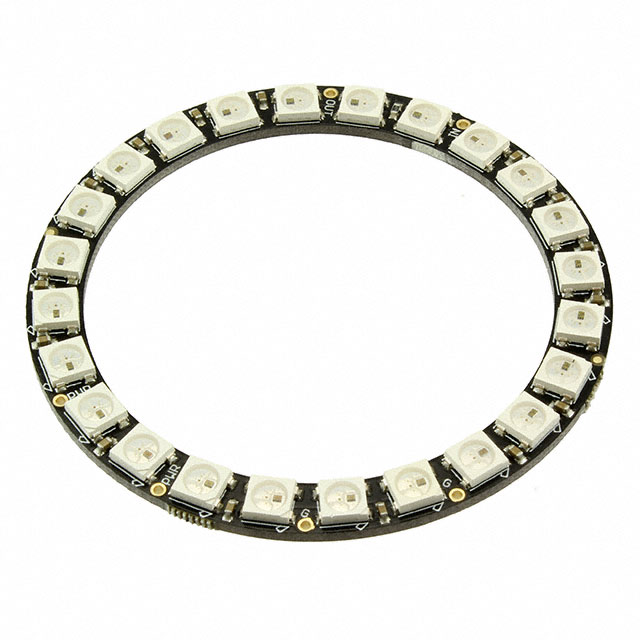
We used a 60 NeoPixel ring, two 24 NeoPixel rings, and one 16 NeoPixel ring for the lamp.
The LED rings press fit into the printed frame.
The LED frame attaches into the 3D printed case. The lid uses a 2.5mm screw to attach to the frame. The Lid snap fits on to the case. The case uses a circular base that press fits onto the case.
1.25mm Pitch 3-pin Cable Matching Pair - 40cm long
Circuit Diagram
The diagram below provides a visual reference for wiring of the components. This diagram was created using the software package Fritzing.
Use Adafruit's Fritzing parts library to create circuit diagrams for your projects. Download the library or just grab individual parts. Get the library and parts from GitHub - Adafruit Fritzing Parts.
Wired Connections
The Raspberry Pi Pico is powered by a USB power adapter.
NeoPixel Ring
The lamp is illuminated by a 60 NeoPixel ring, two 24 NeoPixel rings and one 16 NeoPixel Ring. The 60-pixel ring consists of four 15 pixel quarter strips.
V+ from NeoPixel Ring to VBUS on Pico
G from NeoPixel Ring to GND on Pico
IN from NeoPixel Ring to GP0 on Pico
Installing CircuitPython
CircuitPython is a derivative of MicroPython designed to simplify experimentation and education on low-cost microcontrollers. It makes it easier than ever to get prototyping by requiring no upfront desktop software downloads. Simply copy and edit files on the CIRCUITPY drive to iterate.
CircuitPython Quickstart
Follow this step-by-step to quickly get CircuitPython working on your board.
Download the latest version of CircuitPython for the Raspberry Pi Pico from circuitpython.org
Click the link above and download the latest UF2 file.
Download and save it to your desktop (or wherever is handy).
Start with your Pico unplugged from USB. Hold down the BOOTSEL button, and while continuing to hold it (don't let go!), plug the Pico into USB. Continue to hold the BOOTSEL button until the RPI-RP2 drive appears!
If the drive does not appear, unplug your Pico and go through the above process again.
A lot of people end up using charge-only USB cables and it is very frustrating! So, make sure you have a USB cable you know is good for data sync.
You will see a new disk drive appear called RPI-RP2.
Drag the adafruit_circuitpython_etc.uf2 file to RPI-RP2.
The RPI-RP2 drive will disappear and a new disk drive called CIRCUITPY will appear.
That's it, you're done! :)
Flash Resetting UF2
If your Pico ever gets into a really weird state and doesn't even show up as a disk drive when installing CircuitPython, try installing this 'nuke' UF2 which will do a 'deep clean' on your Flash Memory. You will lose all the files on the board, but at least you'll be able to revive it! After nuking, re-install CircuitPython.
Code
Once you've finished setting up your Raspberry Pi Pico with CircuitPython, you can access the code, audio files and necessary libraries by downloading the Project Bundle.
To do this, click on the Download Project Bundle button in the window below. It will download as a zipped folder.
# SPDX-FileCopyrightText: 2021 Ruiz Brothers for Adafruit Industries
# SPDX-License-Identifier: MIT

import board
import neopixel
from adafruit_led_animation.animation.pulse import Pulse
from adafruit_led_animation.animation.rainbow import Rainbow
from adafruit_led_animation.animation.rainbowsparkle import RainbowSparkle
from adafruit_led_animation.animation.rainbowcomet import RainbowComet
from adafruit_led_animation.sequence import AnimationSequence
from adafruit_led_animation.color import PURPLE

# Update this to match the number of NeoPixel LEDs connected to your board.
num_pixels = 124

pixels = neopixel.NeoPixel(board.GP1, num_pixels, auto_write=True)
pixels.brightness = 0.2

rainbow = Rainbow(pixels, speed=0.01, period=1)
rainbow_sparkle = RainbowSparkle(pixels, speed=0.05, num_sparkles=15)
rainbow_comet = RainbowComet(pixels, speed=.01, tail_length=20, bounce=True)
pulse = Pulse(pixels, speed=.05, color=PURPLE, period=3)

animations = AnimationSequence(
    pulse,
    rainbow_sparkle,
    rainbow_comet,
    rainbow,
    advance_interval=5,
    auto_clear=True,
    random_order=False
)

while True:
animations.animate()Upload the Code and Libraries to the Raspberry Pi Pico
After downloading the Project Bundle, plug your Raspberry Pi Pico into the computer USB port. You should see a new flash drive appear in the computer's File Explorer or Finder (depending on your operating system) called CIRCUITPY. Unzip the folder and copy the following items to the Feather M4's CIRCUITPY drive.
lib folder
code.py
Your Raspberry Pi Pico CIRCUITPY drive should look like this after copying the lib folder and code.py file.
3D Printing
Parts List
STL files for 3D printing are oriented to print "as-is" on FDM style machines. Parts are designed to 3D print without any support material. Original design source may be downloaded using the links below.
Slicing Parts
Slice with setting for PLA material.
The parts were sliced using CURA using the slice settings below.
PLA filament 220c extruder
0.2-layer height
10% gyroid infill
60mm/s print speed
60c heated bed
Assemble
Assemble 60 NeoPixel Ring
The 60 NeoPixel ring is four quarter sized PCB’s that are soldered together by sliding solder from one pad to another.
The pico blade molex cables are soldered to the input and out pins on the back of the NeoPixel rings.
Fit rings into frame
Carefully bend wires behind the ring.
Keep the wires tucked inside the frame and away from the walls to allow the diffuser to press fit into the frame.
Connect cables
The rings are oriented, so the cables can be easily connected together.
The wiring is pressed in between the edges to keep the PCB tightly fitted into the holder.
They’re daisy chained with the data flowing from the large ring at the bottom to the smallest ring at the top.
Mount Pico
The Raspberry Pi Pico is press fitted into the 3d printed case with the pcb facing the opening for the usb port.
Attach lid to frame
To secure the case to the ring assembly, use one M2.5 machine screw to attach the lid cover to the bottom of the ring holder.
The remaining cables are threaded through the top cover and connected together.
Fit base
An additional base is fitted under the 3d printed case for added stability.
The Raspberry Pi Pico can be powered by a 5V USB power supply using a USB battery bank or the wall outlet.
Power
A USB extension cable with a built-in switch can be used to make it easier to power on and off.


 中国
中国