Arduino Project Troubleshooting with Becky Stern
2023-04-25 | By bekathwia
It can be really tough to learn all the things that could possibly go wrong while creating an Arduino project, whether it’s your wiring, code, or software settings. Luckily, I’m here to help! Let’s get into a detective mindset, get out your multimeter, and figure out what's going on.
We’ll cover three major problems you could be having: Your code won’t compile, you’re unable to upload, or your code isn’t doing what you want it to.
The board I recommend starting with is the Arduino Uno or compatibles such as the Adafruit Metro, Sparkfun Redboard, or Seeeduino. We’ll cover installing a new boards package and troubleshooting your wiring with a multimeter in this guide too.
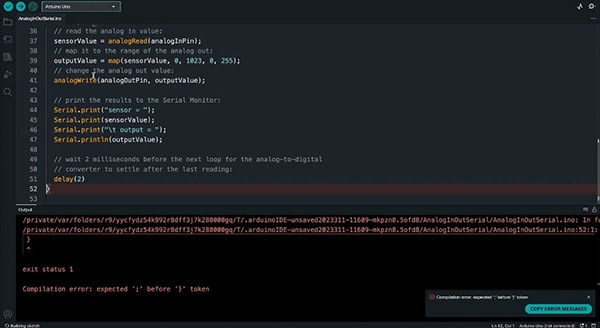
The first major problem you might encounter is an issue compiling when you click the Verify button. If something goes wrong, you’ll see red errors in the console window below your sketch. The first step should always be to read the error message.

If the error message says “expected ';' before '}' token” or similar, then you are probably missing a semicolon or have a misplaced curly brace, parentheses, or other syntax error. The report will identify the area where the problem is but may highlight an area next to or related to the problem spot.
You can double-check your sets of parentheses and curly braces by moving your cursor to one to see its highlighted match. It’s super common to accidentally erase or misplace syntax elements when composing your program. If you saved a version of your code at a previous milestone, you can open that file and compare the two to help sleuth out the issue.

If the error message says, “No such file or directory”, you are missing a library required by the program.
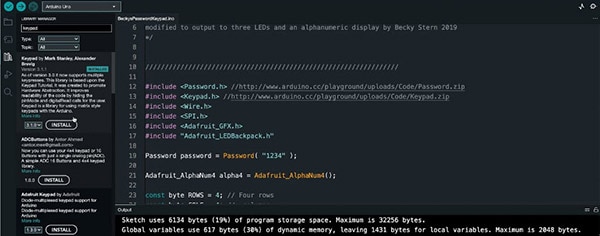
Try looking it up in the library manager and then install it. Or install it manually by downloading it and putting it in your libraries folder, making sure it’s named properly. Learn more in our previous episode about Arduino libraries.
The second problem you’re likely to have is that you get an error when you click the Upload button, preventing you from loading the program to your Arduino board. As before, the first thing to do is to read the error message.

If it says, “can't open device” or “programmer is not responding”, then you may not have the correct board or port selected in the Tools menu.
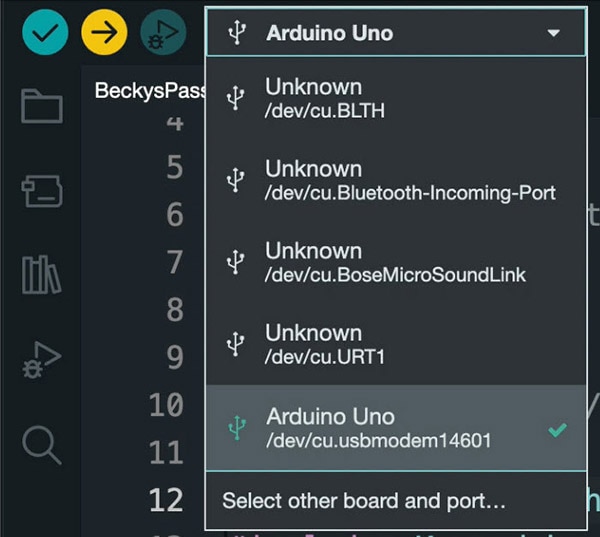
Often, when you unplug your board and plug it back in, as you should be doing when you make changes to your circuit, your Arduino IDE will forget which port you had selected.

If this is your first time using a new board, you may also need to double-check you have installed the necessary drivers and board support, if required. To do so, read the product documentation, where you’ll find the board’s URL which you’ll then paste into the Arduino Preferences.

Then you can find your board in the boards manager and install it. If everything’s configured properly, you can select the proper board and port from the menu and upload your code.

If your board appears in the list, it means the board support is installed. Having the wrong board selected can also cause compilation errors– not all boards have the same programmable features.
If your board doesn’t appear as one of the available ports, it could mean you are missing a software driver, or it could mean your USB cable is a charge-only cable. Be sure you are using a USB cable that is known to support data, double-check the product documentation to see if you need a driver, and try using a different USB port on your computer.
And as usual with technology, sometimes you just need to restart your Arduino software or your whole computer and try again.
There are a few less common problems that could be at play here, too. Arduino will act weird if it’s installed in the wrong place on your computer. I’ve had students try to run the app from their downloads folder on Mac, which results in some pretty vague errors regarding permissions.
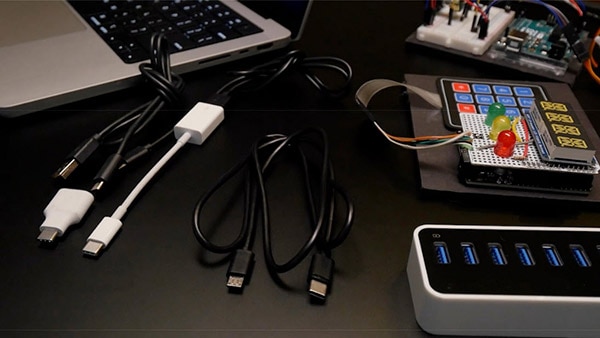
Even less common is a dongle problem, but it does happen. If you are using a USB adapter and having issues, try swapping it out, especially in favor of a powered USB hub or new cable that eliminates the need for an adapter altogether.
The third problem you’re likely to have is that your program compiles and uploads, but just doesn’t do what you want it to do. Double check the pin number you specified in the code is the same pin connected to your device. Double-check power and ground, especially. If you have shorted power and ground, your computer will detect the current draw and protect itself by shutting off power to the USB port. You’ll usually get a warning about a device using too much power. You may not be able to use this USB port again until you restart your computer.
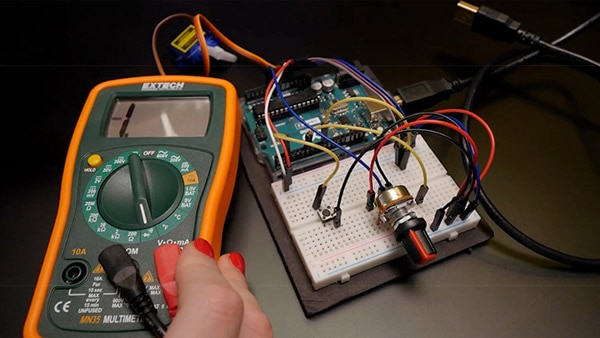
To troubleshoot your wiring, be sure the circuit is unplugged from power, and set your multimeter to continuity mode.

Touch the probes on either end of each thing that should be connected. If they are, you should hear your multimeter emit a tone.
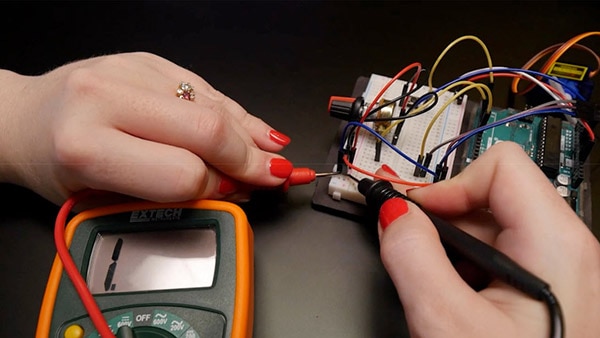
You’ll also want to ensure each item that shouldn’t be connected, isn’t. Touch the probes to either end and make sure you don’t hear the tone.
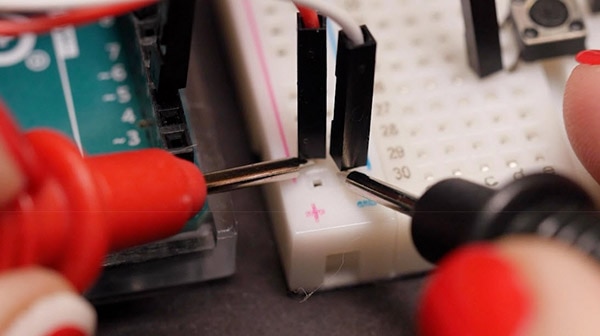
Occasionally, one of your breadboard wires might be invisibly broken inside, or an area of your solderless breadboard isn’t springy enough to make good contact anymore, or you just aren’t seeing that something is plugged into the wrong spot. The multimeter is the way to check for these problems.

After rectifying any compilation, upload, or wiring issues, you may still have a fair bit of code wrangling to get the desired output from your circuit. You can add some serial print statements to various parts of your code to find out if they are executing and how often.

There are also some great references on the Arduino site, which I still use for troubleshooting all the time. Don’t make the common mistake of underutilizing this important resource.
- The Language Reference describes each bit of the whole programming language by groups of commands with simple samples demonstrating each one.
- They’ve also got a more thorough list of error messages and what they mean.
- You can research your questions and error messages in the Arduino Community Forum or DigiKey’s TechForum, or find similar projects (and even share your own) in the Arduino Project Hub or here, on Maker.io.
Check out the rest of this series for even more information on building with Arduino.

Have questions or comments? Continue the conversation on TechForum, DigiKey's online community and technical resource.
Visit TechForum


 中国
中国