制造商零件编号 WBNCC633731-2OZ
NO-CLEAN FLUX CORE SOLDER, 63/37
SRA Soldering Products
Soldering is the process of bonding separate metal objects together with a low-melting-point alloy. When done properly, this creates a secure electrical connection. It’s not as hard as it may seem, and I’m going to show you everything you need to know, but there is an official NASA guide to soldering and workmanship standards that goes way deeper than we will here. So, if you get inspired, there’s always more to learn.
You’ll also see soldering in crafts like stained glass and jewelry making, as well as in construction, for example sweating copper plumbing pipe. Today we’re just talking about small-scale electronics soldering.
These are the tools you’ll need:
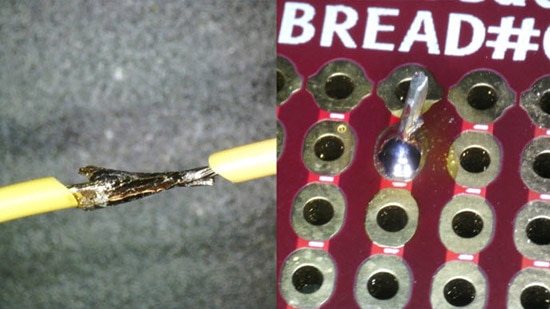
The main idea is to heat both things being soldered and allow the solder to flow between them. When heated properly, the solder will wick to the surfaces, and the solder will look shiny and form concave shapes between components.
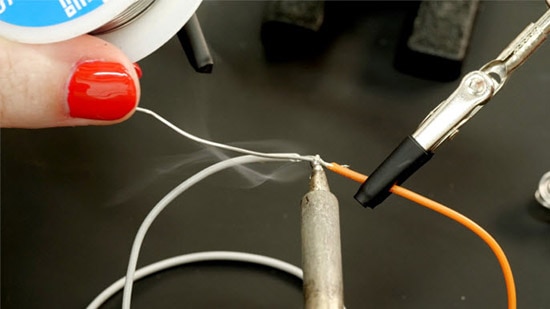
If your components might undergo some stress, you can create a mechanically stronger bond by wrapping the wires together first before soldering.
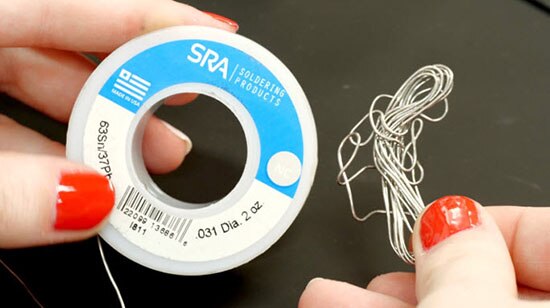
Electrical solder comes in a few main varieties and sizes. For our purposes, a rosin-core wire solder, either with lead or lead-free, is ideal. The flux inside boils off as you solder, creating the ideal shielded environment for the metal bond to take place without oxidation. They do make solid solder and separate flux, though, which usually has to be washed off afterward. That’s because, at the very least, it’s ugly and sticky, and at the worst, it can absorb ambient moisture and corrode the components and PCB. Rosin-core solder and solder that’s labeled “no-clean” are just more convenient. Read more about solder and flux in this other DigiKey article.
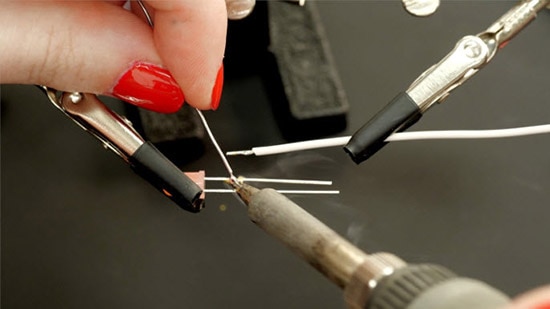
Often you’ll find it useful to tin your parts before you solder them. Especially with things like stranded wire, applying a little solder first can help keep the strands together when you hook it up to the circuit board or other wire you’re working with. The tinned solder reflows when the joint is heated.
If you’re new to soldering, practice making a few simple circuits with LEDs and battery packs. Then you can level up to building a soldered version of your latest breadboard project on a piece of protoboard.
The most important rule of soldering is to heat both parts. The ways it can go wrong are mostly related to incomplete heating. If the hot solder runs up against a cold part, it will cool down so quickly that some oxidation has a chance to form on the surface of the solder, between it and the component. You can reheat the solder joint to correct a cold solder.
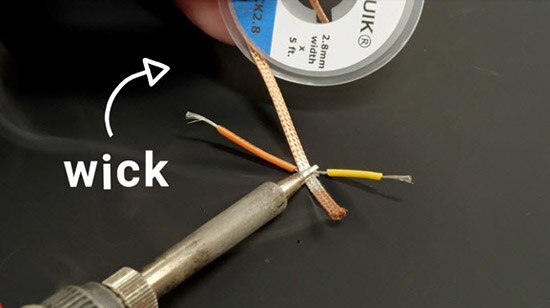
You can also reheat your joint to undo the connection, which can be easier sometimes if the excess solder is first removed by wicking or suctioning it away.
You can check for proper connectivity by using the continuity function on your multimeter. No beep, no electrical flow.
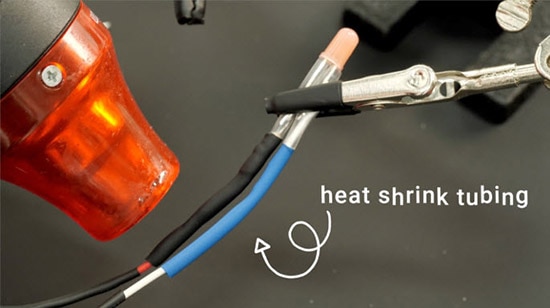
To protect your solder joints from shorting out against other nearby conductors, it is wise to use heat shrink tubing over any applicable solder joints. For splicing multi-wire cables, you can offset the joints and use multiple nesting sizes of heat shrink to tidy up and protect the entire thing.
Once you’ve practiced soldering wires to each other, you might move on to try soldering wires to a circuit board. DigiKey’s got a whole video all about this topic, so check it out to learn more about soldering through-hole components.
The smaller the components, the harder they are to solder by hand, so for surface mount components there’s a robotic process that starts with a stencil to apply a paste solder, followed by a pick and place machine that puts down the parts, then a solder reflow oven that bakes the whole circuit to just the right temperatures to allow the solder paste to liquefy and make all the connections. Larger through-hole parts can be attached by dipping the board in a solder bath, and are sometimes still soldered by hand.
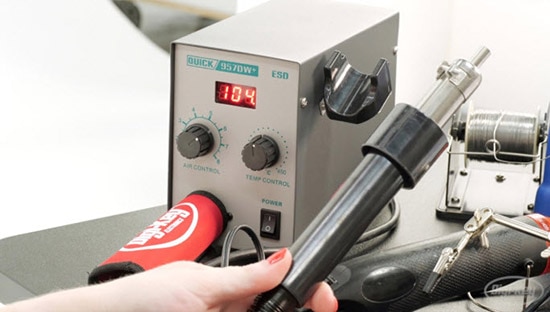
To remove surface mount components, a hot air rework station can heat small pads inaccessible to a soldering iron.
Thanks for reading! Check out my favorite soldering supplies below.
Key Parts and Components