Raspberry Pi Pico and RP2040 - MicroPython Part 2: I2C Sensor and Module
2021-04-19 | By ShawnHymel
License: Attribution
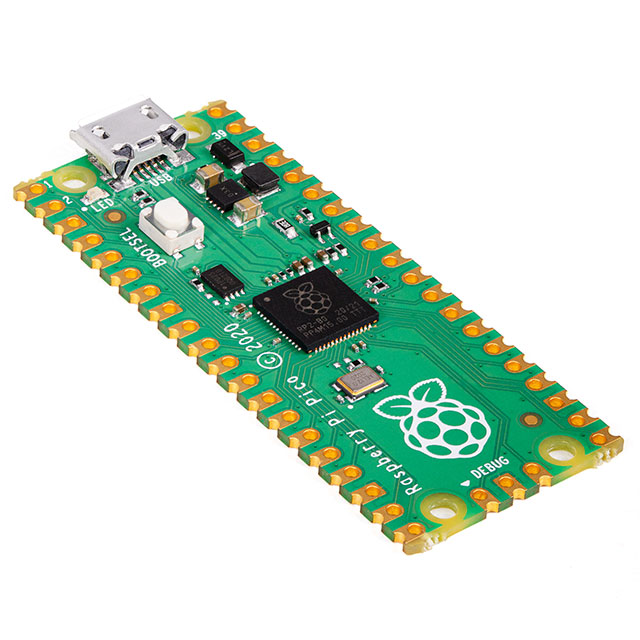
The Raspberry Pi Pico is a development board based around the Raspberry Pi RP2040 microcontroller. It contains a number of peripherals and communication protocols that we can use to read from sensors and control various hardware.
In the previous tutorial, we used Thonny to write a simple MicroPython blinky program to flash an LED on the Raspberry Pi Pico. This time, we’ll show you how to use the I2C module to read from a temperature sensor.
Here is a video showing these steps:
Inter-Integrated Circuit (I2C) is a communication protocol that is popular among chipmakers. It uses 2 open-drain lines, which means you will need to use a pull-up resistor on each line. 4.7 kΩ is the most commonly used pull-up resistor value. Note that most sensor breakout boards (like the one we use in this tutorial) already include the pull-up resistors, so we won’t need to add them.
I2C is a bus protocol that supports multiple devices on a single bus. That means we can have more than one sensor attached to the same two pins! However, note that because devices are addressed, you may run into address conflicts if more than one of the same sensor is on the pin.
I recommend reading this article if you would like to learn more about how I2C works.
Required Components
We will be using the Bosch BME280 for this demo. The BME280 is a combination temperature, humidity, and pressure sensor. Specifically, we will use the Adafruit BME280 breakout board, which contains the necessary pull-up resistors and other supporting components.
You will also need a breadboard, jumper wires, and header pins soldered to your Pico.
Hardware Hookup
Connect the Pico to the BME280 breakout board as follows:
Note that the SDO pin on the breakout board works as an address select line. By pulling it high or low, you can change the I2C address of the BME280:
- SDO line connected to 3.3V: 0x77
- SDO line connected to GND: 0.x76
The SDO line is pulled up by default on the breakout board. If you leave SDO unconnected, it will be connected to 3.3V (address 0x77). You can connect it to GND if you wish to change the address to 0x76.
Scan I2C Bus
Before writing a program to continuously read data from the sensor, it’s a good idea to check the I2C connection to make sure you can communicate with the device.
Luckily, MicroPython comes with an I2C library that we can use. See here to read the I2C API documentation. We will use the scan() function to scan the bus and list out any sensor addresses it finds.
In a new Thonny program, enter the following code:
import machine

# Create I2C object
i2c = machine.I2C(0, scl=machine.Pin(17), sda=machine.Pin(16))

# Print out any addresses found
devices = i2c.scan()

if devices:
    for d in devices:
        print(hex(d))
Make sure you have MicroPython (Raspberry Pi Pico) selected as your target in the bottom-right corner of Thonny. Feel free to save it on your Pico as main.py. I also recommend saving it to your computer as something like i2c_scan.py, as it is a helpful program when working with I2C devices.
When you run it, you should see 0x77 printed to the console, indicating that the Pico can communicate with the BME280 board.
Note that we create an I2C object with machine.I2C(). We give it the following parameters:
- 0 is the I2C bus number on the RP2040
- scl is the clock line. We use GP17 for SCL
- sda is the data line. We use GP16 for SDA
You can find a great pinout of the Pico on page 5 of the datasheet. Here, you can see that there are 2 I2C buses labeled 0 and 1. We’re using bus 0 and pins 16 and 17 for SDA and SCL.
Read Temperature Data
Reading and calculating useful measurements from a sensor, such as the BME280, can be tricky. We can rely on libraries that others have written to help us. Click Tools > Manage Packages…
Search for bme280. Click micropython-bme280 and click Install. This will copy the bme280 module (one or more .py files) to the /lib folder on the Pico.
I recommend clicking on the Homepage link to read more about the library: https://github.com/SebastianRoll/mpy_bme280_esp8266. There, you will find the source code and an example in the README. We will use that example as a starting point for our code.
In a new document in Thonny, enter the following code:
import machine
import bme280 # from bme280.py
import utime

i2c = machine.I2C(0, scl=machine.Pin(17), sda=machine.Pin(16))
bme = bme280.BME280(i2c=i2c, address=0x77)

while True:
    print(bme.values[0])
    utime.sleep(0.5)
In this code, we create an I2C object, just like we did in the scan program. We pass that object to the BME280 library, and we set the address to 0x77 (which we obtained from the scan program).
We can read from the library using the bme.values property. This gives us a tuple in the form of (temperature, pressure, humidity). To read temperature, we retrieve just the first element with bme.values[0].
Run the program, and you should see the temperature (in degrees Celsius) being printed to the console every 500 ms.
Recommended Reading
Feel free to check out the following documentation if you would like to dive deeper into using I2C on the Raspberry Pi Pico with MicroPython:
- Raspberry Pi Pico datasheet: https://datasheets.raspberrypi.org/pico/pico-datasheet.pdf
- Raspberry Pi Pico Python SDK datasheet: https://datasheets.raspberrypi.org/pico/raspberry-pi-pico-python-sdk.pdf
- MicroPython I2C class API: https://docs.micropython.org/en/latest/library/machine.I2C.html
- Raspberry Pi Pico and RP2040 - MicroPython Part 1: Blink
- Raspberry Pi Pico and RP2040 - MicroPython Part 3: PIO


 中国
中国