Arduino VFO Project with a Large LCD Display
2025-01-21 | By Mirko Pavleski
License: General Public License Displays Oscilloscope Signal Generator Arduino
A Variable Frequency Oscillator (VFO) is an electronic oscillator whose output frequency can be adjusted or varied over a specified range. It generates periodic waveforms, whose frequency can be dynamically controlled. VFOs are crucial in a wide range of applications, particularly in communications, testing, and signal processing.
In one of my previous videos, I presented a way to make such a device with an ESP32 microcontroller on a color TFT display. This time I will present you a VFO which according to its characteristics is identical to the previously mentioned one, although it has an incomparably simpler code, and is made with an Arduino Nano microcontroller.
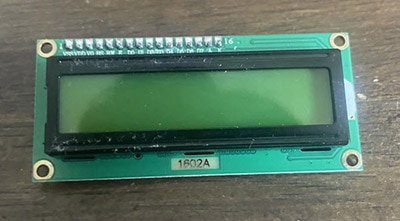
The original device that I present to you in this video is the work of Julio Cesar and all credits go to him. In fact, I made the original device more than a year ago on the SH1106 OLED display, which is larger than the SSD 1306, but even this display is relatively small and difficult to read. Therefore, I decided with my modest programming experience to rewrite the code for the ST7920 LCD Display, which is significantly larger, with a visual area of 70x40 mm.
Since this display is not supported by the Adafruit GFX library, I used the U8G2 library in my project, which currently has support for a huge number of different display types, so by changing only one line in the code, you could use a related display.
The device is really very simple to make and consists of a few components.
- Arduino nano microcontroller
- Si5351 Signal Generator module
- LCD display with ST7920 driver chip
- Rotary Encoder with push button
- band selection button
- and RX-TX switch
Now let me briefly describe how the device works. Immediately after switching on, the display is initialized and then the working screen appears. The starting frequency is entered previously in the code and in this case, it is the 40m amateur band. The frequency is changed with the rotary encoder. The tuning step is selected with the encoder knob and can be 1Hz, 10Hz, 1kHz, 5kHz, 10kHz, and 1MHz. With this button, we can select one of the 20 Band Presets, as well as the Generator function mode. Operation range is from 10kHz to up to 200 MHz. In the code we can set the Intermediate Frequency (IF) offset (+ or -) for use in Superheterodyne or other types of radio receivers. It also has a selector for RX or TX mode of operation which is ideal for use in homebrew QRP transceivers. VFO also consists of a bar graph-type S-meter. The signal for the S-meter is fed to the A3 analog input of the Arduino. This input has adjustable sensitivity, the gain must be adjusted in Sketch, accepting signals from 500mV to 5V (max).
A more detailed description of the method of operation can be found on the author's page. And now let's do a short test to see if the output signal corresponds to the value presented on the display. For this purpose, I will use an oscilloscope. As can be seen, at lower frequencies the signal is rectangular, and with increasing the generated frequency, it gradually turns into a sinusoidal one as a result of the slow transition from low to high level and vice versa.
However, this is not a problem at all, at least in radio engineering where I most often plan to use this device. In fact, I plan for one of my next projects to be a simple Direct Conversion receiver with a VFO presented in this video.
Finally, a short conclusion: This is a cheap and easy-to-build VFO device that is almost indispensable in radio engineering, especially in DIY radio receivers. Credits to the creator of the original project, CesarSound.


