How to Solder Surface Mount Components Using Common Tools
2023-06-28 | By Maker.io Staff
Solder / Desoldering Irons / Stations Solder

Most makers will eventually reach a point in their career when they can’t rely on through-hole components for their circuit design, as the circuit needs to be incredibly small, and these components would make the overall design too bulky. At this point, soldering the often-minuscule surface mount devices (SMD) might seem like a daunting task, and many may struggle with how to begin. This article summarizes a few key techniques you should know before attempting to solder any SMD parts and explores a few of the common mistakes and pitfalls.
Recommended Tools and Accessories
As with many projects, the right tools can make the job much easier to accomplish, and the results are often better than if one had used inferior tools. It’s also important to state that practically all SMD parts that you might encounter are solderable without the need for highly specialized tools, as these components are typically not as delicate as the ones used in high-volume commercial production runs. However, it still helps to have a few tools ready:
 This image shows some of the tools you will need when soldering SMD components.
As mentioned, you can solder most SMD components used in your projects using regular wire solder and a fine-tipped soldering iron. In addition, you should grab a good pair of tweezers and some tools, such as a small metal pick for moving the components around. Some parts, for example, those that don’t have visible pins once soldered in place, will require solder paste and a hot air gun or hot air soldering station.
Soldering SMD Resistors, Transistors, and Diodes
As with through-hole components, these are easiest to solder as they typically are relatively large in physical size and tend to have easily accessible pins. Inexperienced makers should start practicing with SMD resistors, transistors, or diodes.
To solder such a part, begin by locating its place on the PCB. Then, pre-tin the pads by adding a minimal layer of solder to the pads you want to solder to:
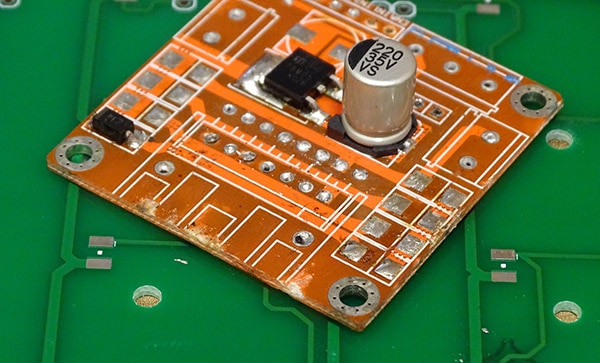 Start the soldering process by preparing all necessary pads.
The extra solder should barely be noticeable, as adding too much at this point might create invisible solder bridges under the part or to neighboring solder pads. Either way, once the pad is tinned, grab the component using the tweezers so that both pins are easily accessible.
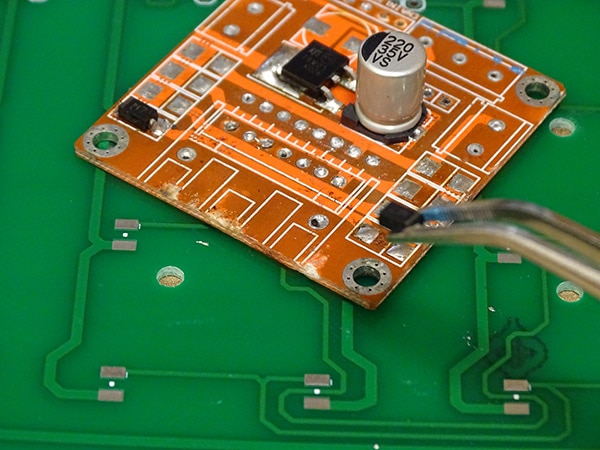 Place components on the previously prepared pads using tweezers.
Next, move the part into place and hold it steady using the pliers. Finally, use the hot soldering iron to tack down one side of the device. At this point, you can still fix the component’s orientation should it be off.
 Use a soldering iron to heat the legs of the parts to solder. Use tweezers to move the part around and align it with the pad.
Once the device sits nicely in its intended spot, use the soldering iron and additional solder to weld the other leg to the PCB. Upon completion, re-visit the first pad and add extra solder if necessary. The result should look like this:
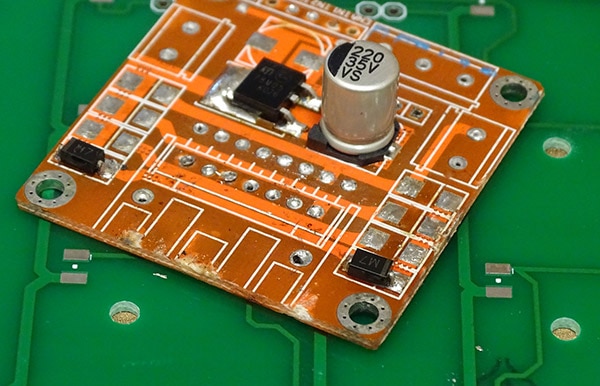 In the end, the part should be connected to all necessary pads.
Handling SMD Integrated Circuits
Soldering SMD ICs is very similar to the previously outlined process of soldering SMD resistors, diodes, and transistors. Start by pre-tinning all of the IC pads on the PCB.
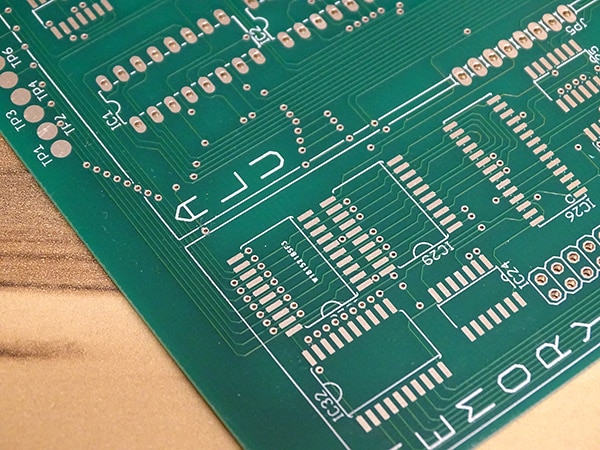 Similar to above, start by pre-tinning all necessary pads.
Then, use tweezers to place the SMD chip on the pre-tinned pads, paying close attention to the chip’s orientation and alignment.
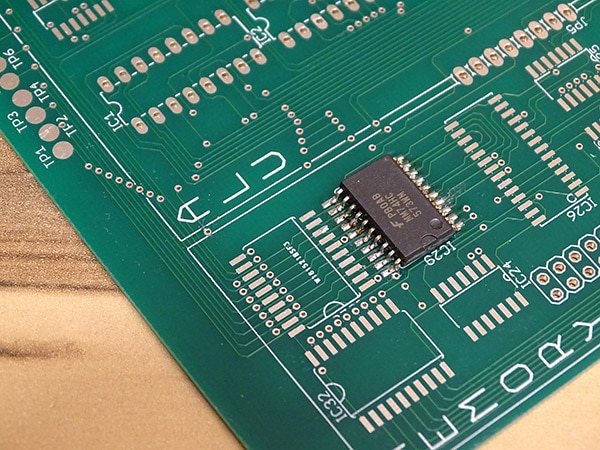 Place the IC on the prepared pads and solder in one of the corner pins before checking the alignment of the part.
Next, come in with the soldering iron and solder one of the pins in either corner of the IC before double-checking the pin alignments:
 This image shows that all pins line up with the correct pads on the PCB.
Then, solder one pin at a time in your preferred order, just as you would with regular through-hole ICs. Finally, check for unintended solder bridges and remove them if necessary.
Solder Inaccessible Pins on SMD Parts
As mentioned, some devices may have pins that are inaccessible once they’re placed on the PCB. Such parts cannot be soldered using ordinary soldering irons, instead requiring a hot air soldering station or a heat gun with low fan speeds. While these parts can be mounted using solder paste, I prefer regular solder in most situations as I find it makes less of a mess and is easier to handle. Conversely, solder paste keeps the components in place during the soldering process and prevents them from getting blown away by the hot air soldering station or heat gun.
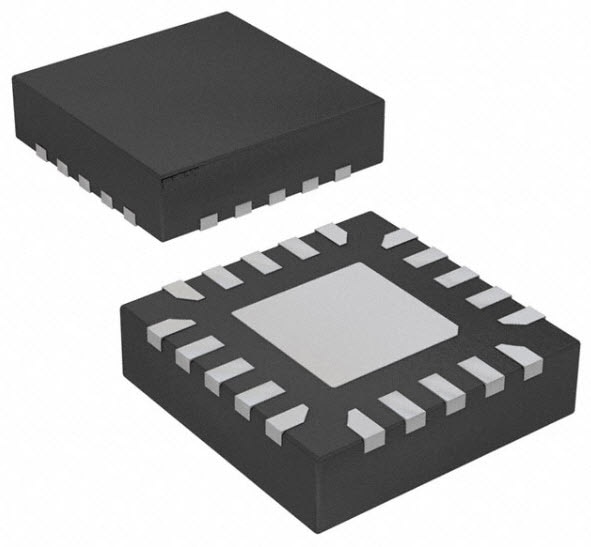
Either way, start by preparing the solder pads. When using solder paste, spread a bit on each pad you want to solder to and remember that a tiny amount usually goes a long way. When using standard wire solder, pre-tin the pads, as explained above. Then, place the component on the prepared pads using tweezers. In this case, the alignment doesn’t have to be perfect, as the surface tension of the molten solder will pull the components to their correct place most of the time.
Finally, heat the PCB using the hot air gun or a soldering station. Pre-heating the entire PCB is especially important when working with large PCBs, as they may otherwise warp. I still heat the whole PCB, however, even when working on smaller pieces. First, move the hot air nozzle over the PCB for about one minute, and don’t get too close. Then, gradually focus the heat around the area you want to solder until you see the components magically move into their intended places.
The components can typically be moved around for a few seconds before the solder solidifies, allowing you to adjust their positioning and alignment using a small metal pick, should one of the parts not be aligned correctly.
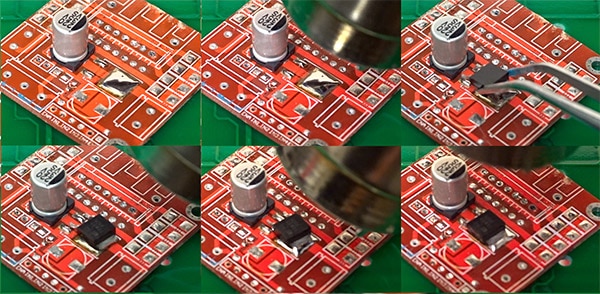 This image illustrates the hot air soldering process. The bottom three images show how the part slowly moves into place when heated, even if not placed perfectly on the pads.
Note that you can apply the same technique to the other parts categories discussed above. Further, this technique allows soldering multiple components at once. Simply prepare all affected pads, place all components in their respective spot, and then heat the entire board until the parts are soldered in place.
The Bottom Line
SMD components come in numerous package sizes, shapes, and layouts, some of which are easier to handle than others. Beginners should start with soldering SMD resistors, diodes, and transistors, as these are typically larger and often have easily accessible pins. Most SMD integrated circuits are also relatively easy to solder.
However, some IC packages and other devices, such as SMD electrolytic capacitors, don’t have easily accessible pins. In these instances, a hot air gun or hot air soldering station is recommended if not necessary.
Regardless of the component type, the same technique applies. First, start the soldering process by preparing the pads using solder paste or regular hobby-grade soldering wire. Then, place the component on the pads using tweezers. Next, apply heat to the part until it moves into place. Lastly, visually inspect the solder joints and remove any solder bridges.
As with most things in life, mastery will come with practice. I recommend starting with big SMD components and a training board that lets you try out different tools and combinations of solder and solder paste before moving on to assembling real projects.
Recommended Reading
Prototyping with Solder Stencils - Another Teaching Moment | DigiKey
How to Remove SMD Components Using a Soldering Iron
How to Solder QFN MLF Package by Hand (Using a Hot Air Rework Station) | DigiKey
How to Solder - Another Teaching Moment | DigiKey Electronics
How and When to Use Solder Wick


