How to Add Sound Effects to Your Arduino Projects
2022-06-08 | By Maker.io Staff
Sound effects can enhance a variety of projects by adding an entertaining aspect to games or giving users audible feedback, for example, when they press a button. However, many projects, such as custom-built Halloween decorations, also benefit from fitting sound effects. This article discusses how to add sound effects to any Arduino-powered project. However, you’re not limited to using an Arduino — you can employ any microcontroller (MCU) board you like!
 This image shows the Adafruit Audio FX Mini soundboard.
Introducing the Adafruit Audio FX Modules
The Adafruit Audio FX range of breakout modules includes everything you need for adding sounds to your existing and new projects. All boards feature a VS1000 OGG and WAV decoder chip responsible for playing back either compressed or uncompressed audio files. It’s capable of playing back high-quality 44.1KHz 16-bit audio using either a single mono or a stereo speaker configuration. The board contains either two or sixteen megabytes of flash memory, depending on the exact model. Finally, a convenient built-in mass storage USB feature lets you upload audio files directly from a computer to the sound module using drag and drop.
Depending on the exact model, the soundboard contains eight to eleven inputs that can be triggered by connecting the respective trigger pin to ground (GND). The board includes everything you need, so you don’t have to think about debouncing the buttons or adding pull-up resistors. In addition to connecting a trigger pin to GND to play one of the audio files stored in the onboard flash memory, the devices can also communicate with an MCU or even a PC via a serial connection.
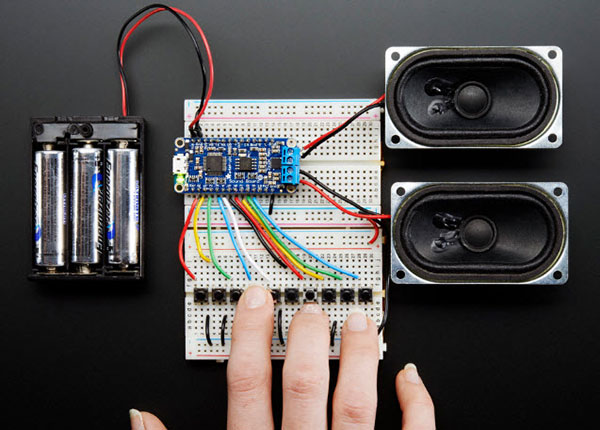
 The largest Audio FX board lets you directly hook up large speakers. Image courtesy of Adafruit
You can choose between three versions of this board. Some devices offer a different number of input pins and more flash memory. However, the most apparent difference is the type of amplifier that comes on the device. The smallest module, the Adafruit Audio FX Mini, requires an external amplifier to produce loud sound effects. This model works great in small, confined spaces. The 16MB version includes a headphone jack, making it a great choice for adding to existing playback hardware. Lastly, the regular Adafruit Audio FX soundboard contains a 2x2W amplifier so that you can directly hook up louder and more powerful speakers, which makes it perfect for larger projects. Luckily, all these devices function the same, which means that you can apply this guide to any of them.
Adding Files to the Audio FX Boards
The audio modules act as USB flash drives when connected to a computer. Therefore, you can drag and drop audio files (OGG or WAV) to the device to effortlessly store different soundtracks. However, you have to adhere to a particular naming convention so that the device knows which file to play when a user or external device activates one of its input triggers.
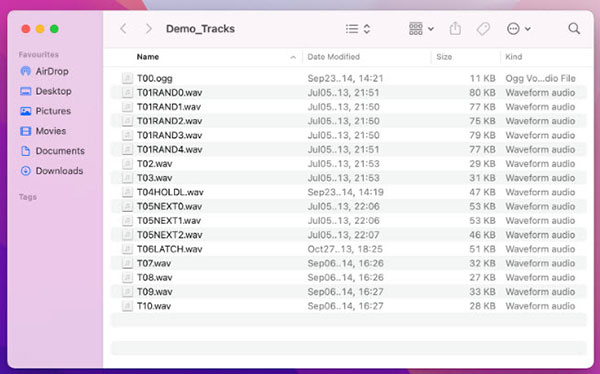
Move a file to the drive and name it Txx to associate that file with trigger pin xx. Whenever you employ this simple naming scheme, the device will play the file Txx exactly once whenever the input pin xx goes low.
 This image shows some example file names supported by the Adafruit Audio FX devices. You can download these demo tracks on the official Adafruit website.
However, you can also make the device randomly select and play one of up to ten files associated with any of the input trigger pins by naming the files TxxRANDy, where xx denotes the input pin and y a number between zero and nine.
Next, you can make the device play a sound in an endless loop while the trigger pin xx is held low by naming the file TxxHOLDL. Similarly, you can make it play a file in an infinite loop whenever the pin XX is pulled low momentarily by naming the file TxxLATCH. Pulling the pin low another time stops the loop.
Lastly, you can make the device endlessly iterate over up to ten tracks whenever input xx is low by naming the files TxxNEXTy, where y must be a number between zero and nine.
Starting Audio Playback Using the Trigger Pins
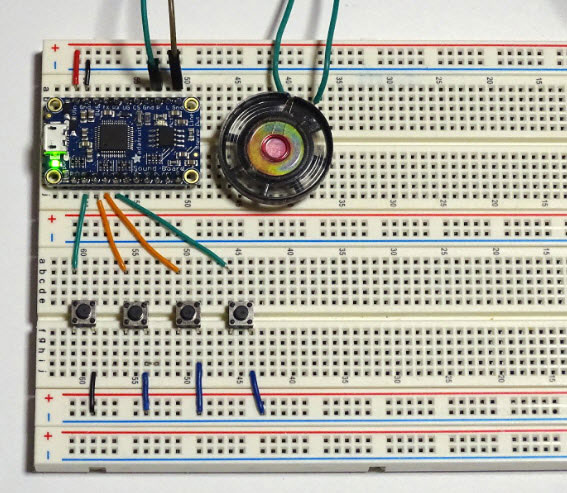
Once you’re done adding tracks to the device’s internal flash memory, you can place the breakout board on a breadboard and add short jumper wires and buttons so that the trigger pins connect to GND whenever a user pushes one of the buttons. You don’t need to add any debounce measures or pull-up resistors, as these are all built into the Audio FX soundboards. Next, add a speaker or plug in headphones, depending on the board you bought:
 This image shows four tactile push buttons that each connect one of the first four trigger pins to GND as soon as a user presses a button.
You should see that a green LED comes on once you supply the breakout module with 3.3V to 5.5V. Then, when you press one of the buttons, the device should play the track you associated with the respective input trigger pin. Finally, an additional red LED comes on while the device is busy playing a soundtrack.
Note that you don’t have to use push buttons. You can, of course, also connect an MCU or any development, for example, an Arduino UNO, to the trigger pins. Then, whenever the MCU pulls one of the trigger pins low, the Audio FX board should play the correct sound.
Accessing the More Advanced Serial Interface
Apart from starting audio playback using the trigger pins and controlling the device's behavior by using specific filenames, you can also use a serial connection to interface with the Adafruit Audio FX boards. For that purpose, Adafruit supplies a convenient Arduino library and a fully documented example that explains every option and parameter in detail. Start by installing the Adafruit soundboard library using the Arduino IDE's library manager:
 Download the Adafruit Soundboard library using the Arduino IDE’s built-in library manager.
Next, open the menucommands example included with the Adafruit Soundboard library. This example program uses the standard software serial library to communicate with an Adafruit Audio FX board. Therefore, you have to connect the external module’s TX pin to pin five on the Arduino and the module’s RX pin to digital pin six on the Arduino. You also need to connect RST to pin four and UG to the Arduino’s GND pin:
 This image outlines how to connect the Adafruit Sound FX Mini module to an Arduino UNO. Scheme-It Link
Finally, you can upload the sketch to an Arduino, which should display the following menu in the IDE’s serial monitor once the device is ready:
 The included example program lists all operations supported by the Sound FX boards.
Using the serial interface over the simpler trigger pins might initially add complexity to the project. This approach not only allows for more advanced control features, such as pausing and resuming playback, but it also helps save GPIO lines in projects that require playing more than three different sound effects.
Summary
Using sound effects, you can introduce various benefits to your projects. Simple sounds (for example, a beep effect) show users that a device recognized their input. However, more complex sound effects are a must for every project that aims to entertain its users. Audio clues can make or break projects such as electronic games, decorative devices, and seasonal projects, like electronic Halloween decorations.
Usually, adding sound effects to a project involves working with complicated codecs and microcontrollers. However, the Adafruit Sound FX boards allow playing back audio samples without the need to write even a single line of code. Users can trigger multiple sounds by pulling one of the numerous trigger pins low. The simple-to-use breakout board already includes all the debounce and playback logic needed. Furthermore, these modules function as standard USB flash drives when plugged into a computer, allowing you to drag-and-drop audio files to the device. The file names also tell the Adafruit Sound FX boards how to handle the added files.
For more elaborate use cases, you can use a serial interface provided by the external sound module. This interface saves GPIO pins, and it also offers some features that can’t be achieved by pulling the trigger pins low.


