Enhance Your Arduino Projects with an External Micro SD Card Reader
2022-06-13 | By Maker.io Staff
Many Arduino-based projects could benefit significantly from storing data on a development board. Unfortunately, most Arduino boards only have minimal storage capabilities that can hold a few variables in volatile memory or a few bytes permanently in their built-in EEPROM. Therefore, storing log files, audio samples, or collected video data is impossible without adding some form of external memory. Therefore, this article discusses how to store large files by adding an external microSD card reader to any Arduino project.

Choosing an SD Card Reader for Your Project
When choosing an SD card reader for your project, there are several things to keep in mind. First, start by considering the physical size of the device. You can most commonly choose between standard SD card readers and microSD card readers, which are typically smaller in size. Secondly, make sure to read up on the supply voltage the device supports.
MicroSD cards are strictly 3.3V devices, and they are susceptible to overvoltage damage or fluctuating voltage levels. Furthermore, the storage device may require several-hundred milliamperes when it operates. Therefore, make sure that the module you’re using comes with a high-quality power supply circuit to ensure optimal and safe operating conditions for the sensitive SD cards.
Furthermore, you should always reformat SD cards before using them in your projects to rule out possible problems that may arise from an incorrectly formatted card. Most Arduino SD libraries support at least FAT16 and FAT32. Note that formatting will erase all data stored on the memory card. Lastly, make sure that you buy a module that supports SPI mode, as most Arduino code will make use of that slower but less demanding mode.
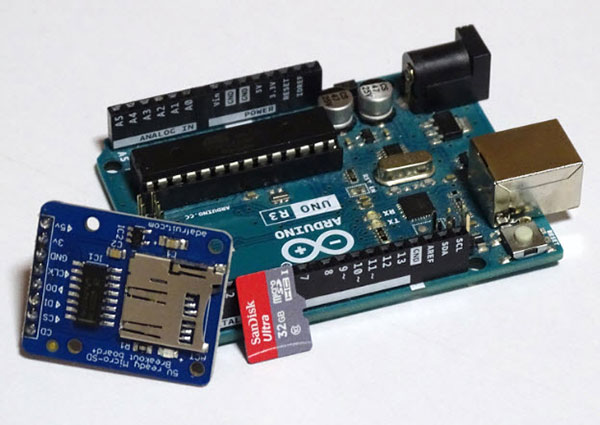
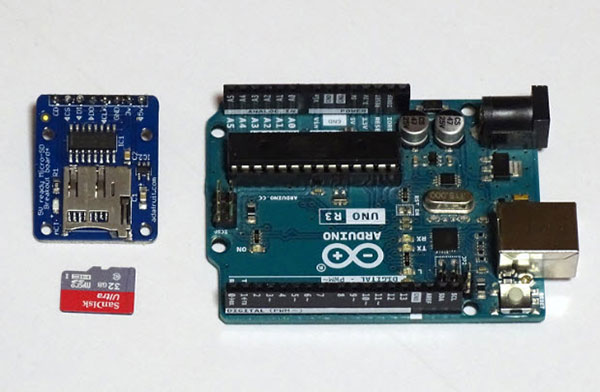
Considering all these requirements, I used this Adafruit micro SD card breakout module. It contains an appropriate step-down circuit and logic-level-shifting circuitry so that you can use the module with 3.3V and 5V Arduino boards.
Connecting the Adafruit Micro SD Card Module to an Arduino
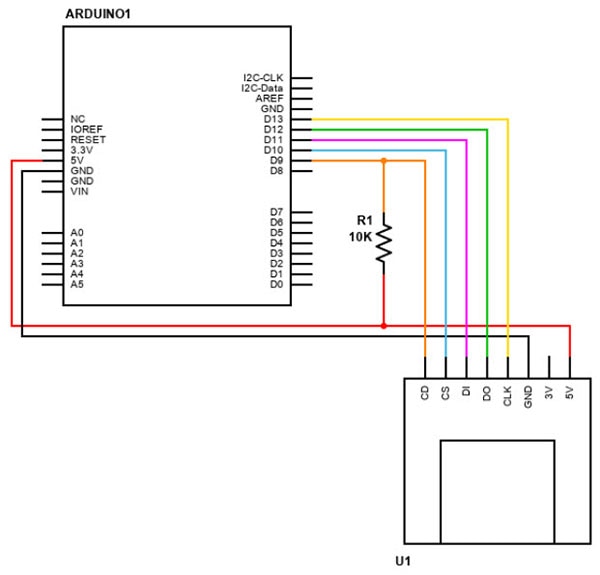
I recommend using the hardware SPI pins on your Arduino board to interface the SD card module. Doing so allows the MCU to keep up with the data-intensive transfers more easily typical for SD cards so you can achieve better transfer speeds. Besides the SPI pins, you also need to connect an additional chip select (CS) pin using any other digital GPIO line. Lastly, wire the SD card module to the +5V and GND pins of your Arduino:
 Connect the SD card reader module to your Arduino, as shown in this schematic diagram. Add a pull-up resistor to the CD line to prevent the pin from floating when there’s no SD card in the reader.
Note that the 3V pin of the SD card reader module is an output from the onboard voltage regulator. Therefore, make sure to connect your Arduino’s power supply pin to the 5V input of the breakout module, even if you’re using a 3.3V development board. Furthermore, you can use the CD output to detect whether an SD card is plugged into the device. The connector pulls this pin high when a card is present. However, some modules may flip this bit, meaning they return a low signal when a card is selected, so double-check the documentation for your chosen module.
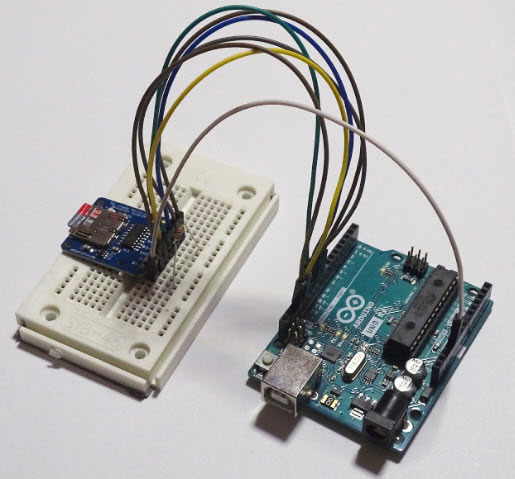
 Use a few jumper wires and a breadboard to connect your Arduino to the external SD card reader module.
Initialize the SD Card Reader using the SD Arduino Library
The Arduino IDE comes with an SD card reader library that lets you conveniently access SD cards with minimal effort. The following sketch initializes an external SD card module using the standard hardware SPI pins, given that the user inserted a storage device into the reader slot:
#include <SPI.h>
#include <SD.h>

#define CS 10
#define CD 9

void setup()
{
  Serial.begin(9600);

  pinMode(CS, OUTPUT);
  pinMode(CD, INPUT);

  bool cardPresent = digitalRead(CD);

  if(!cardPresent)
  {
	Serial.print("No SD card found! Insert a card to proceed...");

	while(!cardPresent)
  	    cardPresent = digitalRead(CD);

	Serial.println("OK!");
  }

  if(!SD.begin(CS))
  {
	Serial.println("Couldn't initialize SD card reader!");
	while(true);
  }
}
As you can see, the code first pulls the standard SPI and SD libraries. Then, the setup method initializes the Serial output and the GPIO pins for selecting the SD reader module and the input used for detecting whether a card is present. Next, the sketch checks whether the CD input is high, indicating that a card is plugged in. If the signal is low, the program prints a message to the serial console and waits for the user to plug in a microSD card. Once the Arduino detects a card, it continues to initialize the external module. Note that this call always fails if there’s no card plugged into the reader.
Reading and Writing Data
Luckily, writing data to the SD card and reading bytes from an existing file are also effortless operations thanks to the convenient standard SD library:
void writeLog(void)
{
  File logFile = SD.open("log.txt", FILE_WRITE);

  if(logFile)
  {
	logFile.println("Device booted!");
	logFile.println("Hello World...");
	logFile.close();
  }
  else
  {
	Serial.println("Couldn't write log.txt!");
  }
}

void readLog(void)
{
  File logFile = SD.open("log.txt");

  if(logFile)
  {
	Serial.println("Log contents:");

	while(logFile.available())
  	    Serial.write(logFile.read());

	logFile.close();

	Serial.println("-----------");
	Serial.println("");
  }
  else
  {
	Serial.println("Couldn't read log.txt!");
  }
}
As you can see, the writeLog function first opens a file using the FILE_WRITE access flag. Note that you can only open a single file at a time, and you have to close a file before opening another one.
The function then checks whether the open operation succeeded. If it did, the method uses the familiar println function call to write data to the log file. Finally, the method closes the open file so that other parts of the program can access different files.
Similarly, the readLog function first opens the file. You don’t have to supply a special flag for reading file contents. Like above, the readLog file checks whether the open operation succeeded, and if it did, the method reads bytes as long as there are bytes available to read from the log file. Next, it prints the received bytes to the serial console using the write method of the Serial class. Lastly, it closes the file to allow other functions to access other files on the SD card.
Finally, the loop method calls the writeLog and readLog functions as follows:
void loop()
{
  writeLog();

  if(SD.exists("log.txt"))
	readLog();
  else
	Serial.println("Couldn't read log.txt! Make sure the file exists!");

  while(true);
}
Summary
 You can effortlessly add multiple gigabytes of external storage to your Arduino projects using only a handful of components.
Most development boards only offer a few kilobytes of non-volatile memory, so adding external storage is necessary for every project requiring graphics, sound, or data logging capabilities. When choosing an SD card reader, make sure to select one that supports the supply voltage of your board. Many popular development boards are still 5V devices, while SD cards strictly operate at 3.3 volts.
Make sure to use the hardware SPI lines of your development board when connecting it to the external SD card reader module. In the case of the Arduino UNO, those are the pins eleven, twelve, and thirteen. In addition, you’ll need to connect a CS pin, which is traditionally pin number ten on the UNO. However, any digital GPIO pin will work fine. Lastly, I recommend you use the CD pin so that your program can check whether the user inserted a card.
The standard SD library of the Arduino IDE makes initializing the module, writing data to the SD card, and reading file contents a breeze. All of these operations only require a single line of code, and the library’s function names mimic standard Arduino method names.

Have questions or comments? Continue the conversation on TechForum, DigiKey's online community and technical resource.
Visit TechForum


 中国
中国