How to Send Data Over Bluetooth in the Atmosphere IoT Studio
2019-11-13 | By Maker.io Staff
One of the key elements in the Atmosphere IoT Studio Platform is the Bluetooth element, which allows for sending and receiving data over Bluetooth. This element, while it may seem simple, has a few quirks that can catch you out. So, we will be looking at each step to using this element carefully. In this simple how-to, we will send the value of a GPIO input once every second!
BOM
- Adafruit Huzzah 32
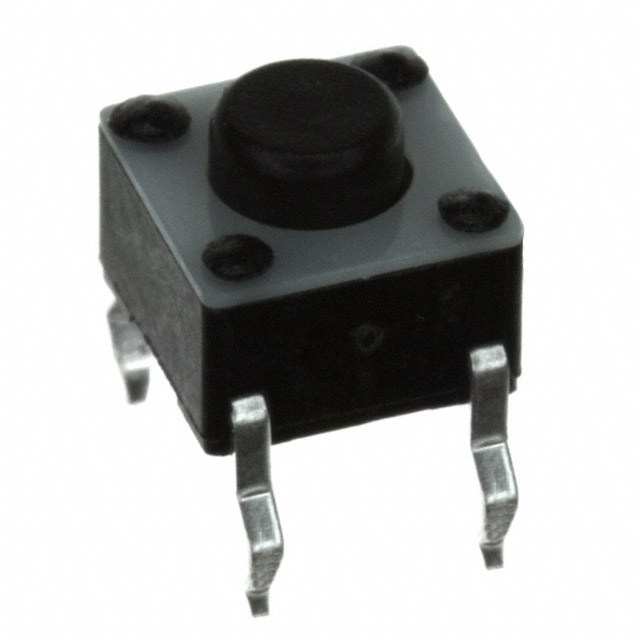
- Tactile Switch
- Breadboard
- Wire
- Smartphone
Scheme-It

Sending Data over the IoT Studio
Atmosphere IoT Studio is an event-based code system, meaning that things happen when something else has happened (unlike typical code written on an Arduino). Therefore, the key to using the Bluetooth element is an event on the IoT device (such as an interval or button press) and an interval on the mobile application side. Since Bluetooth elements do not interact with the internet and only another Bluetooth device, you will need a smartphone with the Atmosphere IoT Studio app and Bluetooth capabilities.
The first step is to create a new project and to select the Adafruit Huzzah 32 device. It does not matter what you call this project, but it would make sense to call it something such as “Bluetooth Example – Sending Data.” Once that’s done, drop in an interval element, a GPIO element, and a Bluetooth BLE GATT Characteristic element.

The next step is to connect these blocks together, such that the interval connects to the GPIO block and the GPIO block connects to the BLE block.

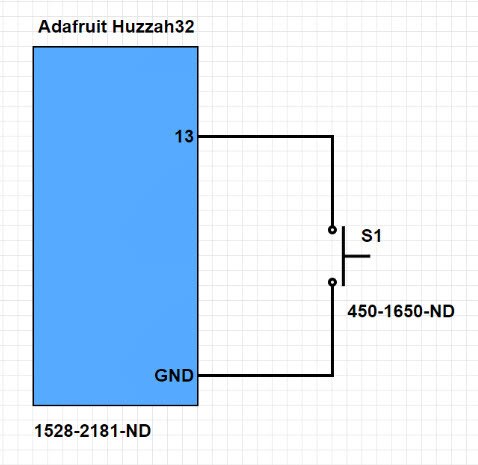
Now that the blocks are connected, you will need to edit the blocks to ensure they are configured correctly. The interval element should be set to 300ms, the GPIO element should be connected to IO13 and be configured as an “Input Pull Up,” while the BLE element needs both read and write options set, as well as the write and read data type set to “Boolean.”

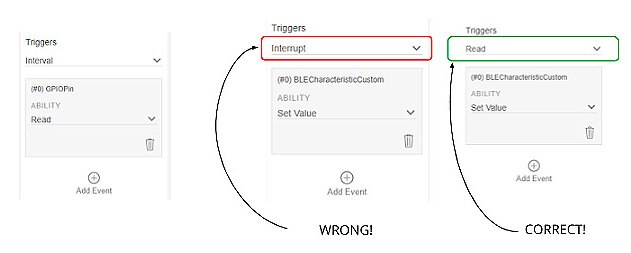
At this point, you might think that you could now move to the app side, but it’s important to remember that you also have to configure the connections. The interval to GPIO connector should be triggered on an interval and the GPIO pin should be set to read. The connector between the GPIO pin and the BLE element should have its triggers changed to read (by default, it’s interrupt). When you change the triggers to read and there are no events, just click the add event button. From here, you can change the drop-down box to read.

Creating an App with a Bluetooth Element
Now that our device program has been completed, it’s time to create our app. Naturally, you might think that the Bluetooth element can be connected to other elements and have an “on data receive” trigger. However, this is not possible, and reading data from a Bluetooth element from the app side also requires an interval, triggering a BLE element to read the data that has been sent. The image below shows the button that you need to press to get to the app designer.

When you switch to the app designer, you will notice that there is already a Bluetooth element, which directly corresponds to the Bluetooth element on the device. In this designer window, you need to add an interval element, as well as a label. Then, connect the blocks together (as shown in the image below).

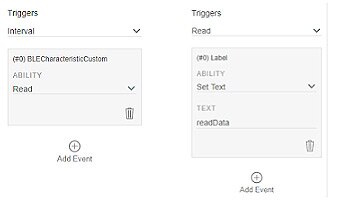
The connection between the interval and the BLE elements needs to trigger a read on an interval, while the connection between the BLE and label elements needs to be set to “Set Text” and the value of the text should be set to “readData.” For those who are curious, some boxes in Atmosphere IoT Studio use JavaScript, and this readData refers to a variable in JavaScript!

Save the project, compile it, program your device, and then provision the device from your smartphone using the Atmosphere IoT Studio app. When you push the button connected to IO13, you will find that the value on the app changes from true to false. You’re now sending data over Bluetooth!


Have questions or comments? Continue the conversation on TechForum, DigiKey's online community and technical resource.
Visit TechForum


 中国
中国