How to Get Started with Arduino
2018-03-13 | By Maker.io Staff
So, you decided to go and buy yourself an Arduino, but once it arrived, you realized you have no idea what to do with it. Do not panic, for help is at hand! In this how-to, we will look at how to get started with Arduino microcontroller boards. We’ll cover software installation, as well as connecting and configuring the Arduino IDE.
You Will Need
- Arduino Uno
- USB B Cable
- Windows 10, Windows 8, Windows 7, Mac, or Linux OS
- Arduino IDE
- About 15 minutes
Step 1: Download and Install the IDE
You can download the IDE from the official Arduino website. Since the Arduino uses a USB to serial converter (which allow it to communicate with the host computer), the Arduino board is compatible with most computers that have a USB port. Of course, you will need the IDE first. Luckily, the Arduino designers have released multiple versions of the IDE for different operating systems, including Windows, Mac, and Linux. In this tutorial, we will use Window 10, so ensure that you download the correct version of the IDE if you do not have Windows 10.
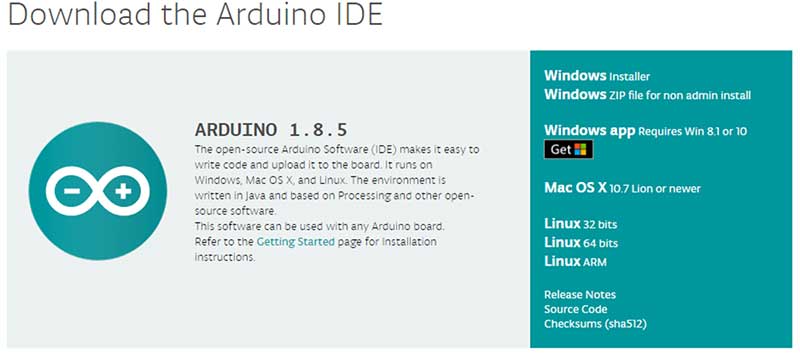
Once downloaded, install the IDE and ensure that you enable most (if not all) of the options, INCLUDING the drivers.
Step 2: Get the Arduino COM Port Number
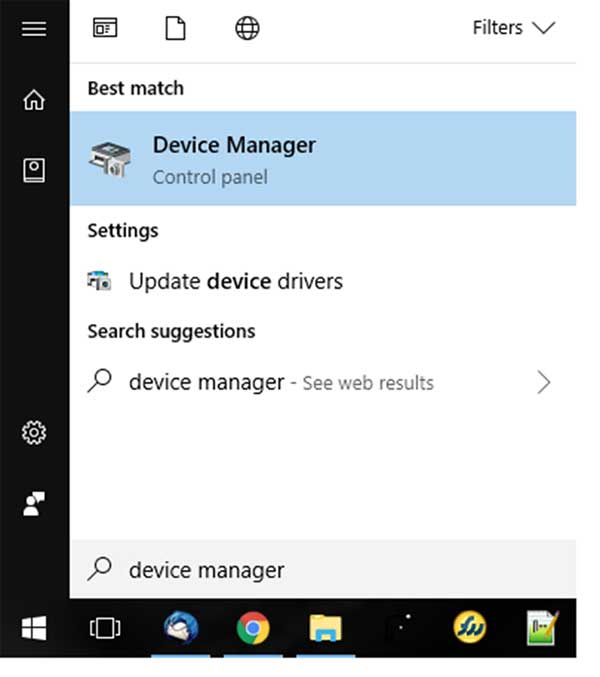
Next, you’ll need to connect the Arduino Uno board to the computer. This is done via a USB B connection. Thanks to the wonderful world of USB, we do not need to provide power to the Arduino, as the USB provides 5V up to 2A. When the Arduino is connected, the operating system should recognize the board as a generic COM port (for example, my Arduino Uno uses a CH340G, which is an RS-232 serial to USB converter). Once it’s recognized, we will need to find out what port number it has been assigned. The easiest way to do this is to type “device manager” into Windows Search and select Device Manager when it shows.
Finding the device manager option in Windows 10
In the Device Manager window, look for a device under “Ports (COM & LPT)”, and chances are the Arduino will be the only device on the list. In my Device Manager, the Arduino shows up as COM7 (I know this because CH340 is in the device name).
The Arduino in my case is a CH340, and it shows on COM7 (port 7).

Be warned, the Arduino won’t always be recognized automatically. If your Arduino is not recognized. then uninstall the driver, remove the Arduino, reinsert the Arduino, find the unrecognized device, right click “Update driver”, and then click “Search automatically”. This should fix 99 out of 100 problems.
If the Arduino is not recognized, update the driver.

In the window that appears, click “Search automatically”.

Windows can be a real pain sometimes with COM ports, as it can magically change their numbers between connections. In other words, one day, your Arduino may be on port 7 (as shown here), but then on other days, Windows may shift it to a different port number. As I understand it, this happens when you connect other COM ports to your system (which I do frequently).
So, if you can’t find your Arduino on the port that you usually use, just go to your Device Manager and check what port it’s actually on and, if necessary, update your driver.
Step 3: Configure the IDE
Now that we have determined the COM port that the Arduino is on, it’s time to load the Arduino IDE and configure it to use the same device and port. Start by loading the IDE. Once it’s loaded, navigate to Tools > Board > Arduino Uno. However, if you are using a different board (i.e., not the Arduino Uno), you must select the proper board!
Tell the IDE which board you are using.
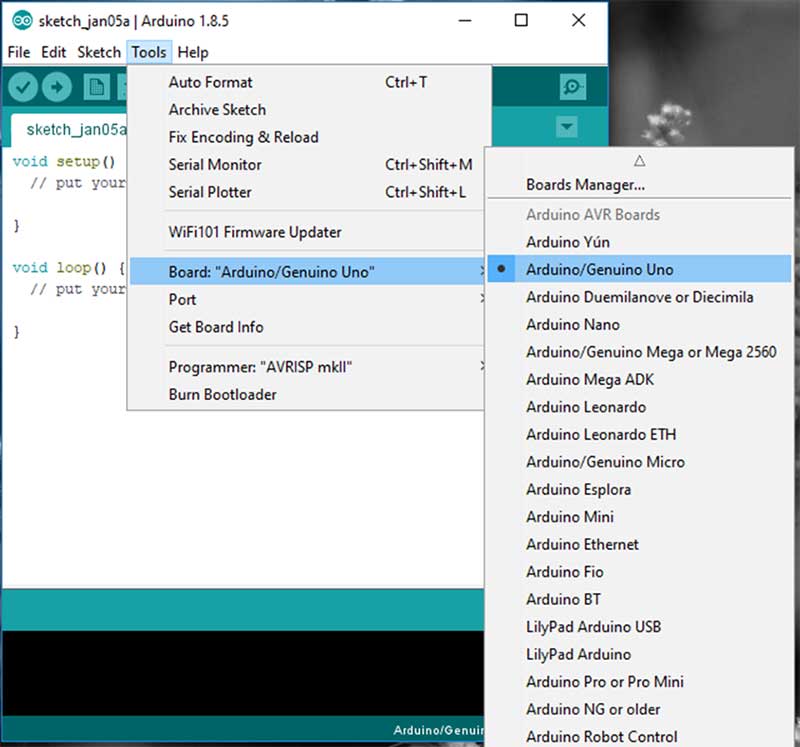
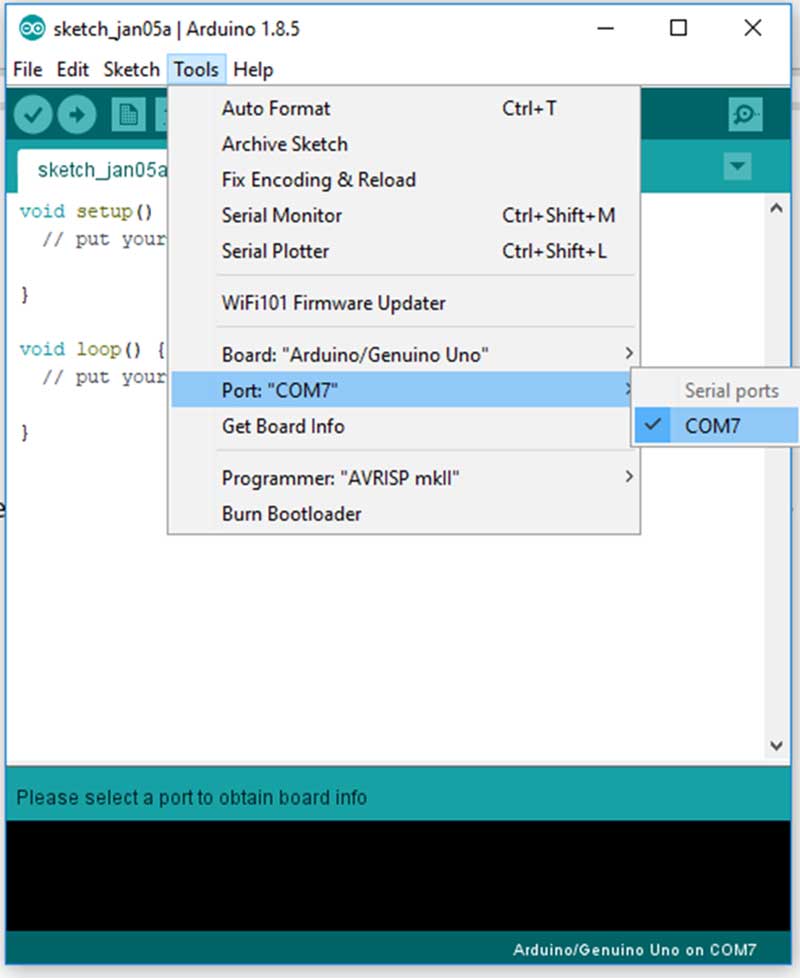
Next, you must tell the IDE which COM port the Arduino is on. To do this, navigate to Tools > Port > COM7. Obviously, if your Arduino is on a different port, select that port instead.
Step 4: Loading a Basic Example
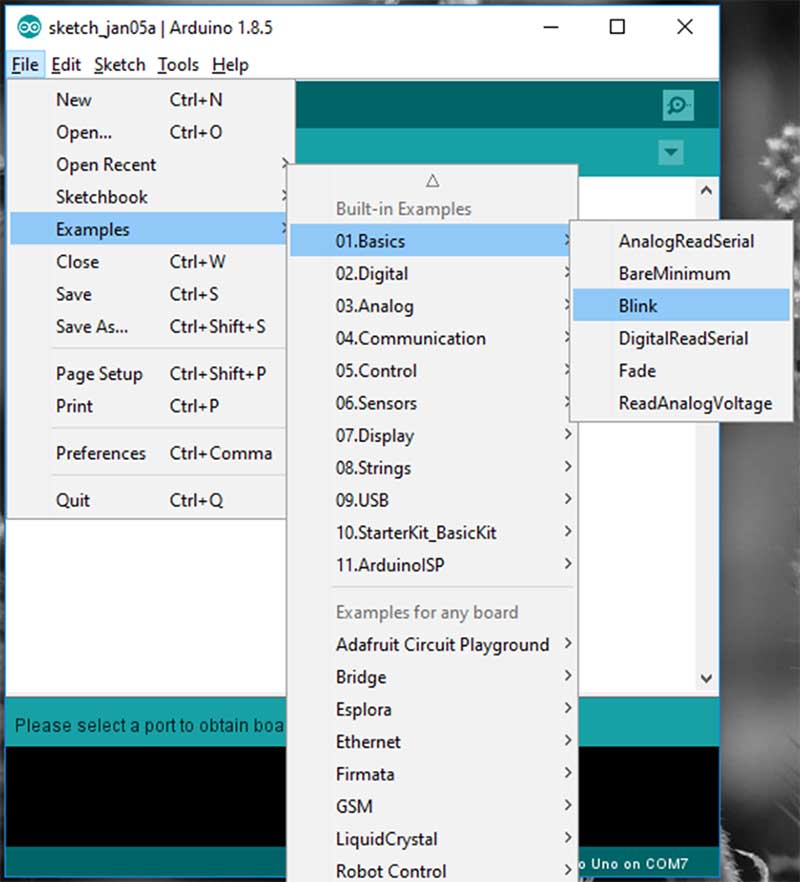
For the sake of simplicity, we will load an example project that the Arduino IDE comes with. This example will make the onboard LED blink for a second continuously. To load this example, click File > Examples > 01.Basics > Blink.
Load the blink example.
With the example loaded, it’s time to verify and upload the code. The verify stage checks the code for errors, then compiles the ready-for-uploading code to the Arduino. The upload stage actually takes the binary data, which was created from the code, and uploads it to the Arduino via the serial port.
To verify and compile the code, press the check mark button in the upper left window.
The “Verify” button will compile the Arduino code.

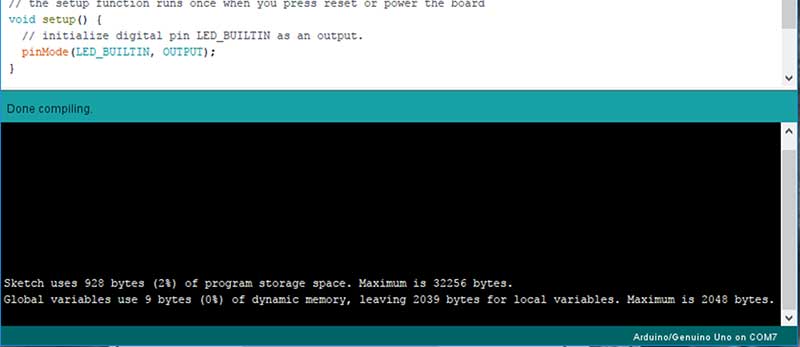
If the compilation stage was successful, you should see the following message in the output window at the bottom of the IDE. You might also see a similar message—just it’s one that does not have words like “ERROR” and “WARNING”.
This is a successful compilation.
With the code compiled, you must now upload it the Arduino Uno. To do this, click the arrow next to the check mark.
The “Upload” button will program the Arduino with your code.

Conclusion
The Arduino is a powerful prototyping tool for many reasons, including its lack of a dedicated programmer, its wide range of available libraries, and the simplicity of its IDE. While we only got a light to blink in this project, you can expect much more in the future. Try your hand at interfacing with displays, taking measurements, talking over the internet, and possibly even working with AI!


