ESP8266 MicroPython Tutorial and Setup
2016-08-10 | By Maker.io Staff
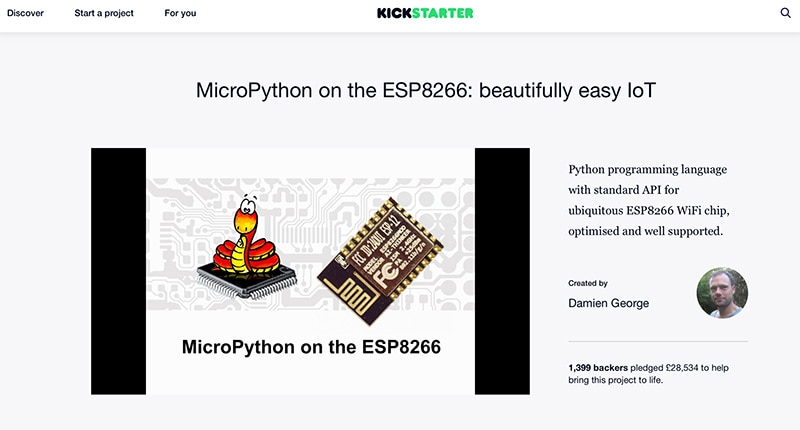
MicroPython is an implementation of the Python 3 programming language that also include a small subset of the Python standard libraries. Micro Python has been specifically designed for use with microcontrollers such as the ESP8266 and other small development boards. MicroPython project was originally funded through crowd sourcing platform Kickstarter in January 2016 and raised just over £28,000 with 1400 backers.

Before we get started it's important to know that whilst most of the features are working for the MicroPython library it is still experimental so some API features are subject to change without notification. You can find all the latest information on the MicroPython GitHub page for the ESP8266. Below is a full list of current features:
- REPL (Python prompt) over UART0.
- Garbage collector, exceptions.
- Unicode support.
- Built-in modules: gc, array, collections, io, struct, sys, esp, network, many more.
- Arbitrary-precision long integers and 30-bit precision floats.
- WiFi support.
- Sockets using modlwip.
- GPIO and bit-banging I2C, SPI support.
- Wire and WS2812 (aka Neopixel) protocols support.
- Internal filesystem using the flash.
- WebREPL over WiFi from a browser (clients at https://github.com/micropython/webrepl)
- Modules for HTTP, MQTT, many other formats and protocols via https://github.com/micropython/micropython-lib
Hardware Requirements
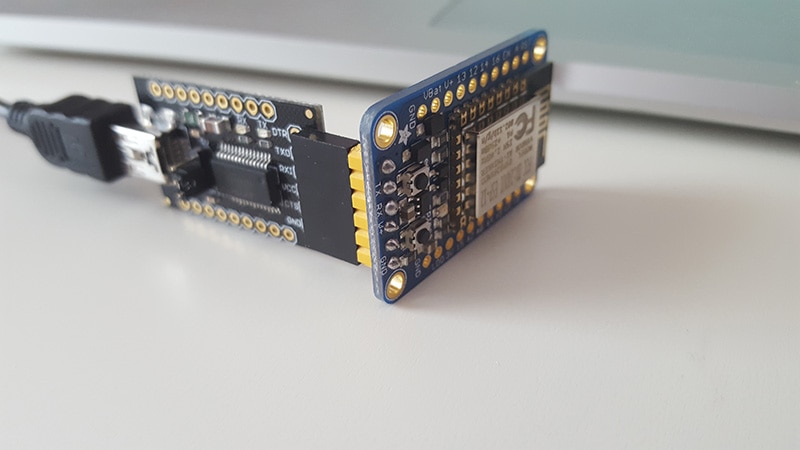
In this example I will be using Adafruit’s Huzzah ESP8266 breakout board. This board simplifies a lot of the processes and makes things a lot easier with the additional buttons and breakout pins.
- Adafruit Huzzah Breakout board
- DFRobot FTDI breakout board 3/5V
- Mini USB cable for connecting to your computer
The DFRobot FTDI breakout board is a very useful board as it has a jumper for selected between 3V and 5V serial power. As we know the ESP8266 modules run on 3V even though there may be a 3V voltage regulator on some boards, however this FTDI breakout will allow you to switch between regardless of what ESP module you have.

Software Dependencies
Before we get started there are a few perquisites we need to download and install. For this example, I will be using a python tool call “esptool” which is a command line based flash program. This tool is particular good for use with MAC OS and Linux platforms. Before you download the esptool python tool script you must first make sure you have the following software installed:
- PIP – PIP is a python package manager and will be required to install the python serial library.
- Python 2.7 - You'll need the latest 2.7 version of Python to use the script. To find which version of python you have installed simply type the following into the terminal “python –version”.
- PySerial Library - On Windows grab the pyserial-2.7.win32.exe installer and run it to install the library. For Mac OSX & Linux, install pip and then run 'sudo pip install pyserial' (without quotes) to install the library.
- Git - Again you'll need git installed to download the code for the esptool script.
Installing esptool
If you are going to flash the firmware and compile it using the ESP SDK then you can skip this section as the esptool is install with the ESP SDK.
To install the esptool script you will need to clone the source for it, which is on GitHub. Open up a terminal window and navigate to a directory you would like to keep the source files such as the Desktop. Now run the following command to download the source files and then change to that download directory:
git clone https://github.com/themadinventor/esptool.git
cd esptool
Now you can run the script with the –h parameter to see the usage of the script. Run the following command:
python esptool.py –h
You should see an output in the terminal with a full list of command and parameter you can use with the esptool script. Now that’s everything you need to do to install and run the script.
Compile and Flash MicroPython Firmware
Install Homebrew
The first thing you will need to install is a package manager called “Homebrew”. To install Homebrew open up the terminal window and copy and paste the following command:
/usr/bin/ruby -e "$(curl -fsSL https://raw.githubusercontent.com/Homebrew/install/master/install)"
Install Git
Now that we have brew package manager install you can go ahead and install git if it is not installed already by typing the following command in the terminal window:
brew install git
This will then begin to install git, which is where we will download all our code from to compile the firmware such as the ESP SDK and the MicroPython files.
Installing the ESP SDK
If you do not wish to install and compile the MicroPython firmware then you can download an already built firmware file from www.micropython.org/downloads .

To build the MicroPython firmware for the ESP8266 you will first need to build the ESP SDK toolchain that can actually do the compilation on your computer.
You will also need to install the following dependencies if not already installed:
brew tap homebrew/dupes
brew install binutils coreutils automake wget gawk libtool gperf gnu-sed --with-default-names grep
export PATH="/usr/local/opt/gnu-sed/libexec/gnubin:$PATH"
In addition to the development tools MacOS needs a case-sensitive filesystem. You might need to create a virtual disk and build esp-open-sdk on it:
sudo hdiutil create ~/Documents/case-sensitive.dmg -volname "case-sensitive" -size 10g -fs "Case-sensitive HFS+"
sudo hdiutil mount ~/Documents/case-sensitive.dmg
Navigate to where you downloaded the ESP SDK by typing the following in the terminal:
cd /Volumes/case-sensitive
In Mac OS or Linux you need to open up a terminal window to issue a git command, make sure you are in the directory where you want to download the files. Run the following command to clone the repository:
cd /Desktop/
git clone https://github.com/pfalcon/esp-open-sdk.git
This will now download and install the ESP open SDK repository to your desktop on your computer.
To build the tool-chain and SDK type the following:
cd esp-open-sdk
make
In order for us to use the tool-chain, you must also create a path so the MicroPython compiler can find it:
export PATH=/Volumes/case-sensitive/esp-open-sdk/xtensa-lx106-elf/bin:$PATH
Install MicroPython
To install MicroPython you must first compile the firmware to flash on to your ESP device. Make sure you are in a directory where you want to download the files to and download the following git repository:
git clone https://github.com/micropython/micropython.git
Add the external dependencies to the MicroPython repository checkout:
git submodule update --init
The MicroPython cross-compiler must be built to pre-compile some of the built-in scripts to bytecode. This can be done by using:
make –C mpy-cross
Then, to build MicroPython for the ESP8266, just run:
cd esp8266
make axtls
make
This will produce binary images in the build/ subdirectory.
Flashing the Firmware
If you install MicroPython to your module for the first time, or after installing any other firmware, you should erase flash completely:
esptool.py --port =/dev/cu.usbserial-AI032CSO erase_flash
Erase flash also as a troubleshooting measure, if a module doesn't behave as expected.
To flash MicroPython image to your ESP8266 you will also need to create a path to the esptool, which was included in the ESP SDK we install previously:
export PATH=/Volumes/case-sensitive/esp-open-sdk/esptool:$PATH
Now run the following to flash the MicroPython firmware to the ESP8266 module, making sure that it is in Bootloader mode:
make PORT=/dev/cu.usbserial-AI032CSO deploy
Connecting to the ESP8266 module
Now everything has been setup on the ESP8266 board you can now go ahead and connect to it using either Putty(Windows) or CoolTerm(MAC OS). As I have set everything up on the MAC I will be using CoolTerm to connect to the board. Connect to the board with the following settings in the below figure.

Once connected you can either reset your board manually using the reset button or you can press CTRL+D to do a soft reset. You should now be greeted with the following on the screen:
Programming in MicroPython
Now this is where the fun begins after the initial installation. From here we can program the ESP8266 module in REPL to do a number of things such as connect to a wireless router, configure in AP mode, control the GPIO pins including I2C and SPI support, you can even program the board through the web browser although I couldn’t get this to work at the time as the port number was blocked. When you first initially boot the ESP board it should be in AP mode. You can scan for wireless networks on your computer and you should see an AP SSID such as “ESP_0077E2”. You can connect to this access point and you should receive an IP address through DHCP. If you type the following in the python command line “help()”, you should receive a list of helpful commands you can use:
Basic WiFi configuration:

import network
sta_if = network.WLAN(network.STA_IF); sta_if.active(True)
sta_if.scan()                             # Scan for available access points
sta_if.connect("<AP_name>", "<password>") # Connect to an AP
sta_if.isconnected()                      # Check for successful connection
# Change name/password of ESP8266's AP:
ap_if = network.WLAN(network.AP_IF)
ap_if.config(essid="<AP_NAME>", authmode=network.AUTH_WPA_WPA2_PSK, password="<password>")

Control commands:
  CTRL-A        -- on a blank line, enter raw REPL mode
  CTRL-B        -- on a blank line, enter normal REPL mode
  CTRL-C        -- interrupt a running program
  CTRL-D        -- on a blank line, do a soft reset of the board
  CTRL-E        -- on a blank line, enter paste mode

For further help on a specific object, type help(obj)
>>>
The first thing we can do is turn the on-board LED on and off, which is a simple test to make sure everything is working as it should do. Most ESP module have a built-in LED on GPIO2, which is also the WiFI activity LED. Try Entering the following to flash the Led on and off:
>>> import machine
>>> pin = machine.Pin(14, machine.Pin.OUT)  # Set pin 14 as an output.
>>> for i in range(10):
...    pin.value(0)     # Set pin low (or use pin.low())
...    pyb.delay(1000)  # Delay for 1000ms (1 second)
...    pin.value(1)     # Set pin high (or use pin.high())
...    pyb.delay(1000)
Summary
MicroPython is a great alternative to the Lua based programming language, which is more commonly found on ESP boards. It is with great thanks to the backers on KickStarter that we have the MicroPython programming language available for small development boards such as the ESP or ST Nucleo boards.
Have questions or comments? Continue the conversation on TechForum, DigiKey's online community and technical resource.


