制造商零件编号 110060482
MICROSOFT IOT GROVE KIT
Seeed Technology Co., Ltd
Early this year at the Microsoft Build conference, Dan Rosenstein, lead principle program manager talked about the Windows 10 IoT Core platform going from Maker to Market. He announced that Microsoft wanted to make every IoT compatible device easier to use for developers. At that time Microsoft had been partnering with SeeedStudio to develop an IoT kit based around their Grove Eco-system, allowing developers to use a plug-n-play system.
The IoT kit has specifically been designed for use with the Raspberry Pi running the latest version of Windows 10 IoT Core. The kit comes with a GrovePi+ cape, which allows users to connect a number of Grove modules to the Raspberry Pi, 15 Grove modules to get started with programming hardware and also a 5” HDMI touch display for an application user interface.

Figure 1: Microsoft Grove Starter Kit for IoT Kit Contents
The Grove Starter Kit includes the following:
In the following steps, I’m going to show you how to connect your Raspberry Pi to the GrovePi+ and download all the software required, including Visual Studio and Windows 10 IoT Core for the Raspberry Pi. There are also a number of examples provided that you can run to test everything works. You can also elaborate on these examples to create your very own projects using the Grove modules.
Getting Connected
First you must mount your GrovePi+ board to the Raspberry Pi using the GPIO headers. The GrovePi+ pin compatible with all versions of the Raspberry Pi and as such only has 26 GPIO pins as opposed to the 40 pin featured on later versions of the Pi.
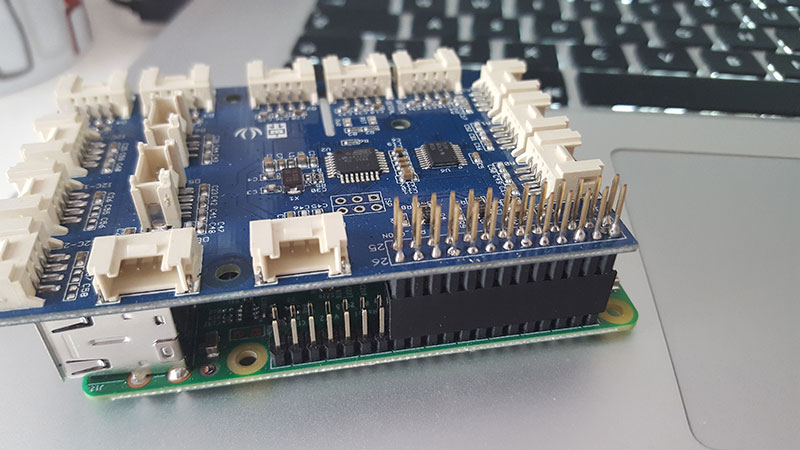
Figure 2: Attaching the GrovePi+ board to the Raspberry Pi
Figure 2 shows how the pins should be aligned when stacking the board on top. At this point you can also connect the 5” Touchscreen HDMI display to the Raspberry Pi using the provided HDMI cable that is supplied. Connect the cable from the Touchscreen to the Raspberry Pi’s HDMI port. Also you will need to connect the provided micro USB cable from the display to one of the Raspberry Pi’s USB ports. The micro USB cable is used to power the HDMI display and also provide a data connection for use with the touchscreen function.
Installing Windows 10 IoT Core
To install Windows 10 IoT Core you will need a micro SD card with at least 4GB of free data and a Windows 10 Desktop/Laptop computer. On your Windows computer head towards the Microsoft developers page where you can download the Windows 10 IoT Core Dashboard, which installs the latest Windows 10 IoT Core software for your Raspberry Pi, you can also use it to manage your devices if there are more than one.
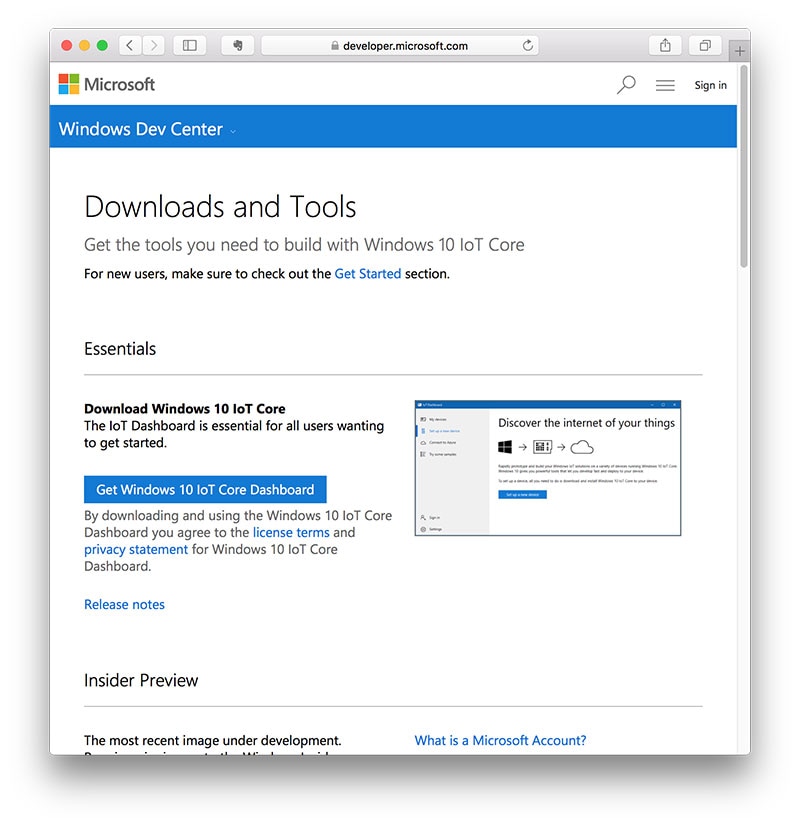
Figure 3: Windows 10 IoT Core Download Tools Webpage
Note: If you are using the latest Raspberry Pi 3 board then you will need to download the Windows 10 IoT Core Insider Preview version, which is under active development. This latest version also supports the built-in wireless capabilities of the Pi 3.
Note: You will require a Microsoft Account to access the Insider Preview Program
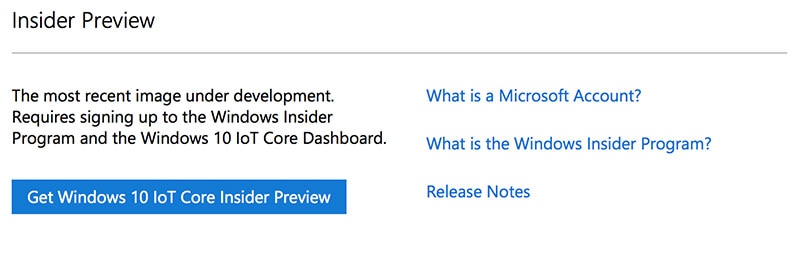
Figure 4: Click on “Get Windows 10 IoT Core Insider Preview”
Click on “Get Windows 10 IoT Core Insider Preview” and login to your Microsoft account. On the next page you can select the latest edition of Windows 10 IoT Core, which as of time of writing this blog is ‘Build 14931’. Click ‘Confirm’ and then select your device, which is the Raspberry Pi. You will then be presented with a ‘Download Now’ button to download the Windows 10 IoT Core Dashboard, as shown in Figure 5.
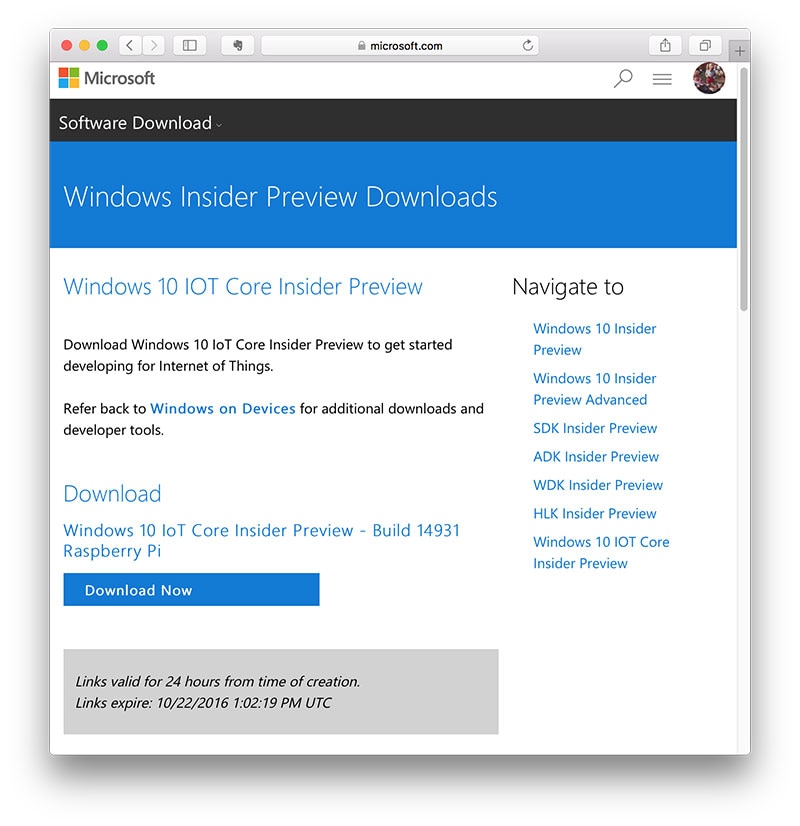
Figure 5: Download the Latest Build
Once installed open up the Windows 10 IoT Core Dashboard and in the menu select ‘Set up a New Device’. Here you will configure the options in the dropdown boxes to install the latest revision of the Windows 10 IoT Core for the Raspberry Pi. Take a look at the next figure for the settings. In the ‘Device Type’ you will need to select ‘Custom’ rather than the ‘Raspberry Pi 2/3’, this is because you will need to install the latest version from part of the Insider Program, which is actively being developed on. You should find that ‘Build 14931’ sits in C:/ProgramFiles(x86)/Microsoft IoT/FFU/Flash.ffu.

Figure 6: Set up a New Device
Once all the settings have correctly been filled out, accept the software agreements by ticking the box and then click ‘Install’. The IoT Dashboard will now start to begin to flash the Windows 10 IoT Core on your micro SD card.

Figure 7: Flashing the image to the micro SD card
Once completed you should see the screen in Figure 8.
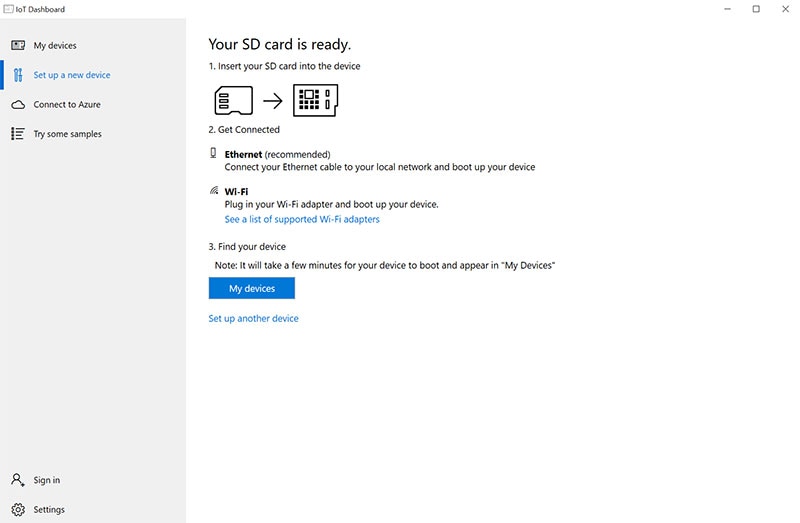
Figure 8: Flashing Windows 10 IoT Core Complete
Powering up your Raspberry Pi
Now that you have a copy of the latest Windows 10 IoT Core you can go ahead and insert it into the Raspberry Pi. To power the GrovePi+ and the Raspberry Pi, you can use the micro USB port on the Raspberry Pi. To power both boards it is recommended to use a 5V 2A USB power adapter. Go ahead and power up your Raspberry Pi.

Figure 9: Power up your Raspberry Pi
Connecting to the Internet
There are two ways in which you can connect your Raspberry Pi to the internet or local network in order to access it remotely. The first and simplest way is to connect an Ethernet cable from your router to the Ethernet port on your Raspberry Pi computer. Once connected you should see in the Touchscreen that your device has been assigned a local IP address.
Secondly, you can configure your device to connect to your wireless network, if you are using the Raspberry Pi 3 then this will be the on-board wireless, alternatively you can connect a USB wireless dongle to the Pi and use it that way. Using the touchscreen press the settings icon which is located in the top right hand screen.
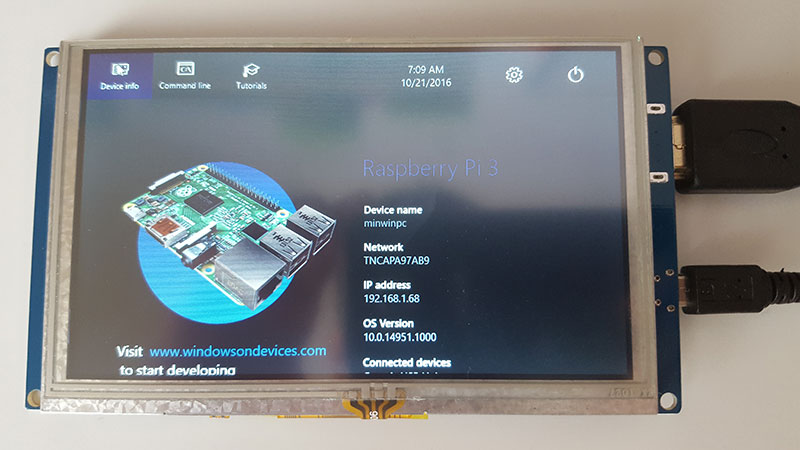
Figure 10: Click the Settings Icon in the Display
In the settings you can select ‘Network & Wi-Fi’ and scan for local wireless networks. When you have found your network ID, simply click the wireless network and enter the passcode.
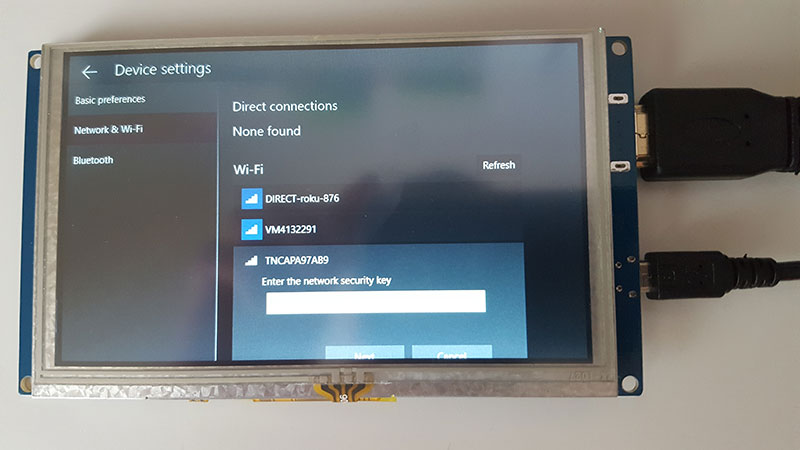
Figure 11: Configure your wireless settings
Once connected, if you go back to the Windows 10 IoT Dashboard on your computer and select ‘Devices’ you should now see you Raspberry Pi listed as a Windows 10 IoT Device.
Installing and Configuring Visual Studio
To be able to program Windows 10 IoT UWP (Universal Windows Platform) applications for the Raspberry Pi you will need to download and install Visual Studio 2015. Visual Studio is a very versatile IDE that allows developers to program a number of applications in almost any programming language for a range of specific or generic devices. Go ahead, download and install Visual Studio from their website. The Download file may be quite large so depending on your internet connection it may take a while to download.
Once installed, before you open Visual Studio you will be required to put your Windows Operating System into ‘Developer Mode’ which can be done in the control panel.
SeeedStudio have also provided a number of examples for use with all the hardware that is available in the IoT Kit. You can use these examples to test that the hardware works correctly and also to test that everything has been setup and installed correctly. You can download the examples from https://github.com/Seeed-Studio/GrovePiExamples_win10 . Once downloaded, extract all the files and place in the Visual Studio Projects, which should be listed in ‘My Documents’.
Open up Visual Studio and open a new project from file. Navigate to where you downloaded the example files and you should see a file labelled ‘GrovePiExamples(win10).sln’. You should see all the example files loaded in the Solutions explorer window.
Before you run any of these examples you need to install the Grove Pi library for Visual Studio. You can do this using the NuGet package manager, which is built-in to Visual Studio. Navigate to Tools > Library Package Manager > Package Manager Console.
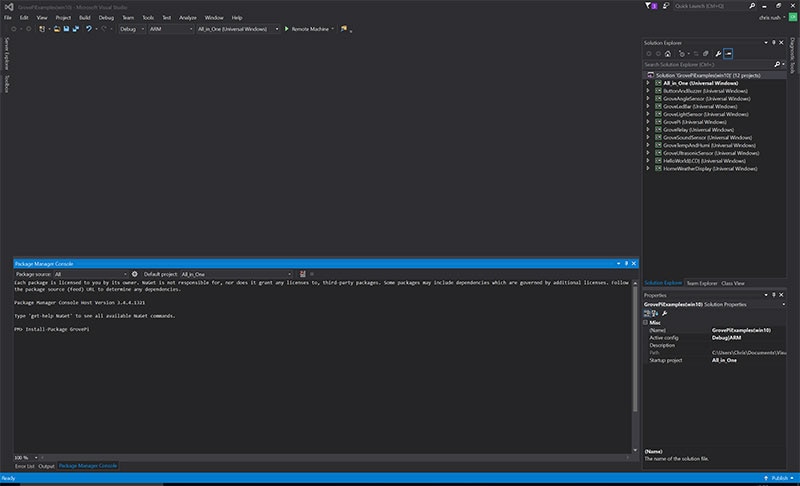
Figure 12: Library Package Manager
You should see a window pop up in the bottom of your screen with a command prompt. In here you can type the following command to install the GrovePi library:
Install-Package GrovePi
The library will begin to install and will be added to the project files in the solution explorer window under resources. There are 11 examples in total:
Before you upload the first example you will need to build the GrovePi project first, this is because other projects depend on this file in order for them to work. Right click in the GrovePi project in the solution explorer and click on Build.
Running your first application
Now that everything has been installed and setup, you can now run one of the examples. The best option would be to run the ‘All in one’ example, where you can connect everything up to the GrovePi+ and the application will interact with all the hardware in the IoT kit. Connect the following Grove modules to the GrovePi+:
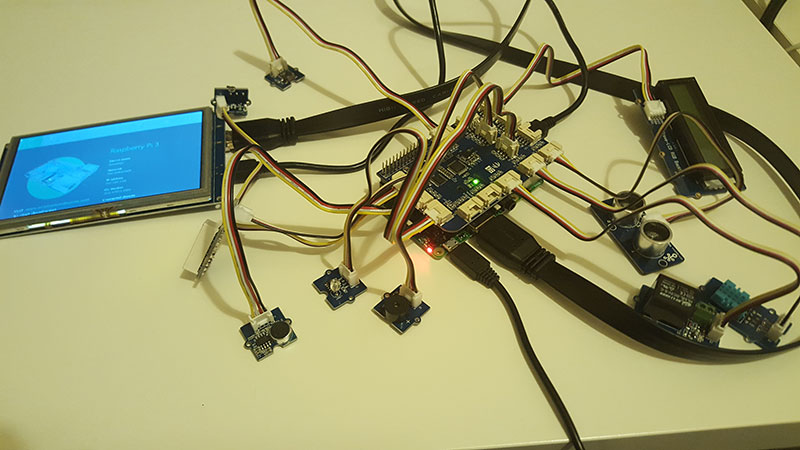
Figure 13: Grove module connected to the GrovePi+
To upload the application, in the tool bar you should see a drop down box next to a green arrow. In the drop down box select the example you want to run on the Raspberry Pi. Then next to the green arrow, click the drop down list and select remote machine. The name and IP address of the Raspberry Pi should appear in here, otherwise you can manually enter the IP address for your Raspberry Pi. Once done so, click the green button to upload to the Raspberry Pi. After a while, you should see on the HDMI screen the statistics of the sensor data that are connected to the GrovePi+.
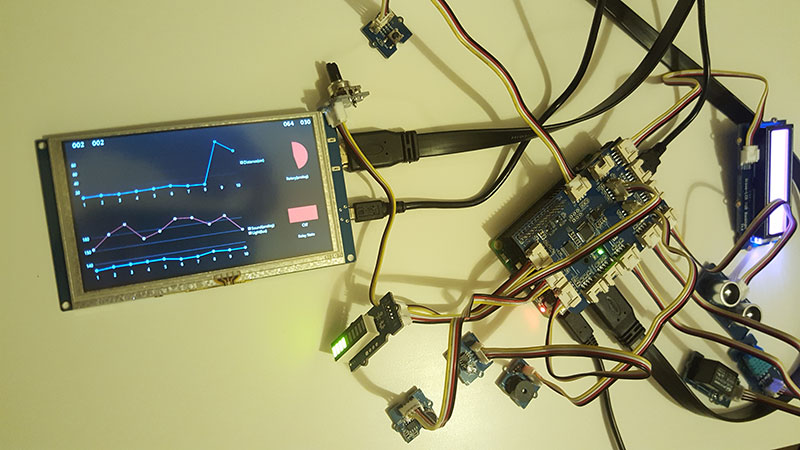
Figure 14: All in one Example for the Raspberry Pi

Figure 15: Display Screenshot
Summary
This IoT Kit by SeeedStudio and in partnership with Microsoft, really is a simple box of tricks to get any users started with programming internet connected hardware. The addition of the touchscreen HDMI display adds another dimension to your projects, giving users the ability to display simple statistical data on the screen and the touch interface allow users to interact with your projects. If you are an advanced programmer lacking in hardware knowledge then this is the kit for you, it highlights the possibility of moving from the initial concept design to manufacturing.