制造商零件编号 A000066
ARDUINO UNO R3 ATMEGA328P BOARD
Arduino
License: General Public License Ultrasonic Arduino
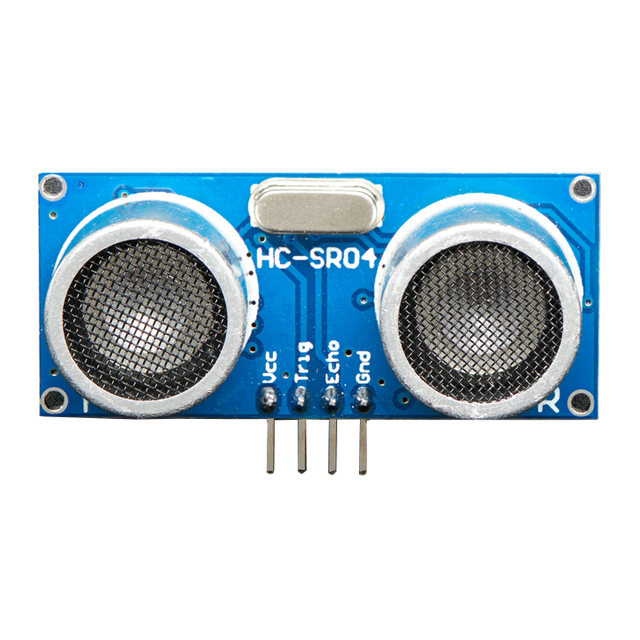
As we know ultrasonic sensors use sound waves to detect objects in their vicinity, making them perfect for applications like distance measurement, obstacle avoidance, and even robotics. If we look at the most popular ultrasonic sensor among the DIY community it is the HC-SR04, which is very easy to use and cheap to acquire. So let's start by looking at how the sensor actually works.
An ultrasonic sensor comprises several essential components that work together to measure distances or detect objects using high-frequency sound waves. At its core is the transducer, typically made of a piezoelectric crystal, which both emits and receives ultrasonic waves. The sensor's operation begins with the ultrasonic transmitter, which sends out bursts of high-frequency sound waves into the environment.
On the back of the Ultrasonic sensor, we have the MAX232 sensor on the right side, which converts the electrical signal received from the trig pin. Converts it into an ultrasonic pulse and sends it through the transmitter side.
These waves bounce off objects in their path and are detected by the ultrasonic receiver. The two LM324 ICs on the left side take this ultrasonic pulse convert it into an electrical signal and send it to the echo pin.
The receiver converts the reflected waves into electrical signals. The time it takes for the sound waves to travel to the object and back is precisely measured by signal processing circuitry within the sensor. This time measurement is then used for calculating distances and determining the presence of objects in proximity to the sensor.
To Interface the Ultrasonic Sensor to the Arduino. You need to connect the sensor's TRIG (trigger) pin to Arduino pin 4. The sensor's ECHO pin to Arduino pin 5. Sensor’s VCC (power) pin to Arduino's 5V output and sensor's GND (ground) pin to Arduino's GND.
Once the connections are made, upload the code to the Arduino and open the serial monitor to see the result.
For more information check out the Ultrasonic sensor interfacing tutorial.
Code
const int trigPin = 4;
const int echoPin = 5;
long duration;
int distance;
void setup() {
  Serial.begin(9600);
  pinMode(trigPin, OUTPUT);
  pinMode(echoPin, INPUT);
  }
  void loop() {
  delayMicroseconds(2);
  digitalWrite(trigPin, HIGH);
  delayMicroseconds(10);
  digitalWrite(trigPin, LOW);
  duration = pulseIn(echoPin, HIGH);
  distance = duration * 0.034 / 2;
  Serial.print("Distance: ");
  Serial.print(distance);
  Serial.println(" cm");
  delay(1000);
  }