Build Your Own Raspberry Pi Weather Station with Initial State
2016-09-26 | By Maker.io Staff
Back in 2014 the Raspberry Pi foundation teamed up with Oracle to build a Weather Station for the Raspberry Pi for schools. Oracle gave the foundation a large grant to go ahead with the project as long as it involved using their software for capturing data and storing it using SQL for analysis, the Pi team was also tasked with creating a whole educational programme to go with it.
After a year or so the Pi team had a final porotype of the hardware, which was able to take the following sensor measurements:
- Rainfall
- Wind speed
- Wind gust speed
- Wind direction
- Ambient temperature
- Soil temperature
- Barometric pressure
- Relative humidity
- Air Quality
- Real Time Clock (for data logging purposes)
Unfortunately, the Raspberry Pi foundation only produced a small batch of 1000 weather station kits for school and as such weather station HAT board was not available commercially. Not to be too disappointed I was determined to create my own variation of a Raspberry Pi weather station with some key changes.
Hardware Overview

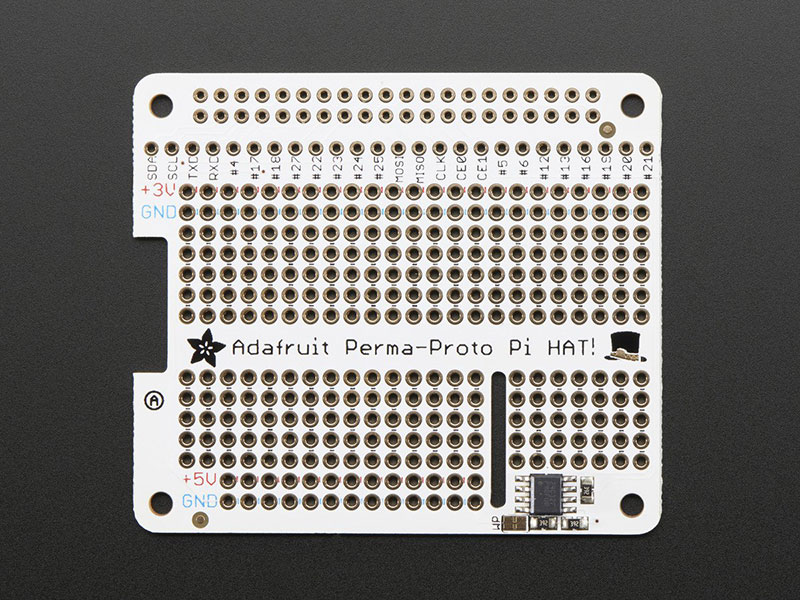
I knew that I was going to use the Raspberry Pi but I wasn’t sure which one to use at the time. There were many factors to consider such as power and size. In the end I decided to use the Raspberry Pi A+ board because of its low energy consumption. Whilst the Pi Zero was even lower I still wanted to be able to design my own HAT board to fit on top and have USB wireless access, the A+ was a perfect fit. For the HAT board, I used one of Adafruit's HAT prototyping boards. This allowed me to add all my circuitry, whilst connecting an ATmega328P to the Raspberry Pi to add ease of I2C communication.
Solar and Power Setup
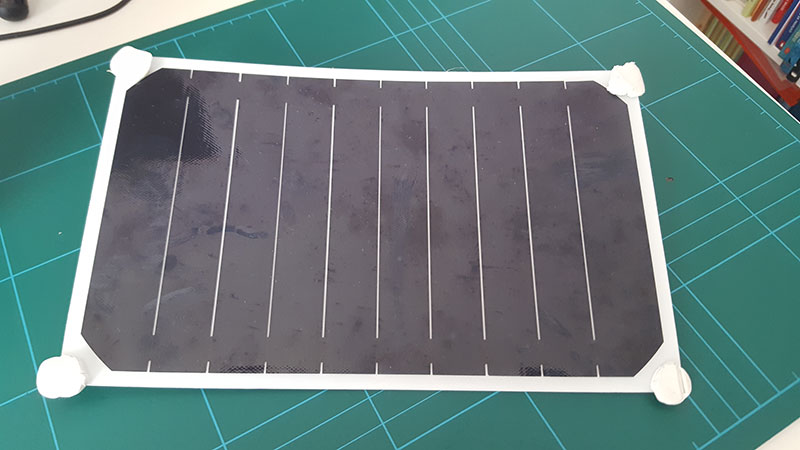
The Raspberry Pi's weather station HAT is powered by "Power over Ethernet", not only does it provide an Ethernet data connection but also power to the HAT board. I really didn't want to go down this route as I dislike cables running everywhere and wanted it to be a fully sustainable, renewable energy wireless project. I used a solar panel, which was rated at 5.5V, 5.4W and up to 1A of peak power which was plenty to not only power my board but to charge a Lithium battery at the same time. The solar cell was monocrystalline, which is a type of silicone used to absorb light. I didn't know much about solar cells but I did know that I needed it to be around 5V and provide at up to 1A of power to my circuit.
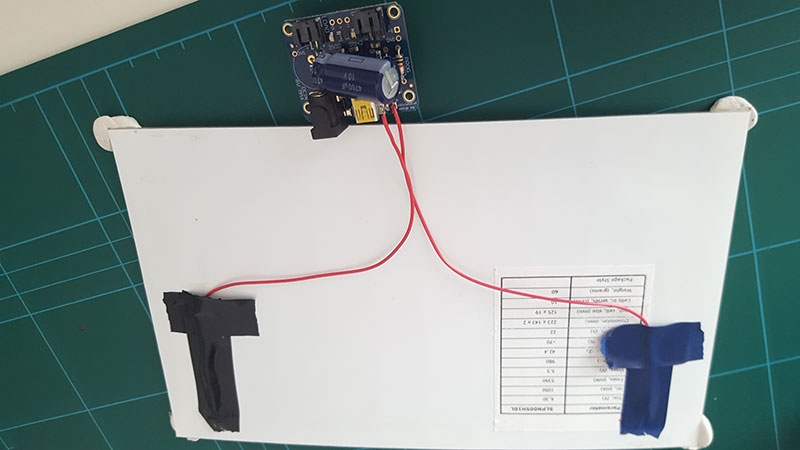
The interesting part of the circuit is how to power the board from a solar cell or lithium battery and also have the ability to charge a battery for use at night and over long winter periods. I looked at many options from SparkFun, Seeed Studio and Adafruit, as well as the idea of designing my own circuitry, however I had limited space on the Perma Proto HAT so there was only one option which was a perfect fit. The Adafruit USB/DC/Solar Lithium/Polymer Charger. This board takes an input voltage between 5 - 6V from a solar panel, it can charge a 3.7 or 4.2V Lithium battery, you can set a max charge rate of 1A with a bit of tinkering and also has a built-in smart load sharing, which automatically uses the input power when available to keep the battery from charging/discharging. I simply soldered some wires from my solar cell directly into the DC IN and soldered a resistor to allow 1A max charging current to the battery.
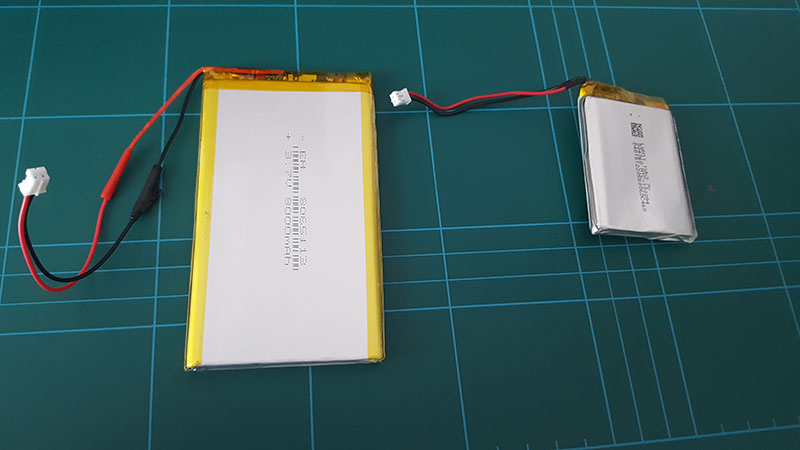
Calculating the battery size was tricky, I wasn't sure initially how long it needed to last and also how quick it would be depleted by the Raspberry Pi. I only had a couple of Lithium batteries lying around, a 2A and 3A. I pulled the 3A one out of my Pocket CHIP and soldered up a JST cable to plugin to the Lithium Solar charger.
After I built the circuit and did some initial testing, the battery did not last long whilst in use overnight, even though I changed some of the code to reduce the use of WiFi. I wasn't able to calculate the power consumption from the Raspberry PI effectively so I purchased a USB Charger Doctor by Adafruit, which is an inline voltage and current. As it turns out the average current consumption was 180mAh (200 Max) and I need the battery to last at least 12 hours for the darker winters here in the UK. Using the DigiKey Battery Life Calculator I estimated that I would need a 4000mAh minimum battery size.

After looking for some local companies to purchase a Lithium battery I ended up purchasing a much larger 8000mAh battery from ebay (Far East), which was a bit over the top but it was only $15 so I couldn't resist. I soldered up a JST connector to the battery with some help from Twitter and Make and it was ready to go.

Last but not least I added a Power Boost 500 board form Adafruit to increase the voltage to the Raspberry Pi when the battery gets very low. This circuit also provides a nice steady voltage supply to the Raspberry Pi for better stability throughout. I soldered a JST connecter to the PCB, however the JST cable is very frail and did break on a number of occasions at the solder joint so I glued it down with a hot glue gun. This allowed the cable to flex without putting pressure on the solder joint.
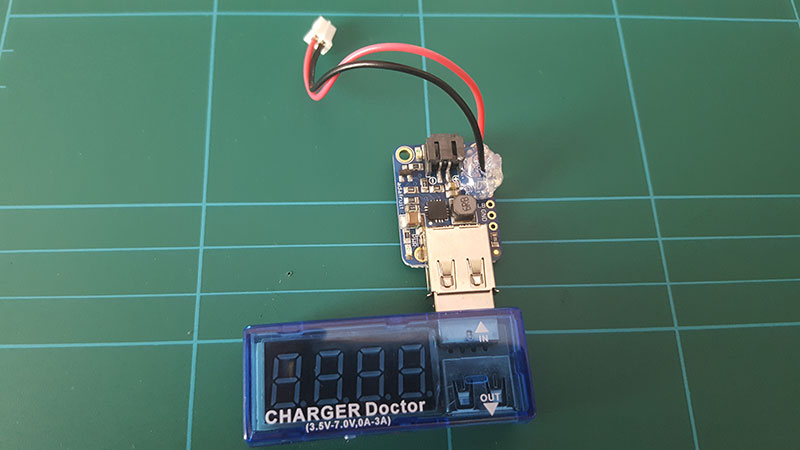
That's sums up the power circuit, which is a very effective way to power your projects using a renewable energy source. There are a couple of issues with this but I will explain these further on.

Note: Later on I found a way to switch off the HDMI output saving around 20 - 30mAh in total with the following command:
sudo /opt/vc/bin/tvservice –o
Sensors
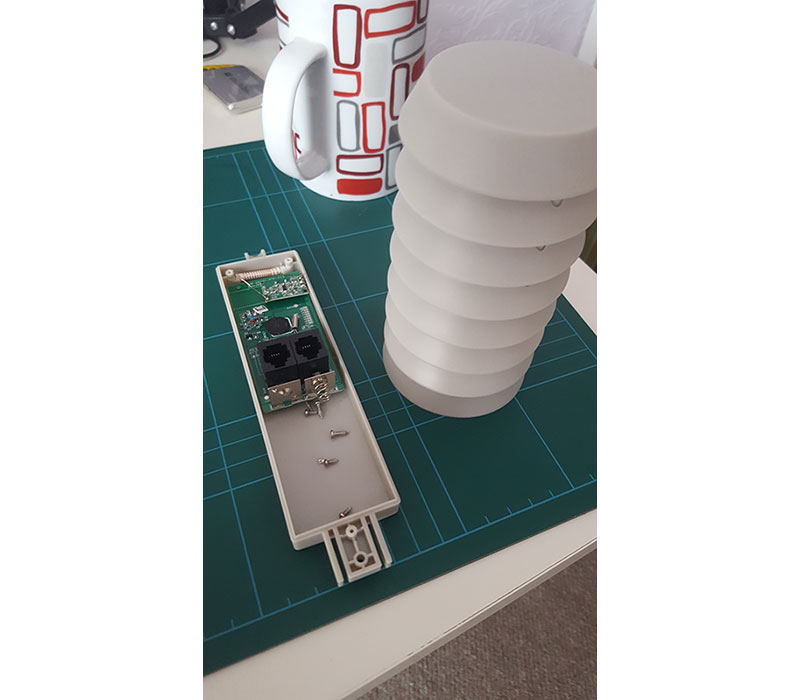
As this was my first attempt at building a weather station I decided to use the basic sensors that most weather stations will use to collect data such as rain, wind, wind direction and temperature. I purchased these sensors from a local Maplin (UK) store for only a few dollars each for testing the weather station. The basics sensors included an Anemometer (Wind Speed), Rain Gauge and Wind Direction sensor. The sensors used a basic circuit, usually consisting of a reed switch and a small magnet with the exception of the Wind Direction sensor which used a series of resistors to change the voltage. You will need to be careful when purchasing your sensors as some sensors are modern as I later found out when I purchased a full kit with mounts and poles. For some reason my Wind Direction sensor was not reading the correct values and I wasn't sure why until I opened it up inside.
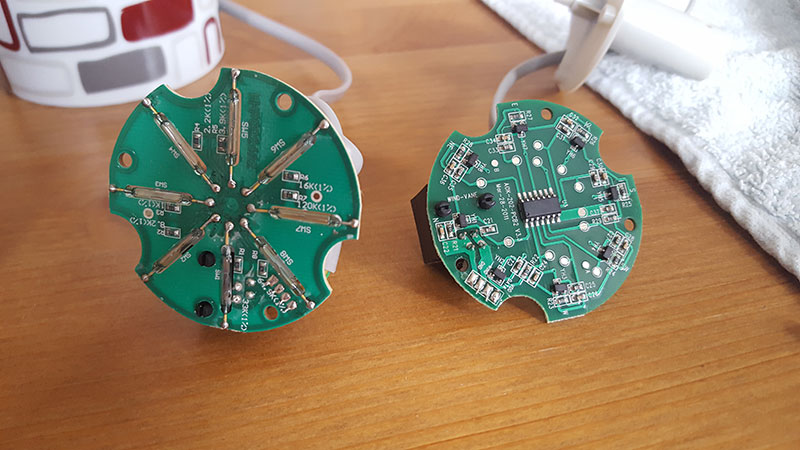
You can see the circuit board on the right uses a modern chip that communicates using serial data. All the sensors use a RJ11 data jack for connecting to the main board. You will see in the next section how I interfaced the sensors to the Raspberry Pi board.
The Rain Gauge sensor used a tipper bucket, which collects a certain amount of rain before it tips. You can see in the below images how it works. When the bucket tips, there is a small magnet which switches the reed switch and makes the circuit back to the Raspberry Pi. This allows the Pi circuit to detect when it's raining and how much rain has fallen. The tipper bucket collects 0.11 inches of rain before it tips.
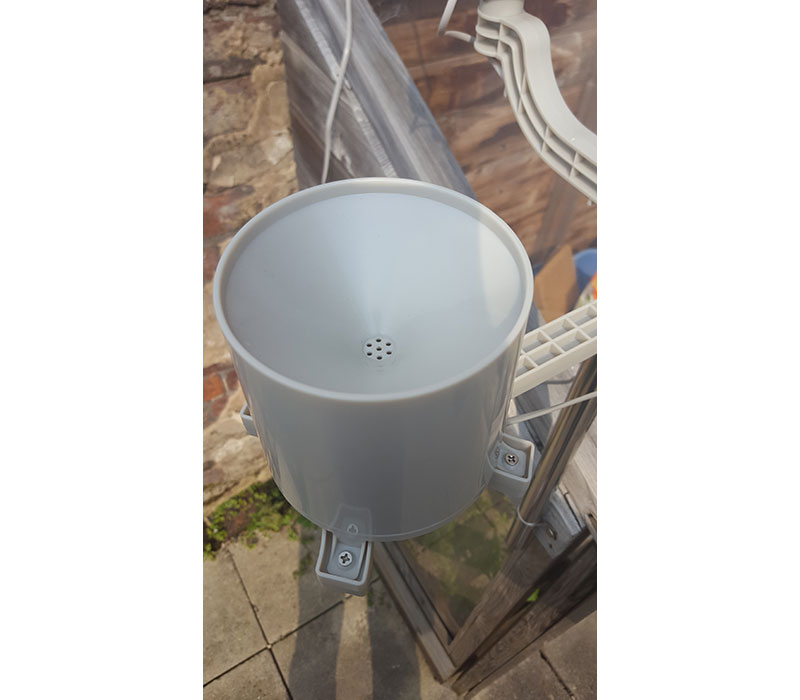

There are pros and cons with using a sensor like this. If there is only a light drizzle rain, then it will take a long time for the bucket to fill up. There is a possibility that the weather station may not register that it is raining.
Circuit Design
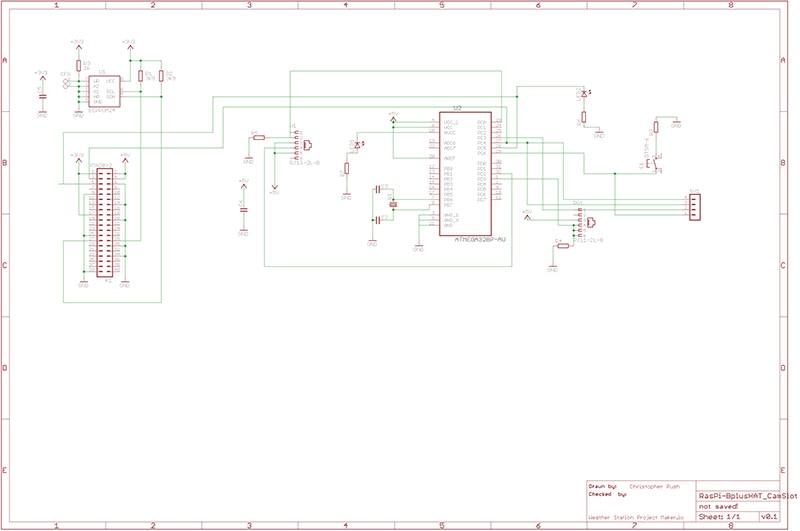
The HAT board I designed was based around a ATmega328P chip because of its analog features which the Raspberry Pi does not have. This also allowed all the processing of the sensor data to be done on the Arduino firmware, which is much easier to work with. The ATmega328P chip was then connected to the Raspberry Pi using I2C to send the data. I built the circuit using a previous tutorial I created on how to build an Arduino on a breadboard using only the through-hole mount components.

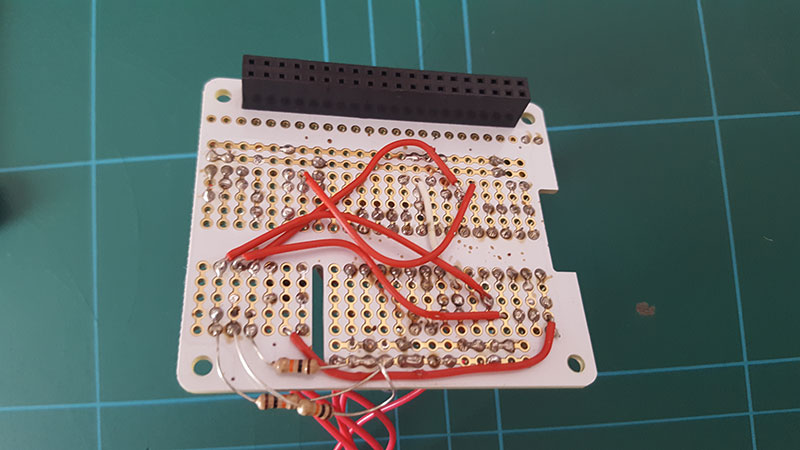
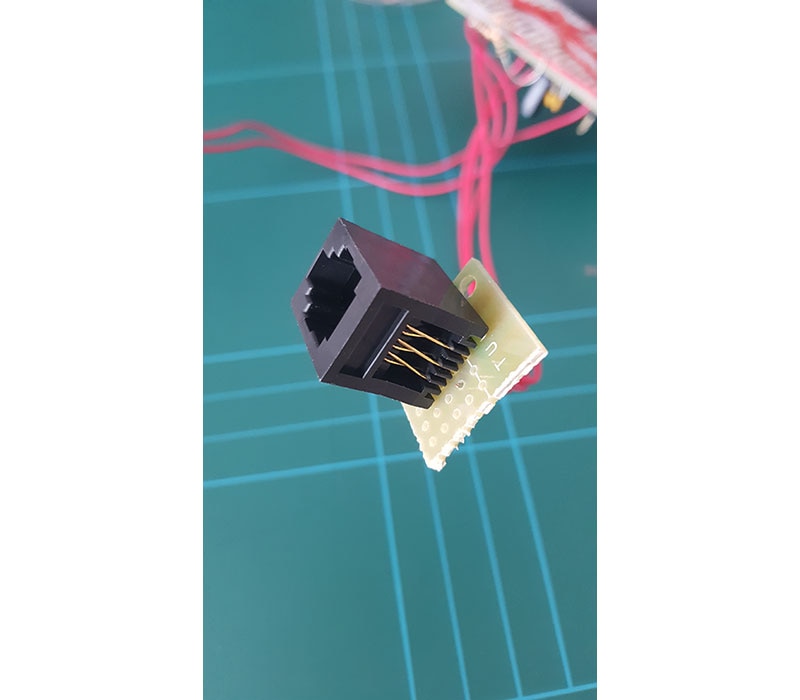
To connect the sensors to the HAT board I had to use RJ11 sockets, however I could not physically fit them on the HAT board to I used some old prototyping board and soldered up my own breakout boards. I looked around on the Internet and I could not find ANY RJ11 breakout boards which was disappointing as there are so many weather station projects out there in the community.

You see the schematic reference for the weather station HAT circuit in the image below:
Arduino Code
Writing the code for this project was the most difficult part of the project. I tried many techniques to not only read the sensor data but also to pass that data through to the Raspberry Pi. By no means am I an expert on programming but the task of sending multiple bytes of data through to the RPi was difficult due to the fact that only a single byte would hold up to 256 in decimal value, therefore a value of 1024 had to be split up into separate bytes then sent to the RPi and then converted back into the decimal value.
I was thinking about other devices out there in the market that use this kind of technique and I soon realized that the GrovePi+ from Seeed Studio and Dexter Industries does exactly that. Fortunately, all their code is listing on their GitHub page under the MIT license which allowed me to take a copy and edit the code for my project.
Raspberry Pi Code & InitialState
The Raspberry Pi code uses an APi called "grovepi" to simplify things when requesting the data from the sensors. The code is written in Python and as such the functions are similar to using normal GPIO requests on the Pi with the exception of using the"grovepi" APi:
grovepi.pinMode(sensor, "INPUT")
All the functions are defined in the GrovePi APi, whenever the code in your project references "grovepi" it then passes the data to the APi and will do one of the following functions:
Once the function here has been defined it then passes the request to the Arduino firmware using I2C and awaits a response from the ATmega328P IC.
It sounds like a complicated process but it actually simplifies everything resulting in your main project code being kept tidy. Also in the APi code you can do ALL of the calculations, for example to read the wind speed you must get the number of rotations from the anemometer and then calculate the speed based in circumference and resolutions per minute. This is all done on the APi side and then a single value of miles per hour is then passed to your main project Python code.
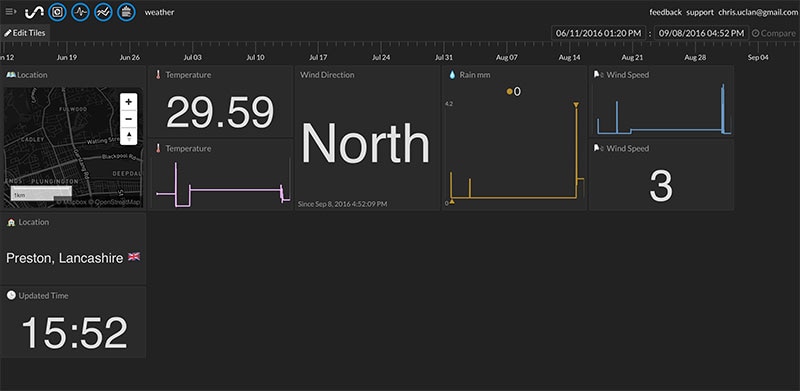
The Raspberry Pi is connected to the internet using WiFI so it would make perfect sense to send all the data to a cloud service so you can access the data/weather at any time. The cloud service I used for this project was InitialState. InitialState allows me to upload the data to their cloud service, and also display the data however I want in the Dashboard, you can even use emoji's to display certain images of the weather. They have some really great resources available on their website in a number of different programming languages.
Current Issues
Of course this project isn't without its faults and there are a few that need working on. The main issue I have is the solar cell isn't powerful enough to power the Raspberry Pi and charge the battery enough for the battery to last the whole night on limited use. The current solar cell is approximately 5W on full power however I have calculated that I would require around 9W of power for it to be more effective at charging the battery, this issue is just a simple swap out of components.
Another issue is that because I have soldered a digital temperature sensor to the HAT board and the fact that it is also inside an (almost) air tight container, the temperature value is not a true representation of the outside temperature and as such generally reads 5-10 degrees Celsius higher than what it is. A work around for this is that I have acquired a humidity/temperature sensor from another weather station and I will use that to house a DHT22 sensor inside, which should be waterproof and allow passive air to flow through for an accurate reading.
Taking it further
The next stage of the project is to design a custom PCB HAT for the Raspberry Pi. Hopefully depending on the actual design of the circuit I will be able to mount most of the components on the HAT board including the power circuit. It would also be nice to have a RTC built-in to keep the time and date, having not to rely on the internet connection for this.
I would at some point like to add more sensors to the weather station such as light, to detect when the sun rises and falls. Also a pollution sensor, to check the overall air pollution for that area.
Some of the weather station code need tidying up as well, some of the values from the wind vane tend to fluctuate +/- 1 decimal value, this is most likely due to the hardware and the tolerance values of the resistors.
Summary
This is a great project to do with the Raspberry Pi and I just hope that someday the foundation will actually release the HAT board for their Raspberry Weather Station project with Oracle. I learnt a lot doing this project, in particular how to communicate between the Arduino ATmega328P chipset and the Raspberry Pi with thanks to Dexter Industries for their open-source code under the MIT license. If you have any questions about the process, then please pop them in the comments below or contact me on twitter @rushmakes.


