制造商零件编号 ROB0148-EN-LB
MICRO: MAQUEEN LITE WITH SKIN (B
DFRobot
The quarter's done and, since I'm finally back home in Hawai'i, we were able to make more progress on the robotics education projects that we started in the Summer. Previously on our Robotics Education series, we talked about how the students put together a Parallax robotics kit and started to maneuver it through obstacles. They were able to get very far with it and even figured out that they didn't need the ultrasonic sensor.
The course often changes from competition to competition, and as a result, the obstacle types and the distances will vary. Here is an example track for the Pearl City Science Olympiad Invitational Tournament, where you can see that foam obstacles were used. Other times, wood 2x4 obstacles are used or plastic 3D printed barriers.
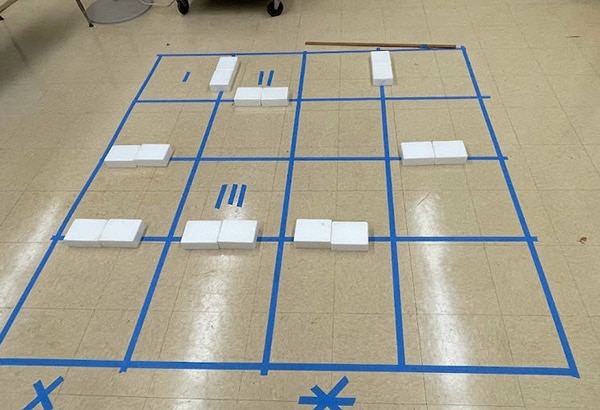
This makes it harder to code/calibrate the robot's movements. Although this could be worked through, the students only have 8 minutes during the competition to adjust their code. This isn't very much time at all, and the students figured out that they could simply make functions for the robot (such as go forward, turn left, turn right, etc.) and standardize it for each grid block since that will always be the same. This not only makes the robot less complex in terms of movement and sensing but also allows them to simply path the robot in movements (go forward, then go right, etc.).
For example, in the obstacle course above, the robot is to start on the X and then hit zones I, II, and then III. It would then end at the *. This could simply just be inputted as traversing each block as opposed to programming the robot to navigate around the obstacles and pathfind on its own.
As such, they've found success with this method and their robot is functioning very efficiently. They've now turned to working on the other robotics kit in hopes of finishing a second robot--one that might potentially be more efficient and faster than the previous one. This kit has been the DFRobot micro:bit kit, including a prebuilt robot chassis and ultrasonic sensor. Note that the batteries and the micro:bit microcontroller are sold separately.
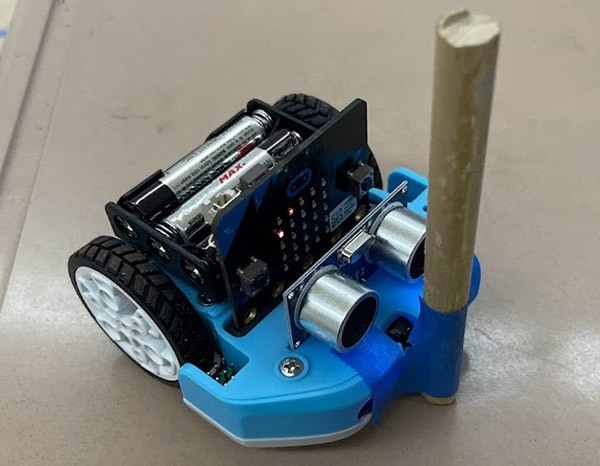
It was very easy to use and put together--only requiring a few steps. Very simply, and in the front, a dowel was attached in order to meet the ruleset for Science Olympiad. Very similar to the previous kit, it does require coding functions--but this is very easy to do with the micro:bit's IDE.
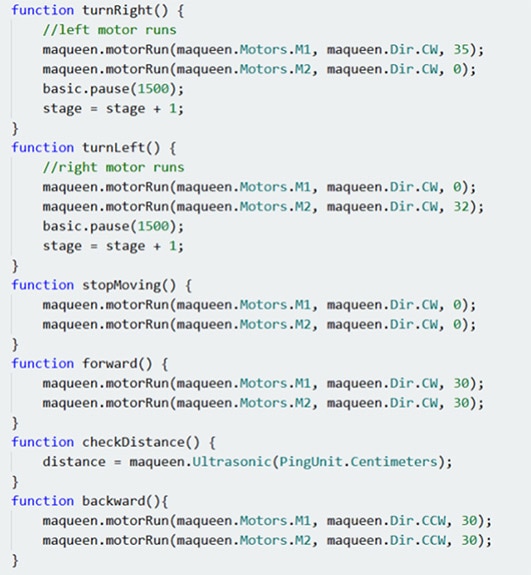
All they needed to do was create two turning functions, a function going backward and forward, and a function to stop the robot from moving. They use these functions back-to-back in the main() function with delays in order to get the robot to move across the track.
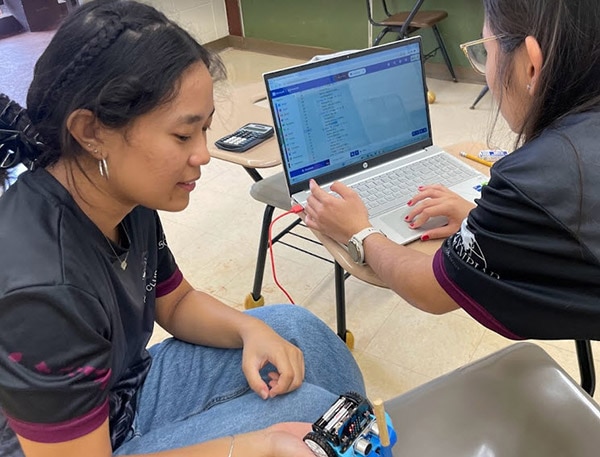
When there's a timeframe of only 8 minutes to adjust the code to the track, these prebuilt functions make it extremely easy to utilize the robot.
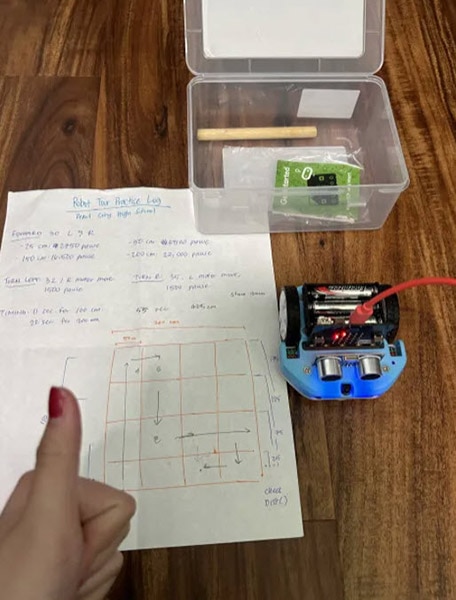
You can see their notes in this picture, depicting how they view the track and the optimal path that they wish to take. There are a lot of adjustments when it comes to the specific delay times and distances, so calibrating the robot's values is extremely important. For now, they need to work on calibrating the turn delays as they can sometimes go too far right/left, messing up the entire run. Even going a few centimeters off target on a turn can make an entire run go from max points to 0.
We've got 2 more DFRobot kits, so we're now going to start working on using these robots to create a couple more teams for the next tournament. With the experience (and lessons learned from mistakes) that the students have gotten from working on their own robot, they'll be able to help out these new students easily. Stay tuned!
Check out the other Robotics Education Projects below!