制造商零件编号 3591
HUZZAH32 ESP32 FEATHER MALE HDR
Adafruit Industries LLC
In this how-to, we will learn how to use the Pi Weather Shield with the Adafruit Huzzah32 and the Atmosphere IoT Studio.

The DPP904R000 is a weather shield designed for use with the Raspberry Pi and includes a number of sensors such as a temperature sensor, a non-contact infrared temperature sensor, humidity sensor, and a barometric sensor. All of the sensors on the shield interface through the I2C interface, which makes the shield a convenient choice for those who want multiple sensors on the same data bus.
While the shield is called “weather shield,” it can be used for far more applications than just weather. For example, this shield would be very useful in drone scenarios where the drone is required to measure the surrounding environmental conditions. It can also be useful for monitoring and controlling the atmosphere through home automation. The infrared sensor on the board can even be used for passive body heat detection, thus potentially making the weather shield applicable in security projects.
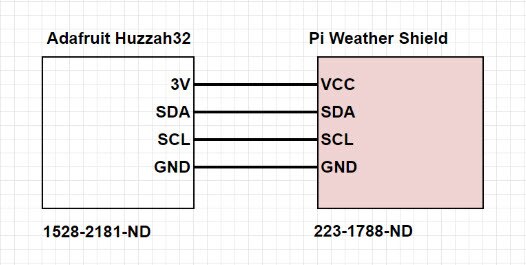
Using this shield is very simple and only requires four connections; two for power and two for the I2C interface. The pinout for the shield is shown below and extracted from the datasheet found on the TE website.
The temperature sensor is on a small breakout PCB, allowing for the temperature sensor to be removed, remotely mounted, and connected to the shield via wires for specific applications. However, in this example, we will leave all the components where they are and stick with the four-wire connection. Two other I2C connections exist for the ID, but these are not needed.

The four sensors that are included on the board include:
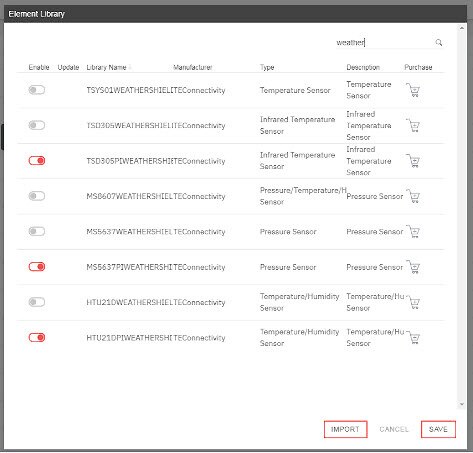
The weather shield can be added to most devices on the Atmosphere IoT Studio platform, but instead of one element, it comes in four. This is because each sensor on the weather shield has its own dedicated element, making it important to choose the right one. To add new elements to an Atmosphere IoT Studio project, click the “Add Element” button below the element toolbox and in the window that appears a search for “weather.”
The image below shows the search results for “weather.” The correct entries are those with the word “PI” in their name. These elements — the four you need to include in your project — have been highlighted for ease.

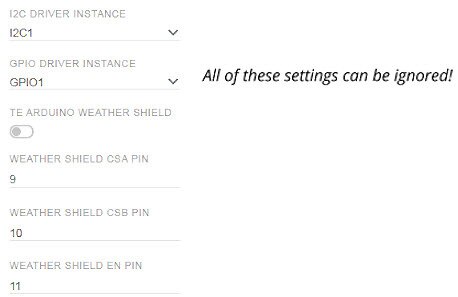
The three elements for the weather shield are easy to use and are almost identical to each other. Firstly, each element has a section called TE Arduino Weather Shield followed by three pin declarations. These declarations do not apply to this weather shield and so these options can be ignored (they should, in fact, be left in their default state). None of the elements have options that can be changed, and the only interfacing will be from taking sensor readings.

To see how these elements can be used, we will demonstrate a simple sensor recording application that will read from each sensor and then display its value in a Bluetooth enabled app. The program uses the interval element to probe each element to take a reading. These elements are then connected to unique Bluetooth elements so that each sensory reading can be processed independently from each other. This makes data processing on the app side far simpler (as opposed to trying to use data parsing to separate the data).

The app portion of the project is also simple, as the three Bluetooth elements are probed by an interval element once every second. When probed, the Bluetooth elements pass their latest received data from the Huzzah32 and print it to a label to show that specific sensors’ reading. However, instead of disregarding the value, we also pre-append some text to make the app more readable (this way, we know which label represents what).
