Increasing battery life by 40 times for a DIY Arduino based sea level indicator
2018-05-22 | By Qoitech
One of the most apparent use cases of IoT is monitoring at remote locations. The use case sets tough requirements on internet accessibility yet long battery life time, due to limited access for frequent battery changes. These requirements add some special restraints on the design of the IoT device. In this post we showcase a sea level measurement station as an example of such IoT use case, explaining its functionality and the ways to get the power consumption lower. For more details and measurement data, check out the videos below!
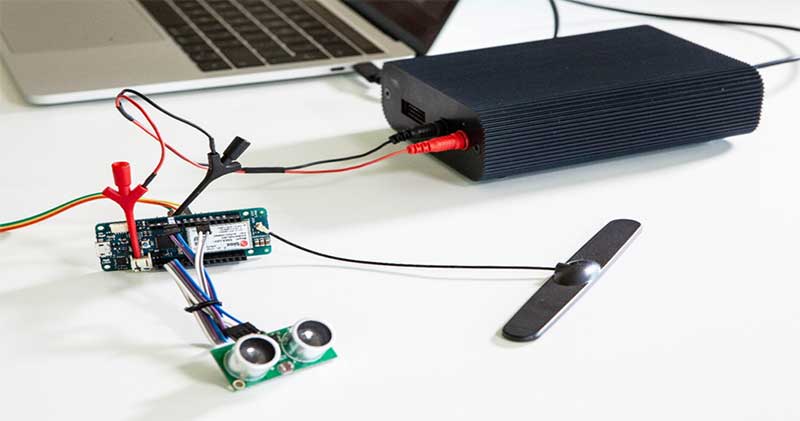
The sea level indicator device is based on an Arduino MKR1400 GSM, which contains a SAMD21 Cortex-M0+ 32bit low power ARM MCU, and a SARA-U201 HSPA module from u-blox, that with an added SIM card provides 2G and 3G connectivity.

Sea level measurement station set-up
In order to measure the water level, an ultrasonic transducer, KS103, is used, which provides temperature compensated measurements over an i2c interface. This transducer is specified down to 0ºC, if you need it for lower temperatures, it should be replaced with e.g. KS101B, which will withhold minus temperatures down to -30ºC.
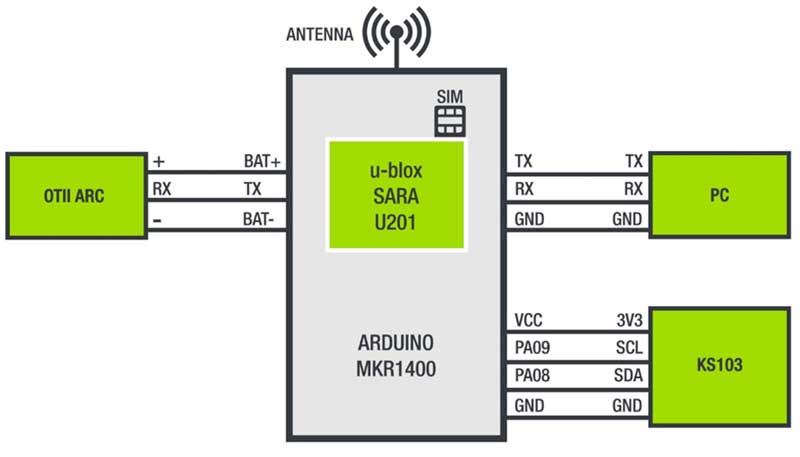
The entire sea level indicator is powered by a 3.7V LiPo battery connected to the Arduino, in this case simulated by Otii. Furthermore, a PC is connected to a serial port of the board, to command the device and to extract the debug logs to sync with energy consumption recordings in the Otii app.

Sea level measurement station set-up overview
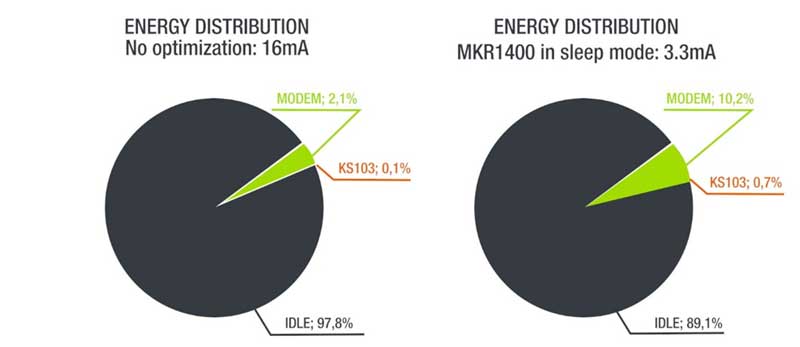
In this set-up, with no energy optimization efforts made, the results show an average power consumption of 16.6 mA, for a simple activity: Send Data (SMS), Wait 1h, and Repeat.
The first step of the optimisation would be to put the MKR1400 in sleep mode using Arduino RTCZero library, and making sure unused pins are not floating. This brings the average current to 3.3 mA. However there are still peripheral components awake which means that this Idle state is still using a lot of energy, more precisely 90 % of it.

Energy distribution comparison with no optimization and with MKR1400 in sleep mode
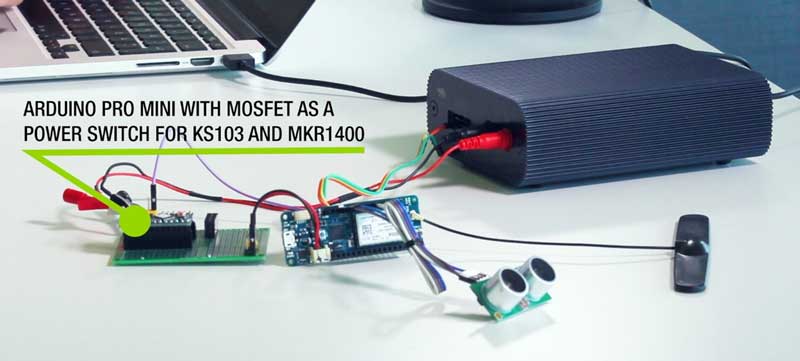
To further lower the power consumption Arduino Pro Mini with a MOSFET was added in the set-up, to control the power to both MKR 1400 and KS103.

The water level indicator setup with additional Arduino Pro Mini with MOSFET

Sea level measurement station set-up overview with MOSFET
Adding Arduino Pro Mini as a power switch to peripheral components results in the current decreased to 5uA, which then results in the average current of 0.4 mA, for the activity: Send Data (SMS), Wait 1h, and Repeat.

Energy distribution comparison throughout energy consumption optimization
The hardware design considerations such as adding the possibility to switch off the peripheral components besides putting the modem and CPU in idle mode can give significant improvements in energy consumption. As showcase here, the increase of the battery life of this sea level indicator can be up to 40 times, compared to the initial non-optimized setup.
Additional thing to consider, which is not covered in this post, is the activity type, what is its purpose and if the active part (sending data) can be less frequent without losing the purpose of the device.
Regardless of what steps are being taken in the development of the IoT device, the important thing is to measure the performance at all instances, to get better insights of the system performance of the device when optimizing.
VIDEO TUTORIALS:


