Creating a Wireless Water-Leak Alarm System for Home Use
投稿人:Convergence Promotions LLC
2012-03-22
Following a water leak in my home, I decided to evaluate different alternatives for creating a wireless water-leak monitoring and alarm system. Rather than design everything from the ground up, it made more sense to use off-the-shelf wireless modules. In addition to speeding the design and implementation process, these modules come with all the required certifications that allow them to be embedded directly into the end product. But which wireless technology should I use –Bluetooth, Wi-Fi or an IEEE 802.15.4-based low-power wireless personal area network (6LoWPAN)?
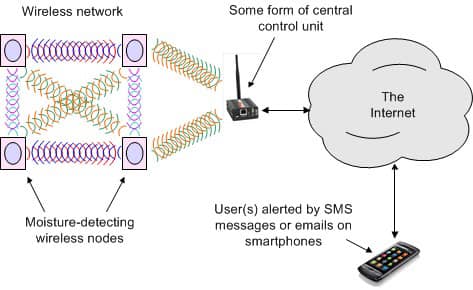
Why are my feet wet?
Here’s how this all came about. A few months ago we had a water leak at our house. The pipe connecting the fridge to the wall in our kitchen failed. I’m not sure why this occurred after three years without any problems. It may have been replacing the water filter in the fridge that caused a pressure pulse that “popped the seal.”
Whatever the cause, a small leak developed. Unfortunately, the leak was behind the fridge, and the fridge sits on a wooden floor. The water soaked into the cracks between the wood and along the underside of the floor without our noticing it. This may have been going on for several weeks before the wood became sufficiently saturated that it started to buckle up.

As soon as we realized there was a problem, I pulled the fridge out of its alcove and turned off the water, but the damage had been done. Although we needed to replace only a few hundred square feet of wood, the problem was that the wooden floor extends from the kitchen into the breakfast area, and from there into the family room and the entrance hall and the study and the dining room. This meant that after the damaged wood had been replaced, the entire floor needed to be sanded and refinished.
The end result was that we had to have a moving company come in to pack everything up and take all of the furniture out of these rooms. Then we had to vacate the house and stay in a hotel for a little over two weeks while everything was sorted out. Then we had to supervise the return of the furniture. The overall cost came to more than $16,000. Even though we had wonderful insurance, this still entailed a lot of disruption to our family and the radiance of my wife’s smile was removed from my life for quite some time – need I say more?
Never again!
Shortly after the leak had occurred, I was sitting at the breakfast bar looking at the fridge sitting in the middle of the kitchen floor, thinking to myself “I wish I’d known when that leak started so that I could have saved myself all of this hassle.” Since I am a hardware design engineer by trade, my next thought was that it should be possible to create a small unit (about the size of a pack of playing cards) that I could place on the floor behind the fridge that would alert me if any moisture was detected.
My first idea was that this would work a little like a smoke detector. The unit should be battery-powered so that I don’t have to wire it into anything. It should last for at least two years before the battery needs replacing. When the battery does need replacing, the unit should beep periodically to alert me. Also, if moisture is detected, it should give a continuous, piercing wail.
Then I started thinking just how many potential “leak points” there are in my house. Thus, another consideration is that the units should be inexpensive enough that I can deploy them throughout the house – one behind the fridge, one under the dishwasher, one behind the washing machine, one behind every toilet, and one under every sink in the kitchen and the bathrooms, and one in the drip-tray under the hot water tank in the garage (and this is just off the top of my head).
The problem with my first-pass solution was that it required someone to be in the house to hear the alarm. But what happens if there is a more significant leak that occurs during the day when we are all out of the house at work or when we are away travelling for a couple of weeks? Talking to my friends, I heard a lot of horror stories along these lines. So my next idea was that each of the moisture monitors should be equipped with some form of wireless capability. If a problem is detected, I want the system to alert me in some way wherever I am in the world. Actually, I want it to alert a number of people, including my best friend who has a key to my house.
A high-level specification
My next step was to start thinking about various facets of my proposed system. In the case of the moisture detecting units, for example, the fact that I want them to be battery-powered means they need to be very efficient with regards to their use of wireless connectivity. They cannot constantly broadcast. Instead, I want them to spend most of their time in some sort of “deep-sleep” powered-down mode – perhaps to wake up for just a few milliseconds once every couple of minutes or so. While a unit is awake, it could check for moisture and check the state of its battery, transmit its status to some central control unit, and then go back to sleep.
The central control unit requires some way to communicate with the outside world. Like almost everyone I know, I already have a wireless router in my house that is permanently active and that provides a gateway to the Internet. So, in the event of moisture being detected, I want the central control unit to send text messages and/or emails to a defined list of people. On the other hand, if one of the moisture detection units reports that its battery needs to be replaced sometime in the not-so-distant future, then I want the central control unit to send me an email (and to follow up with increasingly stringent messages if I fail to act within a reasonable time).
Another consideration is how this system is to be deployed and set up. If I end up creating a single system that will only be used by me, then it would not matter if the user interface is somewhat complicated and “clunky.” However, it may be that I decide to create a number of these systems for my family and friends; I do not want to have to spend my life setting them up and maintaining them. Maybe there is a big market for this sort of thing. Maybe I will end up selling thousands of them, in which case I want the “out-of-the-box” experience to be as simple and as easy as possible.
What I’m imagining is an application that runs on a PC (although I might extend this to Apple and Android™ smartphones and tablet computers at some stage). When the user powers up one of the moisture detection units, the application on the PC immediately detects its presence and asks “Where are you going to put this?” The user then types in something like “under the kitchen sink” and places the unit in this location.
The application should also ask for the names of the primary and secondary contacts. For each of these contacts, the user will be prompted to provide a name, a cell phone number (if SMS messages are required), and an email address (if email notification is selected). It would be nice to include a “test” button which, when clicked, sends messages to everyone on the list saying something like “Don’t worry, this is just a test of [primary contact name]’s water leak detection system. Please let [primary contact name] know that you have received this message.”
It all sounds so easy if you say things quickly and wave your arms around a lot… but how would one actually set about creating a system of this ilk?
Option #1: Wi-Fi
One wireless technology that everyone has heard about is Wi-Fi.¹ An example off-the-shelf module is the Roving Networks WiFly, which has a single unit cost of around $40. One of the advantages of Wi-Fi is a high data rate, which is essential for some applications, although not a requirement for my particular system. It is worth noting that the lower cost/power embedded Wi-Fi modules don’t offer the multi-megabit throughput you may be expecting; most are below 1 Mbps in actual throughput, even though they do connect to your “54M” Wi-Fi access point.
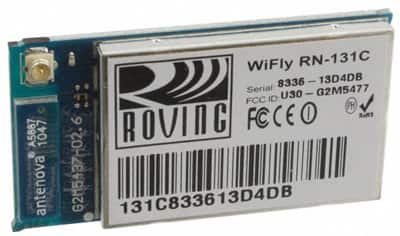
This brings us to another issue. Setting up these things to use your Wi-Fi infrastructure can be somewhat tricky, and embedded modules won’t necessarily work with your local flavor of WPA Wi-Fi security. Most examples of embedded Wi-Fi applications either employ an ad-hoc mode to connect directly to a PC or other end-device, or they are delivered with their own dedicated infrastructure (routers, access points, etc.) to avoid reliance on established IT settings wherever they are installed.
One advantage of the Wi-Fi approach is that you can use a standard TCP/IP socket API to develop your user-interface. But this still leaves quite a few design decisions, such as what application-layer protocols to use (RPC, web-services, etc.) and how to discover devices on the network.
When it comes to tools and software, you can either use serial command-line with an external microcontroller, or you can purchase a developer kit (which may cost around $2,500) and slog away with GCC and lots of open source C code.
Option #2: Bluetooth
Another wireless alternative is Bluetooth.² An example off-the-shelf module is Panasonic Bluetooth, which has a single unit cost of around $35.
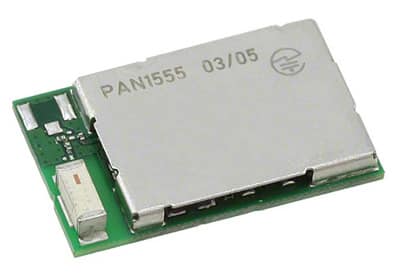
With Bluetooth, the embedded modules offer a “wireless-serial-port” approach based on Bluetooth’s serial port profile (SPP). You can think of this as a wireless COM port between a single PC and an embedded microcontroller. The network topology of Bluetooth is master-slave, with up to seven slaves supported. On the software side, the modules typically act as “modems” and require an additional microcontroller to be the host-computer on the embedded device. Just like in the good-old days, the host computer issues AT commands to the modem to set up connections, and then pounds away with data.
While Bluetooth hardware is common, software support is primarily geared toward human-interface devices such as mice, keyboards, and headsets. This means that you are on your own when it comes to developing a user-interface to a Bluetooth network, especially if you are looking to connect to multiple devices in a Bluetooth “scatternet.”
Option #3: 802.15.4
Known primarily as the IEEE radio standard for ZigBee® networks, 802.15.4 is the workhorse of low-cost spread-spectrum radios in the license-free 2.4 GHz ISM band that it shares with Wi-Fi and Bluetooth.³
The ZigBee protocol itself is a complex and ever-changing beast. 4 There are several problems with using ZigBee from my point of view, not the least of which is that I am not a wireless expert, and commissioning a ZigBee-based network requires quite a lot of specialized knowledge. My understanding is that if I was to write my moisture/battery-checking application for a ZigBee-based node, I would have to create this application in C/C++, compile it with the ZigBee stack, connect the unit to my PC via a physical cable, and download the application into the wireless node. This all sounds like a lot of work to me. Like many engineers I can dabble in C, but I am certainly not an expert. Creating a wireless application is only one part of the task – debugging it is a whole different ball game.
Fortunately there are alternatives, such as the SM200P81 module from Synapse Wireless, which has a single unit price of $20.5 These modules run a wireless stack called SNAP™. In addition to the low cost of the modules, a huge advantage to a non-expert like me is the ability to create applications in the high-level Python® scripting language using the Portal™ development environment that can be downloaded from the Synapse website for free. When you power up one or more of your wireless modules, they appear as icons in Portal. Once you have created the application, you can download it into your wireless node “over-the-air” by simply dragging and dropping it over the appropriate icon in Portal.
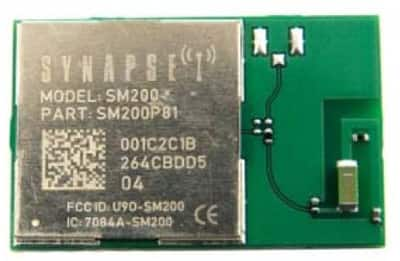
As they are powered-up, the SNAP modules automatically integrate themselves into a full mesh network. This means that if one of the modules cannot “see” the main controller, then its messages will automatically be routed through one or more of the other modules. Also, if a module should happen to fail for any reason, then the remaining modules would automatically route around it.
One of the main considerations for my network is to minimize power consumption in the battery-operated moisture detection units (these are the units that will contain the SNAP modules). Now, I’m not quite sure how to do this yet (although I understand Synapse can provide examples), but you can create a “Sleepy Mesh.” The idea here is that you create your application such that all of the wireless nodes “wake up” at some specified time – say once every couple of minutes – check the state of their sensors, transmit and receive any packets of information, and then go back to sleep. Using this technique allows you to extend the life of a nine-volt battery to two or more years before it needs to be replaced.
The great thing about using the Synapse approach to create your applications is that you can include “print” type commands with variable names in your applications, and you can monitor these in real-time in Portal while the network is running, which makes debugging your applications and your network incredibly easy as compared to traditional techniques.
| Range* | Power** | Data Rate*** | Wake Time**** | Network | |
| Embedded WiFi | 300 feet | 100 mA | 500 kbps | >100 ms | Ad-Hoc or Infrastructure |
| Bluetooth | 50 feet | 40 mA | 300 kbps | >100 ms | Up to 7 active slaves |
| 802.15.4 (SNAP) | 1000 feet | 20 mA | 100 kbps | 5 ms | Full mesh |
**Power is average with receiver ON
***Data rate is sustained wireless serial throughput
****Time from "wake" to full packet-level communication
To be fair, we have really only just begun to scratch the surface of this project. For example, how are we going to create the Graphical User Interface (GUI) for the end users and how are we going to get our SNAP wireless network to “talk” to the Internet?
If you have a PC permanently up-and-running in your home, one option would be to purchase a SNAP® Stick USB Wireless Module for around $62. This plugs into a USB port on your PC, thereby allowing your PC to communicate with your SNAP network.
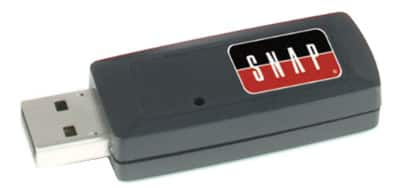
Also, you could purchase a single license of the SNAP® Connect Internet Software for PC, Linux, and Mac for around $79. You can use SNAP Connect to create your GUI and your Internet gateway. Actually, there are a wide range of other options, but I am not an expert and I am still trying to “wrap my brain” around all of this stuff, so I think we’ll leave those for another day (or article).
Summary
Wireless networks make a lot of things easy; for example, they mean you don’t have to hardwire things into your house or commercial building. There are lots of wireless alternatives out there (Wi-Fi, Bluetooth, 802.15.4-based, etc.), and different alternatives will be better-suited to different applications and environments.
Using the DigiKey catalog helps you to track down off-the-shelf wireless modules, to evaluate the various alternatives, to quickly build a prototype, and – when everything is successfully up-and-running – to move into a larger production scenario.
References
- The Wi-Fi Alliance
http://www.wi-fi.org - Bluetooth technology web site
http://www.bluetooth.com - IEEE 802.15.4
http://en.wikipedia.org/wiki/IEEE_802.15.4 - The ZigBee Alliance
http://www.zigbee.org - Synapse Wireless
http://www.synapse-wireless.com

免责声明:各个作者和/或论坛参与者在本网站发表的观点、看法和意见不代表 DigiKey 的观点、看法和意见,也不代表 DigiKey 官方政策。


 中国
中国