Building an Arduino Wireless Gateway
投稿人:DigiKey 欧洲编辑
2013-02-14
Arduino is an open-source electronics prototyping platform that is specifically optimized for receiving input from sensors. This makes it an excellent platform for the development of a wireless gateway. With an Ethernet connection, the gateway can be used to link sensors and actuators to the Internet for applications on smartphones and tablets. Apps can be developed for these platforms that then make use of the data that comes from the network and control actuators remotely from anywhere in the world.
The wide range of open-source software available provides a valuable resource for constructing the project. It is based on flexible, easy-to-use hardware and software intended for designers, hobbyists, and anyone interested in creating interactive environments.
There is a wide range of Arduino boards available, all using the Arduino programming language. This is based on Wiring, which has the same syntax and libraries as C++ but with simplifications and modifications. To make the language easy to use, there is the Arduino development environment, which is based on the Java-based Processing open source IDE. Development can be done on either a PC or Mac as a host under Windows, Mac OSX, or Linux, or on the board itself. The gateway software can be developed on Linux using the Arduino programming language and tools.
The Arduino Nano board is a small, complete, and breadboard-friendly board based on the ATmega328 processor for the Arduino Nano 3.0 or the ATmega168 for the Arduino Nano 2.x family. It lacks only a DC power jack, and works with a Mini-B USB cable instead of a standard one. The Nano was designed and is currently being produced by Gravitech. The 16 MHz processor runs from a recommended input voltage of 7-12 V and has fourteen digital I/O pins with 40 mA of DC current per pin, which can be used to power a wireless module.
There is 16 KB of Flash in the ATmega168 version or 32 KB in the ATmega328 of which 2 KB used by the bootloader. Similarly, there is 1 KB of SRAM and 512 bytes of EEPROM with the ATmega168 or 2 KB of SRAM and 1 KB of EEPROM for the ATmega328.
The value of the Arduino boards lies in the range of open source software that has been developed by hobbyists, and also the flexibility of the hardware. Manufacturers provide the circuit layouts, and it is easy to build an add-on card, or shield, to the wireless functions. A wireless shield can be made or bought to add a wireless link to the design.
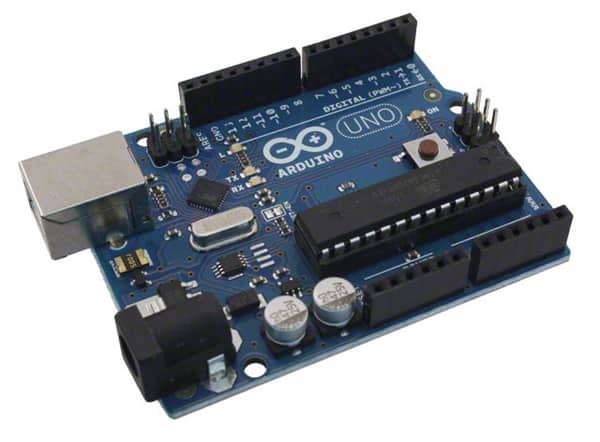
Figure 1: The Arduino Nano board.
Arduino IDE on Linux
The most common development platform for Arduino is Linux, which is similarly open source. Some additional programs are needed, depending on the distribution of Linux that is being used.
The key tool is the Arduino IDE 1.0.1, because it uses an internal pre-build GCC (GNU Compiler Collection) compiler. This excludes all tool-chain problems and includes the Java runtime package 6 or 7 -nopenjdk-7-jre or oracle JRE 7.
The Arduino software download includes custom versions of two additional dependencies:
- RXTX, a Java and native library for communicating with serial devices like Arduino boards
- avrdude, an application for uploading programs to AVR microcontrollers (like the ones on Arduino boards)
The RXTX that comes with Arduino was modified to support devices of the form /dev/ttyACM, which are used by the Arduino Uno and Mega 2560 boards. These use an ATmega8U2 instead of an FTDI chip for USB-serial communication.
Wireless shields
The XBee® shield allows an Arduino board to communicate wirelessly using ZigBee®. It can communicate up to 100 feet indoors or 300 feet outdoors (with line-of-sight). The simplicity of the shield means it can be used as a serial or USB replacement to create a simple wireless point-to-point connection or using the command mode it can be configured for a variety of broadcast and mesh networking options as a wireless gateway. The shields breaks out each of the XBee's pins to a through-hole solder pad, and also provides female pin headers for use of digital pins 2 to 7 and the analogue inputs, which are covered by the shield. The digital pins 8 to 13 are not obstructed by the shield, so they can use the headers on the board itself.
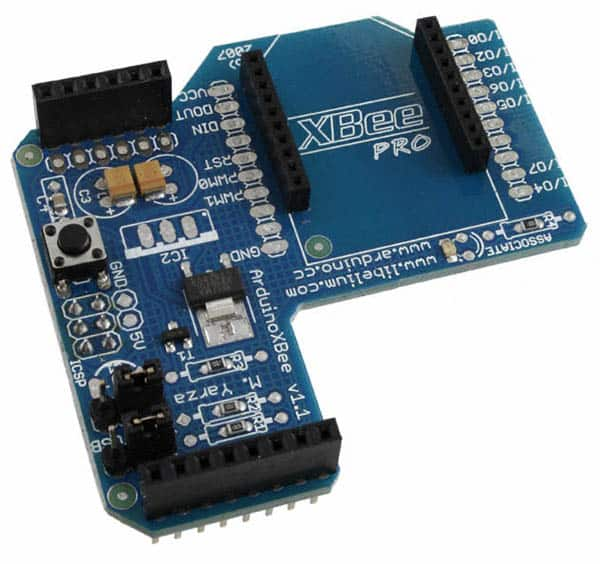
Figure 2: The Arduino Wireless shield.
The XBee shield has two jumpers that determine the serial communication between the microcontroller (the ATmega8 or ATmega168) and FTDI USB-to-serial chip on the Arduino board. With the jumpers in the XBee position, the DOUT pin of the XBee module is connected to the RX pin of the microcontroller and DIN is connected to TX.
There are multiple parameters that need to be configured correctly for two modules to talk to each other (although with the default settings, all modules should be able to talk to each other). They need to be on the same network, as set by the ID parameter. The modules need to be on the same channel, as set by the CH parameter. Finally, a module's destination address (DH and DL parameters) determine which modules on its network and channel will receive the data it transmits. This can happen in a few ways:
- If the module DH is 0 and the DL is less than 0xFFFF (i.e. 16 bits), data transmitted by that module will be received by any module, whose 16-bit address MY parameter equals DL.
- If the DH is 0 and DL equals 0xFFFF then the module's transmissions will be received by all modules in broadcast mode.
- If the DH is non-zero, or the DL is greater than 0xFFFF, the transmission will only be received by the module whose serial number equals the transmitting module's destination address, i.e. a point-to-point connection.
Send Command      Expected Response

+++                       OK<CR>
Once in configuration mode, AT commands can be used to control the module. Command strings have the form ATxx (where xx is the name of a setting). To read the current value of the setting, send the command string followed by a carriage return. To write a new value to the setting, send the command string, immediately followed by the new setting (with no spaces or newlines in-between), and followed by a carriage return. For example, to read the network ID of the module (which determines which other XBee modules it will communicate with), use the ‘ATID’ command:
Send Command      Expected Response

ATID                    3332<CR>
To change the network ID of the module:
Send Command      Expected Response

ATID3331                OK<CR>
Checking that the setting has taken effect:
Send Command      Expected Response

ATID                    3331<CR>
Unless the changes are written to non-volatile memory, they will only be in effect until the module loses power. To save the changes permanently, use the ATWR command in the same way:
Send Command      Expected Response

ATWR                    OK<CR>
To reset the module to the factory settings, use the ATRE command:
Send Command      Expected Response

ATRE                    OK<CR>
Note that like the other commands, the reset will not be permanent unless you follow it with the ATWR command.
The Arduino ModFLEX Shields by Laird Embedded Wireless Solutions use a SiFLEX02 that combines a high performance 802.15.4 radio and microcontroller in a cost effective, pre-certified footprint where the I/O connectors are compatible with the Arduino open-source platforms.
The module features a 900 MHz DSSS transceiver, Atmel radio with RF amplifier circuit, and an Atmel ATRXMEGA microcontroller to give it the same environment as the main board. It comes preloaded with a host serial interface running on top of the Atmel 802.15.4 MAC. The shield has full debug and programming capabilities to develop custom applications and the ZigBee stack or MAC can be easily loaded onto the module to create a custom network.
The module has a 250 mW output power to give a range of 2 miles for line of sight along with a 1 Mbps RF data rate.
Other wireless topologies
It is possible to use standalone wireless modules to build the shield for the Arduino board by using the breadboard prototyping system. This allows other devices to be used to create a shield to handle other topologies such as Wi-Fi.
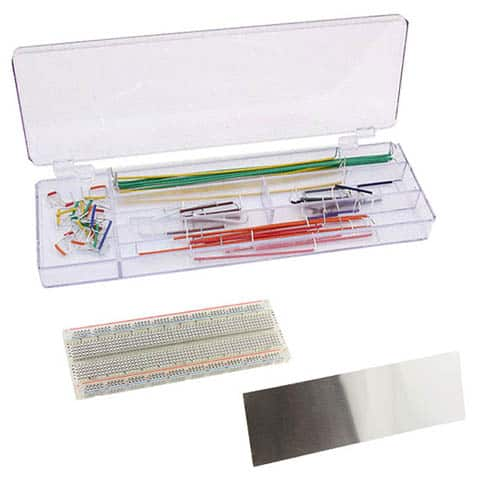
Figure 3: The Arduino breadboard for connecting a wireless module.
The RN-171 module from Microchip is a standalone complete TCP/IP wireless networking module that can be used with the prototyping boards to provide a Wi-Fi connection. Due to its small form factor and extremely low power consumption, the RN-171 is perfect for mobile wireless applications such as an Arduino shield.
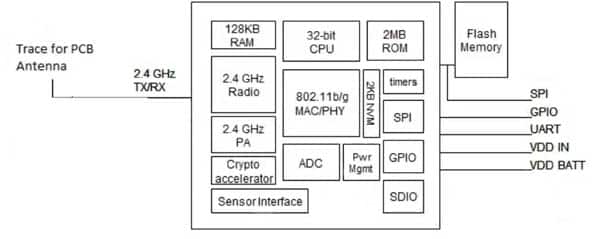
Figure 4: The Microchip Wi-Fi module.
It incorporates a 2.4 GHz radio, TCP/IP stack, real-time clock, crypto accelerator, power management, and analogue sensor interfaces. The module is preloaded with firmware to simplify integration and minimizes development of the application. In the simplest configuration, the hardware only requires four connections (PWR, TX, RX and GND) to create a wireless data connection. The RN-171 also includes a built in HTML client to automatically post serial UART data or sensor data to a web server.
Other topologies include Bluetooth® for connecting Machine-to-machine (M2M) networks.
The Laird Technologies Wireless M2M AC4490 900 MHz radio modules replace miles of cable in industrial environments using field-proven FHSS technology that needs no additional site licensing. The module includes interference rejection and works with other networks while maintaining data integrity. It can be interfaced to the Arduino board via the prototyping breadboard using the 12-pin header.
The AC4490 features include drop-in installation, a number of on-the-fly control commands, and the ability to be used as direct cable replacements, requiring no special host software for communication. All frequency hopping, synchronization, and RF system data transmission/reception is performed by the module.
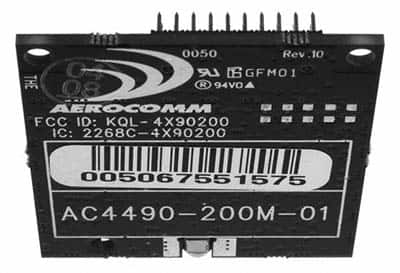
Figure 5: The Laird Bluetooth M2M module.
The radio module can achieve open field ranges in excess of 20 miles, has high propagation in the 900 MHz band, and includes options for 1 W power transmission and a sensitive low noise amplifier in the receive chain. It supports both unicast (one-to-one addressing) and broadcast (one-to-multiple addressing) modes, as well as an acknowledgement mode (ACK) API with hardware and/or software ACK indication to ensure that data has been received. There is also a One-beacon mode and a dynamic radio data table that retains data from up to twelve radio modules.
Internet connection
The other side of building the wireless gateway is to connect it to the Internet, and this is simple with an Ethernet shield, particularly if it can use the Power over Ethernet (PoE) technology. The Arduino ETH Shield includes a PoE Module and allows an Arduino board to connect to a LAN using the Ethernet library. It includes a micro SD card connector with active voltage translators and on board reset controller and can be powered over Ethernet.
Conclusion
The combination of a low cost processor board such as the Nano, with a wireless shield such as the XBee, creates a wireless controller that is easy to develop. Adding in an Ethernet shield with its own power allows the combination to become a wireless gateway to link modules, sensors, and actuators to the Internet so that devices such as smartphones and tablets can control them. The Arduino IDE provides a robust development environment and the open source nature of the project allows libraries and code to be easily acquired and used to build the gateway.

免责声明:各个作者和/或论坛参与者在本网站发表的观点、看法和意见不代表 DigiKey 的观点、看法和意见,也不代表 DigiKey 官方政策。


