How to Avoid Using the Delay() Function in Arduino Sketches
2022-02-23 | By Maker.io Staff
When you’re just starting with the Arduino platform, you’re likely to come across plenty of tutorials and code examples that make use of the delay()-function. However, you often see more experienced makers point out that using delay() is considered bad practice. This article discusses why and how to avoid delay() when writing Arduino sketches for your projects.
Why is Using Delay() Considered Bad Practice?
The delay() function allows you to pause the execution of your Arduino program for a specified period. For that purpose, the method requires you to supply it with a whole number that specifies how many milliseconds the program should wait. When used in simple sketches, you might not notice a difference when using the delay() function. Under the hood, the delay() function drastically changes the microcontroller’s behavior, especially in multi-threaded programs.
 Using delay() is not suitable for more complex projects, and this article explains a few alternatives you can use instead.
Delay() is widely known as a blocking (or synchronous) function call. As the name implies, the Arduino will stop most of whatever it’s doing and wait for the delay()-function to finish before executing other code. The problem with this approach is that aside from stopping the program, a blocking call also halts potentially critical operations such as reading sensors, I/O pin changes, and serial output. All this means that if your project contains buttons and uses the delay()-function, the Arduino will not register button presses while waiting for the delay()-function to return. Lastly, the delay()-function does not work within interrupt callback methods. However, incoming serial data still gets buffered, and the microcontroller (MCU) continues to execute interrupts, regardless of whether you use the delay()-function or not.
One Solution: Use millis() Instead of delay()
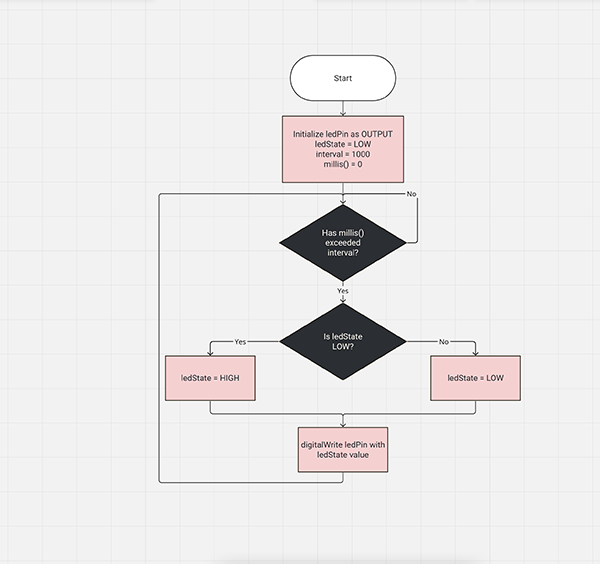
Using millis() instead of delay() is one of the most common methods to tackle the problems that the delay()-function introduces to Arduino programs. The millis()-function returns the number of milliseconds that have elapsed since the board started running the sketch. In this approach, you use the millis()-method to make the Arduino execute a piece of code with a specified frequency
unsigned long previousMillis = 0UL;
unsigned long interval = 1000UL;

void setup()
{ /* do setup */ }

void loop()
{
  /* other code */

  unsigned long currentMillis = millis();

  if(currentMillis - previousMillis > interval)
  {
	/* The Arduino executes this code once every second
 	*  (interval = 1000 (ms) = 1 second).
 	*/

 	// Don't forget to update the previousMillis value
 	previousMillis = currentMillis;
  }
}

Note how the loop()-method in the example sketch above can execute code with every iteration and some other code only once every second. This behavior is another benefit of using the millis()-method instead of delay(). With a delay-call, the entire program would halt for a second. When using millis(), ensure that you update the “previousMillis” variable somewhere in the if-block to ensure that the timings remain correct in consecutive iterations of the loop()-method.
Using Counters for Intervals
If you don’t want to use the millis()-method discussed above, you can also employ a custom counter variable that serves the same purpose. In this approach, the program increases a counter and checks whether the counter value exceeds a predetermined maximum number. If the counter value is greater than the preset maximum value, the Arduino executes some code and then resets the counter. The counter will typically exceed the maximum value with the same frequency because the board’s clock speed remains constant.
However, note that this method is only viable if you don’t want to use your Arduino code on other boards, as those might use different clock speeds, which will lead to the interval getting shorter or longer depending on the clock frequency. In addition, this method does not offer the accuracy often needed for implementing communication protocols.
unsigned long value = 0UL;
unsigned long maxValue = 16000000UL;

void setup()
{ /* do setup */ }

void loop()
{
  /* other code */

  if(value++ >= maxValue)
  {
	/* The Arduino executes this code approx. once every second
 	*  (assuming clock speed = 16MHz)
 	*/

 	// Don't forget to reset the counter
 	value = 0UL;
  }
}
Using Timer Interrupts to Trigger Periodic Events
The methods discussed so far worked by periodically checking a variable value in the loop()-method of the Arduino sketch. Instead, you can also employ the Arduino hardware timer to trigger periodic code execution. Most MCUs used on Arduino boards come with such hardware timers. However, make sure to check the chip’s datasheet if you want to learn more about the timers a particular chip offers.
 The timers on the Arduino use the board’s internal 16MHz crystal oscillator.
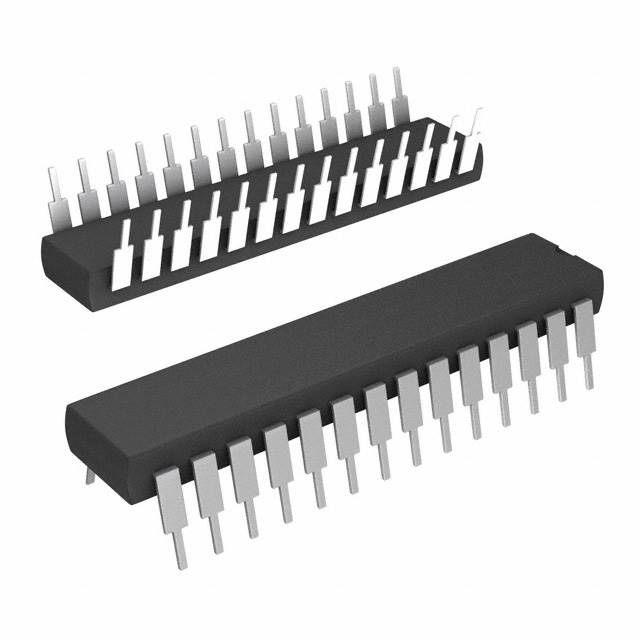
In this example, I use the ATMega328PU that comes on the classic Arduino Uno board. This MCU has three timers, and the delay(), millis(), and micros() functions use timer0. Therefore, your sketch should use timer1 (16-bit) or timer2 (8-bit). The timers use the Arduino’s 16MHz clock signal, and each tick of the clock makes the timer registers count up, similar to the counter-method discussed earlier. An additional pre-scaler value allows you to slow down the timers to implement longer wait times. Note that when the timer value reaches its maximum, it resets itself to zero. For timer1, that value is 65.535, and timer2 resets when the counter reaches 255. The following example illustrates how to enable timer1 to run a piece of code once every second:
volatile bool execute = false;

void setup()
{
  // Pause interrupts
  cli();

  // Reset counter1
  TCCR1A = 0;
  TCCR1B = 0;
  TCNT1  = 0;

  // Set the value that the counter has to reach before it triggers an interrupt
  // 15624 = 1s (assuming you use 1024 as the prescaler value)
  // Counter1 is 16-bit so the value must be less than or equal to 65535
  OCR1A = 15624;

  // Clear timer on compare match
  // The timer resets itself when it reaches 15625 (OCR1A +1)
  TCCR1B |= (1 << WGM12);

  // Set the prescaler to 1024 (See ATMega328PU datasheet for infos)
  TCCR1B |= (1 << CS12) | (1 << CS10);

  // Enable timer interrupt
  TIMSK1 |= (1 << OCIE1A);

  // Enable interrupts
  sei();
}

ISR(TIMER1_COMPA_vect)
{
  // The MCU calls this function whenever the timer resets itself
  // (i.e., once every second).

  execute = true;
}

void loop()
{
  /* Other code */

  if(execute)
  {
	/* The Arduino executes this code once every second */

	// Don't forget to reset the flag
	execute = false;
  }
}
Note that this code looks much longer than the other examples, and it will only function on AVR-based boards such as the Arduino Uno. The setup()-method initializes timer1 and enables CRC (Clear timer on compare match) mode. In this mode, the timer counts clock cycles to a predetermined value and then resets itself when it reaches that value. The setup()-method also sets the timer-reset value to 15624 and the pre-scaler to 1024. These two values together cause the timer to reset itself once every second.
When that happens, the timer calls an Interrupt Service Routine (ISR) that sits between the setup() and loop() methods. In that ISR, I set a flag. The loop()-method periodically checks that flag, executes some code when it is set, and then clears it. Therefore, the Arduino runs the code within the if-block in the loop()-method once every second.
Although using hardware timers instead of delay() is the most complicated method, it also offers the best precision. However, it’s unlikely you’ll need this method for simple projects. More elaborate projects and custom implementations of communication protocols will, however, greatly benefit from the added accuracy.
Why You Should Avoid Using Delay in Arduino Sketches

Using the built-in delay()-function for anything other than simple sketches and hello-world examples is considered bad practice due to various problems that the blocking function call causes. The most apparent problem is that an Arduino sketch that includes delay()-function calls will stop responding to user input as long as the MCU waits for the delay()-function to return. Instead of using delay(), you can employ millis() in your sketch and check how much time has elapsed since the Arduino last executed some code. Alternatively, you can also utilize a custom counter and increment it in the loop()-method. You can then instruct the Arduino to execute the code once the counter reaches a specified value.
These two methods work fine in most applications, but they offer limited accuracy. You can employ high-precision hardware timers if you work on a more elaborate project that requires high accuracy timing. However, setting up these timers and interrupts is more complicated, and more uncomplicated projects might not benefit from the increased accuracy. In addition, the timers presented in this article will only work on AVR hardware. Consult the datasheet of your microcontroller if you’re using a non-AVR MCU.
Recommended Reading
Using BLDC Hall Sensors as Position Encoders – Part 3

Have questions or comments? Continue the conversation on TechForum, DigiKey's online community and technical resource.
Visit TechForum


 中国
中国