How to Create Your Own Scrolling Message on the micro:bit
2018-11-06 | By Maker.io Staff
In previous micro:bit how-to articles, we learned about the various peripherals on the micro:bit and how they can be used in projects. In this how-to article we will focus a little more on the 5 x 5 LED display and how to display scrolling messages.
Display a Scrolling Message
Getting a message to scroll across the display of the micro:bit is trivial when using blocks on makecode. To display a scrolling message, you only need to use the block “show string” and enter the variable or string that you want to display. If the string is longer than the size of the display, the micro:bit will automatically scroll the string so that it can be seen (the display is very limited)

Images
The micro:bit can also be made to display crude images, which can be thought of as array variables that hold LED states. If these images are larger than the display, the image can be displayed at specific offsets to show different portions of the image. The micro:bit can even display scrolling images that may be larger than the display itself, and these images scroll across the screen in an identical way to the scrolling messages.
To create an image variable, you will first need to activate the advanced options. This is easily done by clicking the “Advanced” tab in the menu list (see below).

In the advanced list, select “Images” and then drop the “create image” block into the code space.

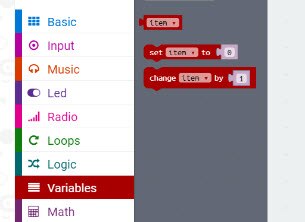
Then, we will need to drag the “set item” block into the code space found under “Variables” and connect the “create image” to the “set item” block.

You can customize the image by clicking the individual LED spaces to toggle them on or off. Below, you can see my image, which is an upward pointing arrow.

Next, we need to display the image on the micro:bit. This is done by using the “show image” block which is found under Advanced > Images. Drag this block into a forever loop and ensure that you set the image to display to the “item” variable. For now, leave the offset at 0.

Large Images
Small images can be handy, but some images may be larger than the display, and this is where image scrolling comes in! To start, drop a “create big image” block into the code space and attach it to the “set item to”, which is then attached to the “on start” condition as shown below.

Then, in the “forever” condition, we will use the block “scroll image”, which is found under Advanced > Images. The offset determines how much the image will shift automatically after the interval also defined in the block.
If all goes to plan, your micro:bit should display a continuing sinewave!

Have questions or comments? Continue the conversation on TechForum, DigiKey's online community and technical resource.
Visit TechForum


 中国
中国