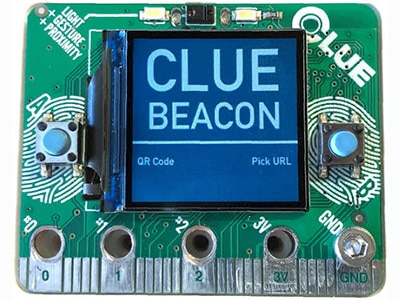
ulab: Crunch Numbers fast in CircuitPython
2024-02-20 | By Adafruit Industries
License: See Original Project Programmers
Courtesy of Adafruit
Guide by Jeff Epler
Overview
What is ulab
ulab (pronounced "micro lab") lets you perform number crunching tasks in CircuitPython more quickly, often around 10x as fast. This can be very handy when dealing with sensor data, as we'll see below.
Make sure you have CircuitPython 5.1.0 or newer, and any Adafruit CircuitPython board with an M4 or higher processor, including most SAMD51 and nRF boards.
It's a "built-in module", meaning that it is installed when you install CircuitPython, it's not a file or a set of files in a project bundle or installable via circup. Check the "Built-in modules available" list for a particular board on circuitpython.org to find out if it's available, or just run import ulab at the reply to find out for yourself immediately. If the result is an ImportError, then ulab is not available on that board.
ulab is modeled after numpy, but is not entirely compatible; so after the examples there are guidelines to help you move between numpy and ulab.
ulab is not available in Blinka, Adafruit's Single Board Computer layer for CircuitPython - for those boards we recommend using plain numpy since it's available! If your code needs to run on both CircuitPython and Blinka, you'll probably either need to use conditional code or forego the use of ulab altogether.
Starting with CircuitPython 7 the ulab APIs were changed to move the functions into ulab.numpy and ulab.scipy respectively based on where they exist in their CPython library counterparts. If you have projects using ulab functions, you'll likely need to update the code to import and call the functions using the new names.
The ulab API
ulab makes things faster by operating on entire arrays of values in one operation. For example, when you have two numbers a and b, a+b adds them together, returning a new number. When you have two ulab arrays a and b, a+b adds the corresponding numbers in a to the corresponding numbers in b, returning a new array. Want to double every number in an array? That's a*2. Compute its sine? ulab.numpy.sin(a). It also has special versions of functions like sum that act on a whole array and return a single number. Documentation for all functions in ulab are on readthedocs.
These examples only cover a portion of the functions available in ulab. The items below are beyond the scope of this guide:
- Matrix functions in ulab.numpy.linalg, such as determinant, inverse, and eigenvectors of a matrix
- Creating vectors with ulab.numpy.linspace, which is sort of like range() but for arrays
- Statistical functions such as standard deviation, ulab.numpy.std and others
- Functions for working with polynomials in ulab.numpy.polyfit and ulab.numpy.polyval
- Slicing arrays with arr[lo:hi:step]
Parts
- Adafruit CLUE - nRF52840 Express with Bluetooth LE
- Adafruit APDS9960 Proximity, Light, RGB, and Gesture Sensor
- Adafruit BMP280 I2C or SPI Barometric Pressure & Altitude Sensor
- Flexible Silicone Neon-like Skinny NeoPixel LED Strip
- USB cable - USB A to Micro-B
A Simple Benchmark
In this simple benchmark, we compare two ways of finding the amplitude of a signal. normalized_rms computes it in a traditional way, handling each number one by one in Python code. normalized_rms_ulab computes more quickly by working on groups of numbers in a ulab array at the same time. ulab.numpy.std computes most quickly by moving all operations from Python to ulab.
# SPDX-FileCopyrightText: 2020 Jeff Epler for Adafruit Industries
# SPDX-FileCopyrightText: 2020 Zoltán Vörös for Adafruit Industries
#
# SPDX-License-Identifier: MIT

import time
import math
from ulab import numpy as np

def mean(values):
    return sum(values) / len(values)

def normalized_rms(values):
    minbuf = int(mean(values))
    samples_sum = sum(
        float(sample - minbuf) * (sample - minbuf)
        for sample in values
    )

    return math.sqrt(samples_sum / len(values))

def normalized_rms_ulab(values):
    # this function works with ndarrays only
    minbuf = np.mean(values)
    values = values - minbuf
    samples_sum = np.sum(values * values)
    return math.sqrt(samples_sum / len(values))

# Instead of using sensor data, we generate some data
# The amplitude is 5000 so the rms should be around 5000/1.414 = 3536
nums_list = [int(8000 + math.sin(i) * 5000) for i in range(100)]
nums_array = np.array(nums_list)

def timeit(s, f, n=100):
    t0 = time.monotonic_ns()
    for _ in range(n):
        x = f()
    t1 = time.monotonic_ns()
    r = (t1 - t0) * 1e-6 / n
    print("%-30s : %8.3fms [result=%f]" % (s, r, x))

print("Computing the RMS value of 100 numbers")
timeit("traditional", lambda: normalized_rms(nums_list))
timeit("ulab, with ndarray, some implementation in python", lambda: normalized_rms_ulab(nums_array))
timeit("ulab only, with list", lambda: np.std(nums_list))
timeit("ulab only, with ndarray", lambda: np.std(nums_array))
On my Metro M4, the ulab code computes almost exactly the same value, but over 40 times faster. Take care if running this on a board with an LCD display such as the CLUE, printing the results on the display takes a lot longer than the computation itself, and completely distorts the results.
traditional               :    2.951ms [result=3535.843611]
ulab, algorithm in python :    0.251ms [result=3535.853624]
ulab only, with list      :    0.336ms [result=3535.854340]
ulab only, with ndarray   :    0.068ms [result=3535.854340]
FFT Example: Waterfall Spectrum Analyzer
Use the microphone on your Adafruit CLUE to measure the different frequencies that are present in sound and display it on the LCD display. This shows the author whistling up and down a musical scale.
The program is below. The program samples audio for a short time and then computes the fast Fourier transform (FFT) of the audio data. FFT is a way of turning a series of samples over time into a list of the relative intensity of each frequency in a range.
While running the demo, here are some things you might like to try:
- Sing or whistle a musical scale
- Look at the difference between saying "ah", "th", and "sss"
- See how your favorite music looks when you transform it by FFT
(Note that because the program alternates between recording sound and doing computations, it can miss registering short sounds like claps.)
# SPDX-FileCopyrightText: 2020 Jeff Epler for Adafruit Industries
#
# SPDX-License-Identifier: MIT

"""Waterfall FFT demo adapted from
https://teaandtechtime.com/fft-circuitpython-library/
to work with ulab on Adafruit CLUE"""

import array

import board
import audiobusio
import displayio
from ulab import numpy as np
from ulab.scipy.signal import spectrogram

display = board.DISPLAY

# Create a heatmap color palette
palette = displayio.Palette(52)
for i, pi in enumerate((0xff0000, 0xff0a00, 0xff1400, 0xff1e00,
                        0xff2800, 0xff3200, 0xff3c00, 0xff4600,
                        0xff5000, 0xff5a00, 0xff6400, 0xff6e00,
                        0xff7800, 0xff8200, 0xff8c00, 0xff9600,
                        0xffa000, 0xffaa00, 0xffb400, 0xffbe00,
                        0xffc800, 0xffd200, 0xffdc00, 0xffe600,
                        0xfff000, 0xfffa00, 0xfdff00, 0xd7ff00,
                        0xb0ff00, 0x8aff00, 0x65ff00, 0x3eff00,
                        0x17ff00, 0x00ff10, 0x00ff36, 0x00ff5c,
                        0x00ff83, 0x00ffa8, 0x00ffd0, 0x00fff4,
                        0x00a4ff, 0x0094ff, 0x0084ff, 0x0074ff,
                        0x0064ff, 0x0054ff, 0x0044ff, 0x0032ff,
                        0x0022ff, 0x0012ff, 0x0002ff, 0x0000ff)):
    palette[51-i] = pi

class RollingGraph(displayio.TileGrid):
    def __init__(self, scale=2):
        # Create a bitmap with heatmap colors
        self._bitmap = displayio.Bitmap(display.width//scale,
                                       display.height//scale, len(palette))
        super().__init__(self._bitmap, pixel_shader=palette)

        self.scroll_offset = 0

    def show(self, data):
        y = self.scroll_offset
        bitmap = self._bitmap

        board.DISPLAY.auto_refresh = False
        offset = max(0, (bitmap.width-len(data))//2)
        for x in range(min(bitmap.width, len(data))):
            bitmap[x+offset, y] = int(data[x])

        board.DISPLAY.auto_refresh = True

        self.scroll_offset = (y + 1) % self.bitmap.height

group = displayio.Group(scale=3)
graph = RollingGraph(3)
fft_size = 256

# Add the TileGrid to the Group
group.append(graph)

# Add the Group to the Display
display.root_group = group

# instantiate board mic
mic = audiobusio.PDMIn(board.MICROPHONE_CLOCK, board.MICROPHONE_DATA,
                       sample_rate=16000, bit_depth=16)

#use some extra sample to account for the mic startup
samples_bit = array.array('H', [0] * (fft_size+3))

# Main Loop
def main():
    max_all = 10

    while True:
        mic.record(samples_bit, len(samples_bit))
        samples = np.array(samples_bit[3:])
        spectrogram1 = spectrogram(samples)
        # spectrum() is always nonnegative, but add a tiny value
        # to change any zeros to nonzero numbers
        spectrogram1 = np.log(spectrogram1 + 1e-7)
        spectrogram1 = spectrogram1[1:(fft_size//2)-1]
        min_curr = np.min(spectrogram1)
        max_curr = np.max(spectrogram1)

        if max_curr > max_all:
            max_all = max_curr
        else:
            max_curr = max_curr-1

        print(min_curr, max_all)
        min_curr = max(min_curr, 3)
        # Plot FFT
        data = (spectrogram1 - min_curr) * (51. / (max_all - min_curr))
        # This clamps any negative numbers to zero
        data = data * np.array((data > 0))
        graph.show(data)

main()
Example: NeoPixel Wave Simulation
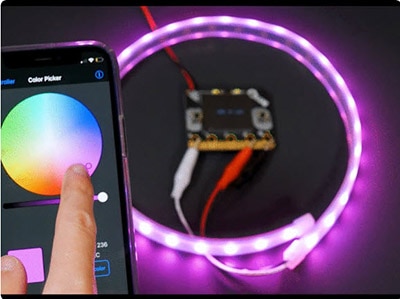
Create an ever-varying rainbow pattern on NeoPixel LED strips using the equation for "1D wave simulation".
It is possible to create numeric simulations of waves which resemble ocean waves or ripples on a pond. Here is an example as a web demo. In this case, instead of the simulation values representing heights of a liquid wave, they represent colors on the color wheel, which are shown on a neon-like NeoPixel strip. By changing a few parameters in the Python source code, you can create a relaxed experience or an almost stroboscopic effect.
This demo, heavily adapted from an answer on Stack Overflow, is designed for a neon-like NeoPixel strip and I ran it using an Adafruit Feather nRF52840. However, you can adapt it to a wide range of CircuitPython devices and NeoPixel strip types.
Wire the neopixels to the feather, as shown below. If you need to use a different pin than D5, or the number of neopixels you have is not 96, you'll need to change some things in the code.
You'll need to manually install the necessary libraries from the bundle:
- neopixel.mpy
Next, copy the code below to code.py on the CIRCUITPY drive.
Many of the parameters can be tinkered with to give different effects. Some are pretty, some are boring, and a few will even cause errors because they give a result of infinity!
The elements of f that are nonzero indicate places where energy is added to the wave. The main function randomly assigns one element of f to be nonzero, every once in a while.
dx, dt, and c control how quickly the wave reacts, but in slightly different ways. dx is how far apart the sampled points are, dt is how far apart in time the calculated instants are, and c is the maximum speed of a wave in distance per time. These are all in arbitrary units; they don't have anything to do with the physical distance between NeoPixels or the time between updates of the strip, which always goes as fast as possible.
The number 0.99 which is used as a multiplier of u and um within the main loop is a damping factor. 0.99 damps a very small amount. Values closer to 0 dampen the wave more.
# SPDX-FileCopyrightText: 2020 Jeff Epler for Adafruit Industries
#
# SPDX-License-Identifier: MIT
import random

import board
import neopixel
from rainbowio import colorwheel
from ulab import numpy as np

# Customize your neopixel configuration here...
pixel_pin = board.D5
num_pixels = 96
pixels = neopixel.NeoPixel(pixel_pin, num_pixels, brightness=0.1,
                           auto_write=False, pixel_order=neopixel.RGB)

ddt = np.array([1.,-2.,1.])
def step(u, um, f, n, dx, dt, c):
    dt2 = dt*dt
    C2 = (c*dt/dx)**2
    deriv = np.convolve(u, ddt)[1:-1] * C2
    up = -um + u * 2 + deriv + f * dt2
    up[0] = 0
    up[n-1] = 0

    return up

def main():
    # This precomputes the color palette for maximum speed
    # You could change it to compute the color palette of your choice
    w = [colorwheel(i) for i in range(256)]

    # This sets up the initial wave as a smooth gradient
    u = np.zeros(num_pixels)
    um = np.zeros(num_pixels)
    f = np.zeros(num_pixels)

    slope = np.linspace(0, 256, num=num_pixels)
    th = 1

    # the first time is always random (is that a contradiction?)
    r = 0

    while True:

        # Some of the time, add a random new wave to the mix
        # increase .15 to add waves more often
        # decrease it to add waves less often
        if r < .01:
            ii = random.randrange(1, num_pixels-1)
            # increase 2 to make bigger waves
            f[ii] = (random.random() - .5) * 2

        # Here's where to change dx, dt, and c
        # try .2, .02, 2 for relaxed
        # try 1., .7, .2 for very busy / almost random
        u, um = step(u, um, f, num_pixels, .1, .02, 1), u

        v = u * 200000 + slope + th
        for i, vi in enumerate(v):
            # Scale up by an empirical value, rotate by th, and look up the color
            pixels[i] = w[round(vi) % 256]

        # Take away a portion of the energy of the waves so they don't get out
        # of control
        u = u * .99

        # incrementing th causes the colorwheel to slowly cycle even if nothing else is happening
        th = (th + .25) % 256
        pixels.show()

        # Clear out the old random value, if any
        f[ii] = 0

        # and get a new random value
        r = random.random()

main()
Filter Example: Pulse Rate Estimation
Sensor data is often noisy or contains slowly varying DC offsets. Here we will see how to use Finite Impulse Response Filters (FIRs) to get just the part of the signal that is of interest.
Designing the "taps" of a filter is somewhat of an art. Websites like https://fiiir.com/ can ease the task and even provide the filter values as a Python list ready to paste into your program. As a rule of thumb, doubling the number of taps in your filter doubles the computation time, so a smaller filter is much faster than a larger one. (Also, before the data coming out of a filter is valid, the number of data points must be at least the number of taps. This is why the pulse waveform takes about 2 seconds to start displaying.)
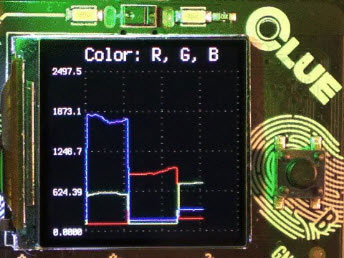
High pass filtering: Measuring pulse with CLUE's APDS
The gesture sensor on the CLUE, APDS9960, can be used as a crude pulse sensor. You can also use other CircuitPython boards together with the APDS9960 breakout board. As your heart pumps blood, the amount of light that is transmitted through your skin changes very slightly. In this demo, a high-pass FIR filter is used to exclude the parts of the signal that change at less than .5Hz (equivalent of a 30bpm heart rate) and preserve higher frequencies up to 4Hz (equivalent to a 240bpm heart rate.)
Make sure the following libraries from the bundle are installed:
- adafruit_apds9960
- adafruit_bus_device
- adafruit_register
Next, copy code.py (below) to the CIRCUITPY drive. Open up the Mu editor and its plotter window. Press your finger firmly on the sensor just above the CLUE's screen. When your finger is registered, the white LEDs will turn on. After a few seconds, a graph of the recorded pulse data will begin to display. Shortly after that, an estimated pulse rate will be displayed too. When you remove your finger, the plot will stop, and the LEDs will turn back off.
During the demo, the CLUE's screen is blank to preserve processing power for the script.
Depending on your individual body, this demo may work well or not at all. It worked very well for the author, but not at all for a spouse - don't press too hard and try first finger and also thumb.
Of course, this is just a toy, not medical diagnostic equipment!
Here's what you will see in mu if the sensor is picking up your pulse: a somewhat irregular waveform in blue, and an estimated pulse rate in green. The values shown at the left represent the current filtered light value and the estimated pulse in beats per minute.
# SPDX-FileCopyrightText: 2020 Jeff Epler for Adafruit Industries
#
# SPDX-License-Identifier: MIT

import time

import adafruit_apds9960.apds9960
import board
import digitalio
from ulab import numpy as np

# Blank the screen.  Scrolling text causes unwanted delays.
import displayio
d = displayio.Group()
board.DISPLAY.root_group = d

# Filter computed at https://fiiir.com/
# Sampling rate: 8Hz
# Cutoff freqency: 0.5Hz
# Transition bandwidth 0.25Hz
# Window type: Regular
# Number of coefficients: 31
# Manually trimmed to 16 coefficients
taps = np.array([
    +0.861745279666917052/2,
    -0.134728583242092248,
    -0.124472980501612152,
    -0.108421190967457198,
    -0.088015688587190874,
    -0.065052714580474319,
    -0.041490993500537393,
    -0.019246940463156042,
    -0.000000000000000005,
    +0.014969842582454691,
    +0.024894596100322432,
    +0.029569415718397409,
    +0.029338562862396955,
    +0.025020274838643962,
    +0.017781854357373172,
    +0.008981905549472832,
])

# How much reflected light is required before pulse sensor activates
# These values are triggered when I bring my finger within a half inch.
# The sensor works when the finger is pressed lightly against the sensor.
PROXIMITY_THRESHOLD_HI = 225
PROXIMITY_THRESHOLD_LO = 215

# These constants control how much the sensor amplifies received light
APDS9660_AGAIN_1X = 0
APDS9660_AGAIN_4X = 1
APDS9660_AGAIN_16X = 2
APDS9660_AGAIN_64X = 3

# How often we are going to poll the sensor (If you change this, you need
# to change the filter above and the integration time below)
dt = 125000000 # 8Hz, 125ms

# Wait until after deadline_ns has passed
def sleep_deadline(deadline_ns):
    while time.monotonic_ns() < deadline_ns:
        pass

# Compute a high resolution crossing-time estimate for the sample, using a
# linear model
def estimated_cross_time(y0, y1, t0):
    m = (y1 - y0) / dt
    return t0 + round(-y1 / m)

i2c = board.I2C()
sensor = adafruit_apds9960.apds9960.APDS9960(i2c)
white_leds = digitalio.DigitalInOut(board.WHITE_LEDS)
white_leds.switch_to_output(False)

def main():
    sensor.enable_proximity = True
    while True:
        # Wait for user to put finger over sensor
        while sensor.proximity < PROXIMITY_THRESHOLD_HI:
            time.sleep(.01)

        # After the finger is sensed, set up the color sensor
        sensor.enable_color = True
        # This sensor integration time is just a little bit shorter than 125ms,
        # so we should always have a fresh value when we ask for it, without
        # checking if a value is available.
        sensor.integration_time = 220
        # In my testing, 64X gain saturated the sensor, so this is the biggest
        # gain value that works properly.
        sensor.color_gain = APDS9660_AGAIN_4X
        white_leds.value = True

        # And our data structures
        # The most recent data samples, equal in number to the filter taps
        data = np.zeros(len(taps))
        # The filtered value on the previous iteration
        old_value = 1
        # The times of the most recent pulses registered.  Increasing this number
        # makes the estimation more accurate, but at the expense of taking longer
        # before a pulse number can be computed
        pulse_times = []
        # The estimated heart rate based on the recent pulse times
        rate = None
        # the number of samples taken
        n = 0

        # Rather than sleeping for a fixed duration, we compute a deadline
        # in nanoseconds and wait for the new deadline time to arrive.  This
        # helps the long term frequency of measurements better match the desired
        # frequency.
        t0 = deadline = time.monotonic_ns()
        # As long as their finger is over the sensor, capture data
        while sensor.proximity >= PROXIMITY_THRESHOLD_LO:
            deadline += dt
            sleep_deadline(deadline)
            value = sum(sensor.color_data) # Combination of all channels
            data = np.roll(data, 1)
            data[-1] = value
            # Compute the new filtered variable by applying the filter to the
            # recent data samples
            filtered = np.sum(data * taps)

            # We gathered enough data to fill the filters, and
            # the light value crossed the zero line in the positive direction
            # Therefore we need to record a pulse
            if n > len(taps) and old_value < 0 <= filtered:
                # This crossing time is estimated, but it increases the pulse
                # estimate resolution quite a bit.  If only the nearest 1/8s
                # was used for pulse estimation, the smallest pulse increment
                # that can be measured is 7.5bpm.
                cross = estimated_cross_time(old_value, filtered, deadline)
                # store this pulse time (in seconds since sensor-touch)
                pulse_times.append((cross - t0) * 1e-9)
                # and maybe delete an old pulse time
                del pulse_times[:-10]
                # And compute a rate based on the last recorded pulse times
                if len(pulse_times) > 1:
                    rate = 60/(pulse_times[-1]-pulse_times[0])*(len(pulse_times)-1)
            old_value = filtered

            # We gathered enough data to fill the filters, so report the light
            # value and possibly the estimated pulse rate
            if n > len(taps):
                print((filtered, rate))
            n += 1

        # Turn off the sensor and the LED and go back to the top for another run
        sensor.enable_color = False
        white_leds.value = False
        print()
main()
Filter Example: Measuring barometric pressure
Low pass filtering: Measuring barometric Pressure with a BMP280
In the pulse rate estimation example, we used a filter to remove the low frequency (slowly changing) part of a signal and preserve the high frequency part. This is known as a high pass filter.
To measure barometric pressure, we instead want to preserve the slowly changing part of the signal and exclude the quickly changing part, AKA noise. This is known as a low-pass filter.
This example is designed for CLUE or Feather Sense but can be adapted to other supported boards with the BMP280 breakout.
The image below shows a typical plot in Mu. The green trace is unfiltered, the blue is filtered. Notice how the blue trace is smoother than the green but is also moved further to the right. This represents the phase shift of the filter, which is about 10 seconds.
You'll need to manually install the necessary libraries from the bundle:
- adafruit_bmp280.mpy
- adafruit_bus_device
Before continuing make sure your board's lib folder or root filesystem has the adafruit_bmp280.mpy, and adafruit_bus_device files and folders copied over. Put the following Python code into code.py and then open the Mu plotter window. In the plot, you will see a noisy, unfiltered trace and a smooth filtered trace.
Note that the barometric pressure value is offset by 980, which happened to be the local barometric pressure when this example was written. This is to move the values closer to the center of the Mu plot, which accentuates the variation in the value. You can remove the subtraction so that you are dealing with absolute, not relative, values.
# SPDX-FileCopyrightText: 2020 Jeff Epler for Adafruit Industries
#
# SPDX-License-Identifier: MIT

import time

import adafruit_bmp280
import board
import displayio
from ulab import numpy as np

# Blank the screen.  Scrolling text causes unwanted delays.
d = displayio.Group()
board.DISPLAY.root_group = d

# Sampling rate: 16Hz
# Cutoff frequency: 0.16Hz
# Transition bandwidth: 0.16Hz
# Window type: Hamming
# Filter has 311 coefficients
taps = np.array([
    -0.000050679794726066, -0.000041099278318167, -0.000031279920668665,
    -0.000021183486597150, -0.000010770285292045, +0.000000000000000000,
    +0.000011167446754809, +0.000022770999889941, +0.000034847558259864,
    +0.000047431049079466, +0.000060551498686721, +0.000074234108254511,
    +0.000088498343199344, +0.000103357045109305, +0.000118815575023601,
    +0.000134870996840645, +0.000151511309510219, +0.000168714736477861,
    +0.000186449080596567, +0.000204671152403140, +0.000223326279275218,
    +0.000242347902542027, +0.000261657269119383, +0.000281163223679941,
    +0.000300762106756334, +0.000320337763510928, +0.000339761667195315,
    +0.000358893160569588, +0.000377579817760222, +0.000395657928211038,
    +0.000412953103529159, +0.000429281007152519, +0.000444448205872873,
    +0.000458253141344113, +0.000470487218795955, +0.000480936009263626,
    +0.000489380560741255, +0.000495598812776238, +0.000499367108150093,
    +0.000500461794444300, +0.000498660907473236, +0.000493745927786584,
    +0.000485503600706003, +0.000473727809671115, +0.000458221492033063,
    +0.000438798585855176, +0.000415285995764155, +0.000387525565446236] +
    [+0.000355376044004699, +0.000318715033091691, +0.000277440901501588,
    +0.000231474653767861, +0.000180761739242710, +0.000125273788160487,
    +0.000065010261293197, +0.000000000000000000, -0.000069697336247377,
    -0.000143989957415198, -0.000222752767634882, -0.000305826338672358,
    -0.000393016043088374, -0.000484091357342654, -0.000578785344322494,
    -0.000676794323931742, -0.000777777739462615, -0.000881358226495441,
    -0.000987121890034750, -0.001094618794499868, -0.001203363670049808,
    -0.001312836837542114, -0.001422485353209744, -0.001531724372895900,
    -0.001639938734420840, -0.001746484755374530, -0.001850692242341569,
    -0.001951866706278179, -0.002049291777482158, -0.002142231812333790,
    -0.002229934682745978, -0.002311634738053158, -0.002386555927898205,
    -0.002453915073551964, -0.002512925274028313, -0.002562799432345805,
    -0.002602753886341418, -0.002632012127569287, -0.002649808591023194,
    -0.002655392497711921, -0.002648031731496151, -0.002627016731069257,
    -0.002591664377536210, -0.002541321857718479, -0.002475370483091317,
    -0.002393229444145817, -0.002294359479963247, -0.002178266442894981,
    -0.002044504738458277, -0.001892680620886388, -0.001722455325210333,
    -0.001533548017297868, -0.001325738543930948, -0.001098869965763655,
    -0.000852850856865069, -0.000587657355512251, -0.000303334951952833,
    +0.000000000000000001, +0.000322159059450752, +0.000662880773589522,
    +0.001021830060775982, +0.001398597909331569, +0.001792701398335994,
    +0.002203584045179127, +0.002630616483032971, +0.003073097469789485,
    +0.003530255228366684, +0.004001249116626688, +0.004485171623483914,
    +0.004981050686118591, +0.005487852321559077, +0.006004483564265146,
    +0.006529795699742466, +0.007062587782654920, +0.007601610426384373,
    +0.008145569849526276, +0.008693132163411565, +0.009242927883419039,
    +0.009793556645595150, +0.010343592108937170, +0.010891587022627668,
    +0.011436078436539264, +0.011975593032464911, +0.012508652552774892,
    +0.013033779302562583, +0.013549501700820601, +0.014054359855790191,
    +0.014546911139352909, +0.015025735735186426, +0.015489442135386880,
    +0.015936672560369614, +0.016366108277098043, +0.016776474791055797,
    +0.017166546887869318, +0.017535153501103896, +0.017881182383493146] +
    [+0.018203584559716979, +0.018501378539810983, +0.018773654273367416,
    +0.019019576825867947, +0.019238389759765797, +0.019429418204303113,
    +0.019592071599501125, +0.019725846101288819, +0.019830326636332028,
    +0.019905188596781104, +0.019950199166862841, +0.019965218274992248,
    +0.019950199166862841, +0.019905188596781104, +0.019830326636332028,
    +0.019725846101288819, +0.019592071599501125, +0.019429418204303113,
    +0.019238389759765800, +0.019019576825867947, +0.018773654273367420,
    +0.018501378539810983, +0.018203584559716979, +0.017881182383493149,
    +0.017535153501103892, +0.017166546887869318, +0.016776474791055797,
    +0.016366108277098043, +0.015936672560369614, +0.015489442135386881,
    +0.015025735735186426, +0.014546911139352912, +0.014054359855790193,
    +0.013549501700820601, +0.013033779302562583, +0.012508652552774890,
    +0.011975593032464912, +0.011436078436539264, +0.010891587022627668,
    +0.010343592108937174, +0.009793556645595150, +0.009242927883419041,
    +0.008693132163411567, +0.008145569849526276, +0.007601610426384373,
    +0.007062587782654920, +0.006529795699742466, +0.006004483564265146,
    +0.005487852321559078, +0.004981050686118592, +0.004485171623483914,
    +0.004001249116626688, +0.003530255228366684, +0.003073097469789486,
    +0.002630616483032971, +0.002203584045179127, +0.001792701398335993,
    +0.001398597909331569, +0.001021830060775982, +0.000662880773589522,
    +0.000322159059450752, +0.000000000000000001, -0.000303334951952833,
    -0.000587657355512251, -0.000852850856865070, -0.001098869965763655] +
    [-0.001325738543930948, -0.001533548017297868, -0.001722455325210333,
    -0.001892680620886389, -0.002044504738458278, -0.002178266442894981,
    -0.002294359479963247, -0.002393229444145818, -0.002475370483091317,
    -0.002541321857718479, -0.002591664377536210, -0.002627016731069256,
    -0.002648031731496151, -0.002655392497711923, -0.002649808591023195,
    -0.002632012127569288, -0.002602753886341418, -0.002562799432345805,
    -0.002512925274028314, -0.002453915073551965, -0.002386555927898205,
    -0.002311634738053157, -0.002229934682745978, -0.002142231812333790,
    -0.002049291777482159, -0.001951866706278179, -0.001850692242341569,
    -0.001746484755374531, -0.001639938734420841, -0.001531724372895900,
    -0.001422485353209745, -0.001312836837542114, -0.001203363670049807,
    -0.001094618794499867, -0.000987121890034750, -0.000881358226495441,
    -0.000777777739462615, -0.000676794323931742, -0.000578785344322494,
    -0.000484091357342654, -0.000393016043088375, -0.000305826338672358,
    -0.000222752767634882, -0.000143989957415198, -0.000069697336247377,
    +0.000000000000000000, +0.000065010261293198, +0.000125273788160487,
    +0.000180761739242710, +0.000231474653767861, +0.000277440901501588,
    +0.000318715033091691, +0.000355376044004699, +0.000387525565446236,
    +0.000415285995764155, +0.000438798585855176, +0.000458221492033064,
    +0.000473727809671115, +0.000485503600706004, +0.000493745927786584,
    +0.000498660907473236, +0.000500461794444300, +0.000499367108150093,
    +0.000495598812776237, +0.000489380560741255, +0.000480936009263626,
    +0.000470487218795956, +0.000458253141344114, +0.000444448205872873,
    +0.000429281007152519, +0.000412953103529159, +0.000395657928211038,
    +0.000377579817760223, +0.000358893160569588, +0.000339761667195315,
    +0.000320337763510927, +0.000300762106756335, +0.000281163223679941,
    +0.000261657269119383, +0.000242347902542027, +0.000223326279275218,
    +0.000204671152403140, +0.000186449080596567, +0.000168714736477861,
    +0.000151511309510219, +0.000134870996840645, +0.000118815575023601,
    +0.000103357045109305, +0.000088498343199344, +0.000074234108254511,
    +0.000060551498686721, +0.000047431049079466, +0.000034847558259864,
    +0.000022770999889941, +0.000011167446754809, +0.000000000000000000,
    -0.000010770285292045, -0.000021183486597150, -0.000031279920668665,
    -0.000041099278318167, -0.000050679794726066,
])

# How often we are going to poll the sensor (If you change this, you need
# to change the filter above and the integration time below)
dt = 62500000 # 16Hz, 62.5ms

# Wait until after deadline_ns has passed
def sleep_deadline(deadline_ns):
    while time.monotonic_ns() < deadline_ns:
        pass


# Initialize our sensor
i2c = board.I2C()  # uses board.SCL and board.SDA
# i2c = board.STEMMA_I2C()  # For using the built-in STEMMA QT connector on a microcontroller
sensor = adafruit_bmp280.Adafruit_BMP280_I2C(i2c)
sensor.standby_period = adafruit_bmp280.STANDBY_TC_1000
# Disable in-sensor filtering, because we want to show how it's done in
# CircuitPython
sensor.iir_filter = adafruit_bmp280.IIR_FILTER_DISABLE
sensor.overscan_pressure = adafruit_bmp280.OVERSCAN_X1

# And our data structures
# The most recent data samples, equal in number to the filter taps
data = np.zeros(len(taps))
t0 = deadline = time.monotonic_ns()
n = 0
# Take an initial reading to subtract off later, so that the graph in mu
# accentuates the small short term changes in pressure rather than the large
# DC offset of around 980
offset = sensor.pressure

while True:
    deadline += dt
    sleep_deadline(deadline)
    # Move the trace near the origin so small differences can be seen in the mu
    # plot window .. you wouldn't do this subtraction step if you are really
    # interested in absolute barometric pressure.
    value = sensor.pressure - offset
    if n == 0:
        # The first time, fill the filter with the initial value
        data = data + value
    else:
        # Otherwise, add it as the next sample
        data = np.roll(data, 1)
        data[-1] = value
    filtered = np.sum(data * taps)
    # Actually print every 10th value.  This prints about 1.6 values per
    # second.  You can print values more quickly by removing the 'if' and
    # making the print unconditional, or change the frequency of prints up
    # or down by changing the number '10'.
    if n % 10 == 0:
        print((filtered, value))
    n += 1
Writing code for ulab and numpy
Importing ulab
The ulab module is split into two main parts ulab.numpy and ulab.scipy each of which provide similar functionality to their respective CPython library counterpart. You can rename ulab.numpy when you import it to use the shorthand name np. from ulab import numpy as np then in your code you can call the functions like np.sum() etc. Many existing CPython numpy examples are written to use this shorthand name.
Working with CircuitPython and Blinka
Where possible, if a ulab function and a numpy function have the same name, ulab's functionality is a subset of numpy.
try:
  import ulab.numpy as np
except ImportError:
  import numpy as np

u = np.array([1,2,3,4])
v = np.array([1,-2,1])
print(np.convolve(u, v))
Numpy/ulab differences
Many ulab functions do not support all the same arguments as numpy. For instance, numpy.convolve supports several ways of controlling how the boundary conditions are handled, using the mode= named parameter. However, ulab.numpy.convolve always acts like numpy's mode='full'.
In a few cases, numpy accepts a positional argument but ulab requires a named parameter. This is true of ulab.numpy.linspace's num= argument, for instance.
ulab does not support complex numbers. Because of this, ulab's fft returns a pair of arrays, where the first array holds the real part of the fft and the second array holds the imaginary part. Instead of using fft directly, consider whether to use ulab.scipy.signal.spectrogram instead. For compatibility with both CircuitPython and Blinka, spectrum can be implemented as follows:
try:
  from ulab import numpy as np
except ImportError:
  import numpy as np

try:
  from ulab.scipy.signal import spectrogram
except ImportError:
  def spectrogram(arr):
    return abs(np.fft.fft(arr))

data = np.array([1,2,1,4])
print(spectrogram(data))


