制造商零件编号 A000066
ARDUINO UNO R3 ATMEGA328P BOARD
Arduino
Though working on the Science Olympiad Robot Tour has been one of the students' primary goals, another has turned their focus to their Senior Capstone Project. At Pearl City High School, in order to receive STEM/CTE honors, each student is required to complete a capstone project in their pathway (cybersecurity, engineering, medical studies, business, graphic design, etc.). This particular student is in the engineering pathway and decided to work on a robotics/embedded systems project.
When the students first came to me for advice, they emphasized that they wanted to work on something cool but with practical applications. The main requirement of their project was that it needed to have an impact somewhere. As such, since I had a spare on hand, I suggested that they work with the Pixy2--an easy-to-use camera that detects colors and returns them as "blocks." You can read more about it in my blog here. This would allow them to work on a project that could process real-world data and transmit it somewhere.
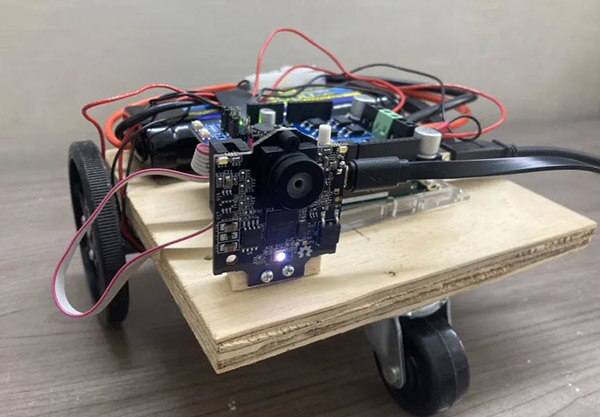
The next step was to build a rover--something that I've done dozens of times at this point. The design was simple--motors controlled by PWM from an Arduino UNO via a motor shield. All these components were easy to put together and easy to use, making the production of the rover extremely simple. The Arduino UNO and Pixy2 have a compatible cable that allows for seamless integration.

The student mounted everything on top of a wooden base and got to work on coding.
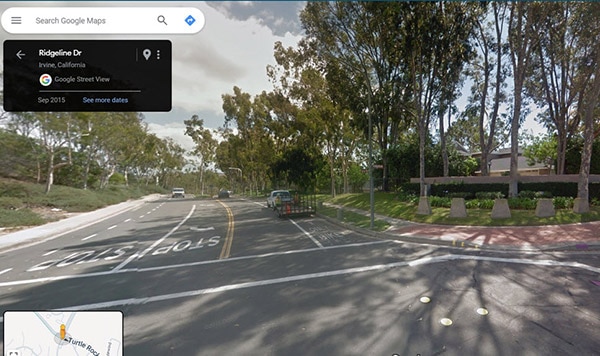
Now, it was up to the student to find an application for the rover. Having put everything together, they now needed to think of what it could be used for--and what they could code it around. In the end, they chose to utilize it for mapping out indoor areas. Something that's commonly done for hard-to-navigate buildings or even house tours is photographers taking individual photos of each area and piecing them together in an interactive 3D environment. It's similar to how Google Maps does their street view:

To get an equivalent for an indoor model, it usually takes a photographer a great amount of time to not only get out there but also to take the photos and piece them together. The idea was to make an autonomous rover that would take photos of an indoor space and automatically send them to a program that could piece it together. The rover would recognize specific symbols that would indicate for it to go into a room and take a photo, or for it to continue going forward. This means that all the person would need to do is put symbols on doorways or floors and the rover would do the rest of the work. This would, in turn, make it easier for anybody to operate and wouldn't require the expensive services of a photographer.
Now, with the finished rover:

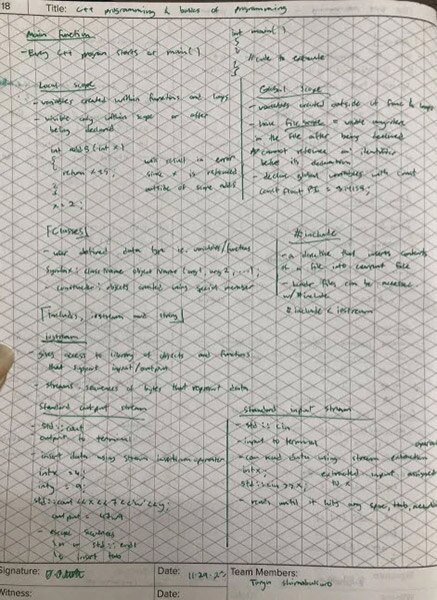
The student now needed to produce a sort of "proof-of-concept" demonstration. In order to do this, the goal for the rover was to detect a symbol on a doorway, go inside the room, snap a photo, and then leave to go further down the hall. For us to get there, I had the student learn basic C coding in the Arduino IDE:

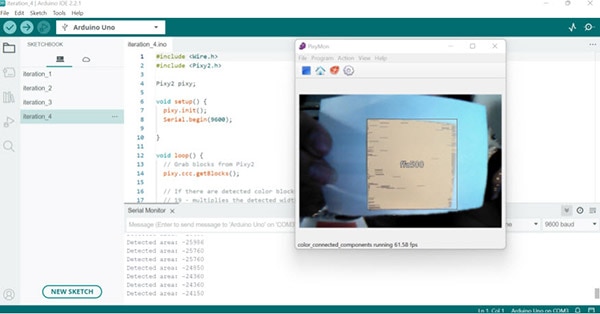
The biggest problem the student had was utilizing the Pixy2 library, but through looking up documentation and watching videos on how to use PixyMon (Pixy2's application), they were able to get the rover to not only detect a symbol but move as a result of it! They were even able to start doing calculations on the detected area to possibly determine how far away it is and to start making adjustments to the movements.

These students have worked hard on their own and have been very quick learners through our Zoom calls. Their presentation is very soon, and I'm optimistic that they will pass with flying colors. For the next steps, they were looking towards implementing the actual camera to take photos onto the rover and possibly figuring out how to send photos over Wi-Fi, which will require a different microcontroller and a set of different components. However, for now, they've been successful with their project and are looking towards implementing this into Robot Tour, where they need to navigate through a 16x16 maze.
Check out the other robotics education blogs here!