制造商零件编号 26200B-211
LED RING LIGHT 1.57" ID
Aven Tools
Test Equipment Other Equipment
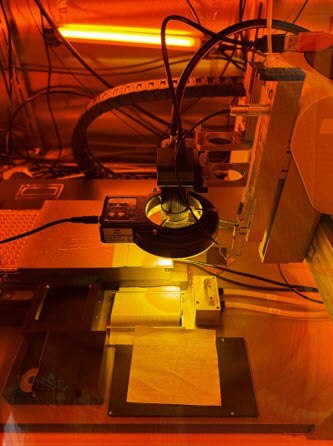
The Aven Tools LED Lamp is designed to provide precise, bright lighting for detailed tasks. Its energy-efficient LED technology and high-quality build make it a versatile choice for various applications. Here, I will focus on its suitability for use with a multi-material printer, specifically to integrate with a camera setup for enhancing the visibility of transparent hydrogel polymers.

In the world of transparent materials, achieving precise visibility is very important and quite tricky sometimes. One of the key challenges, especially when working with hydrogels, is ensuring that the camera can accurately capture the edges of the material for analysis. This is where the Aven Tools LED lamp comes into play. The lamp features a 7-step intensity control, allowing users to adjust the brightness to the exact level needed for their specific application. This customization ensures that it can provide just the right amount of light for optimal visibility without overexposing the picture. Additionally, the independent 4-zone control feature allows users to control different sections of the light individually. This enables precise lighting adjustments, perfect for setups where uniform lighting might not be ideal. You can customize the illumination pattern to suit the specific requirements of your printing and analysis process.

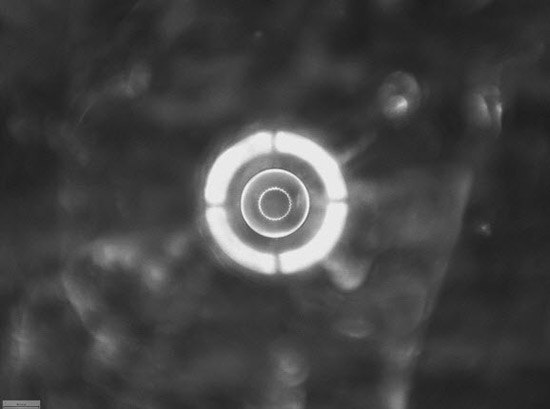
The ring-like light produced by the Aven Tools lamp is particularly useful for illuminating ring-shaped materials. This lighting effect creates a distinct ring reflex on transparent objects like hydrogels, enhancing the contrast at the edges. In the above image, generation of such a ring light reflex has been made visible.
To integrate the Aven Tools lamp into your printer setup, follow these steps:
When printing with transparent materials, standard lighting often falls short, making it difficult for cameras and analysis software to detect the edges of the material accurately. Proper lighting is crucial to create the necessary contrast for clear image capture. By integrating this lamp into your workflow, you can achieve better visibility and more accurate analysis of your printed materials, ultimately enhancing the quality and precision of your work. If you’re looking to improve your printing setup in terms of better optics, the Aven Tools lamp at its good price point, performance, and durability is a highly recommended addition in my opinion.