Arduino Inputs/Outputs with Becky Stern
2023-01-17 | By bekathwia
After you’re up to speed with your Arduino Basics and controlling a simple LED output, it’s time to learn about Arduino inputs–electrical signals used to provide information to an Arduino board, which can be programmed to listen to those signals and take actions based on them. In this guide, we’ll cover digital input with switches and analog input with variable resistors.

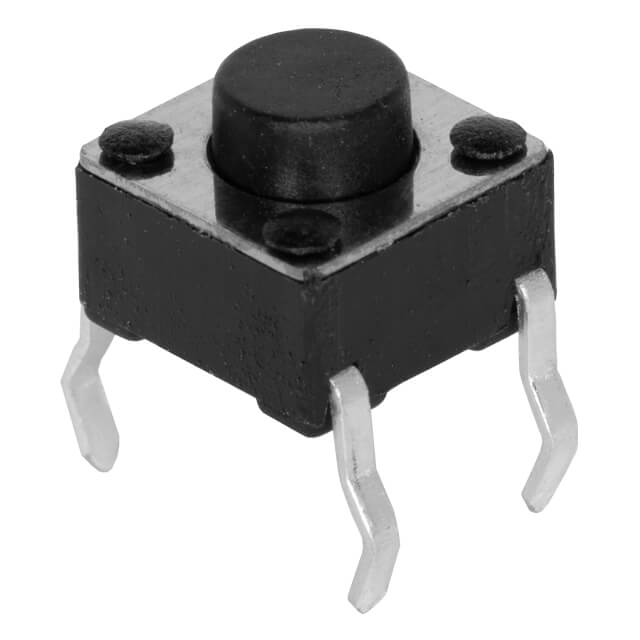
A switch is a mechanical device that connects or breaks a circuit, often using a lever or button. To follow along with building this circuit, you’ll need a tiny pushbutton, which is just one member of a huge variety of switches.
The board I recommend starting with is the Arduino Uno (1050-1024-ND), or compatibles such as the Adafruit Metro (1528-1214-ND), Sparkfun Redboard (1568-1977-ND), or Seeeduino (102010026-ND).
To build the circuits in this guide, you will need:
- Arduino Uno or compatible, and USB cable
- Solderless breadboard DK #1738-1326-ND
- Jumper wires DK #1528-1967-ND or solid-core hookup wire DK #1528-1743-ND
- 3V through-hole LEDs
- Through-hole resistors, 100-1000 ohms and 10K ohms
- Tactile switches DK #2223-TS02-66-60-BK-160-LCR-D-ND
- Potentiometer DK #1568-1616-ND
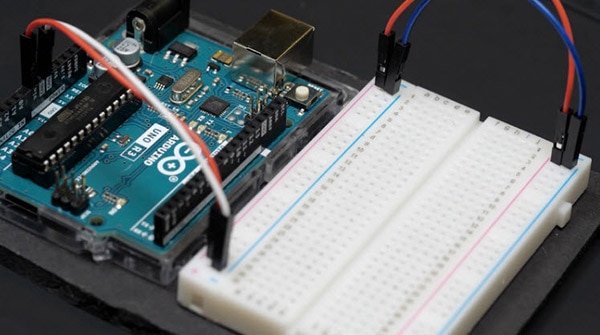
Start with the basic setup for prototyping a new circuit: Place the Arduino Uno board and solderless breadboard together on a mounting plate and connect the 5V and ground (GND) ports from the Arduino to the rails on both sides of the breadboard. This is the basic setup anytime I want to prototype a new circuit.
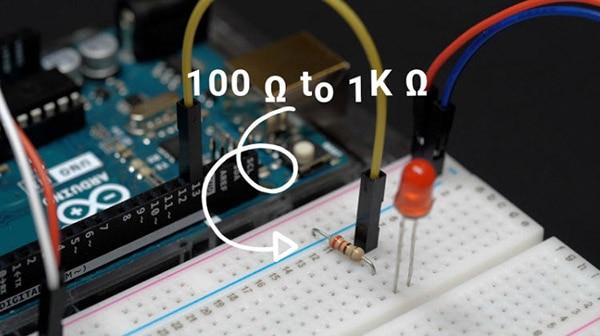
Then, connect an output LED, with the longer, positive leg connected to pin 13 and the negative leg connected to ground through a small-value resistor (100 ohms - 1K ohms).

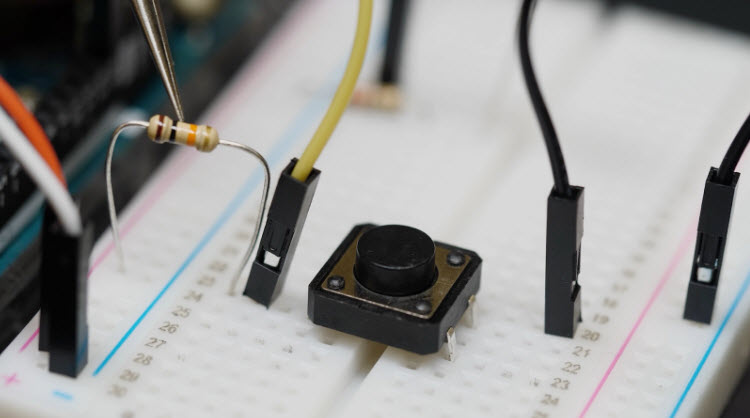
Next, add the pushbutton to the breadboard, which is designed to straddle the center dividing line. If it doesn’t click into place and stay snugly, you may have to bend the legs a little bit.
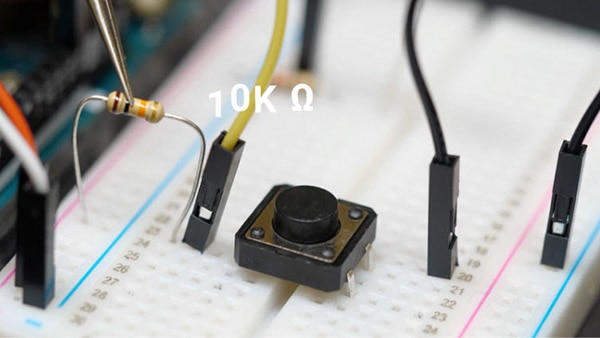
One side of the pushbutton is connected to both pin 2 and also to power through a large-value resistor (10K ohms). The other side of the switch is connected to ground.

I used the diagonal pin from the other connections because it’s a surefire way to find the correct wiring no matter how the switch is wired inside. You can also just check it with a multimeter set to continuity testing mode. Probe two pins on the switch and press it to see which are connected.

Once the circuit is put together, plug in the USB cable, and get ready to upload a new program.
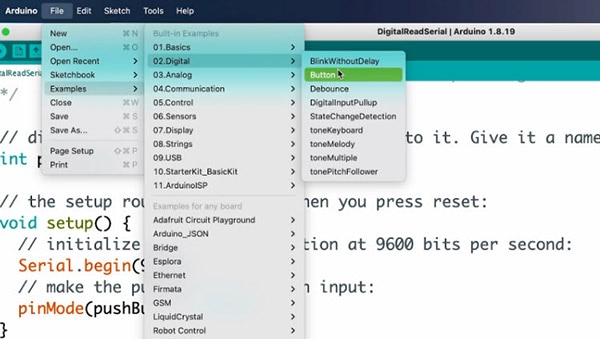
Open the downloadable Arduino software, and navigate to File, Examples, 02 Digital, and Button.
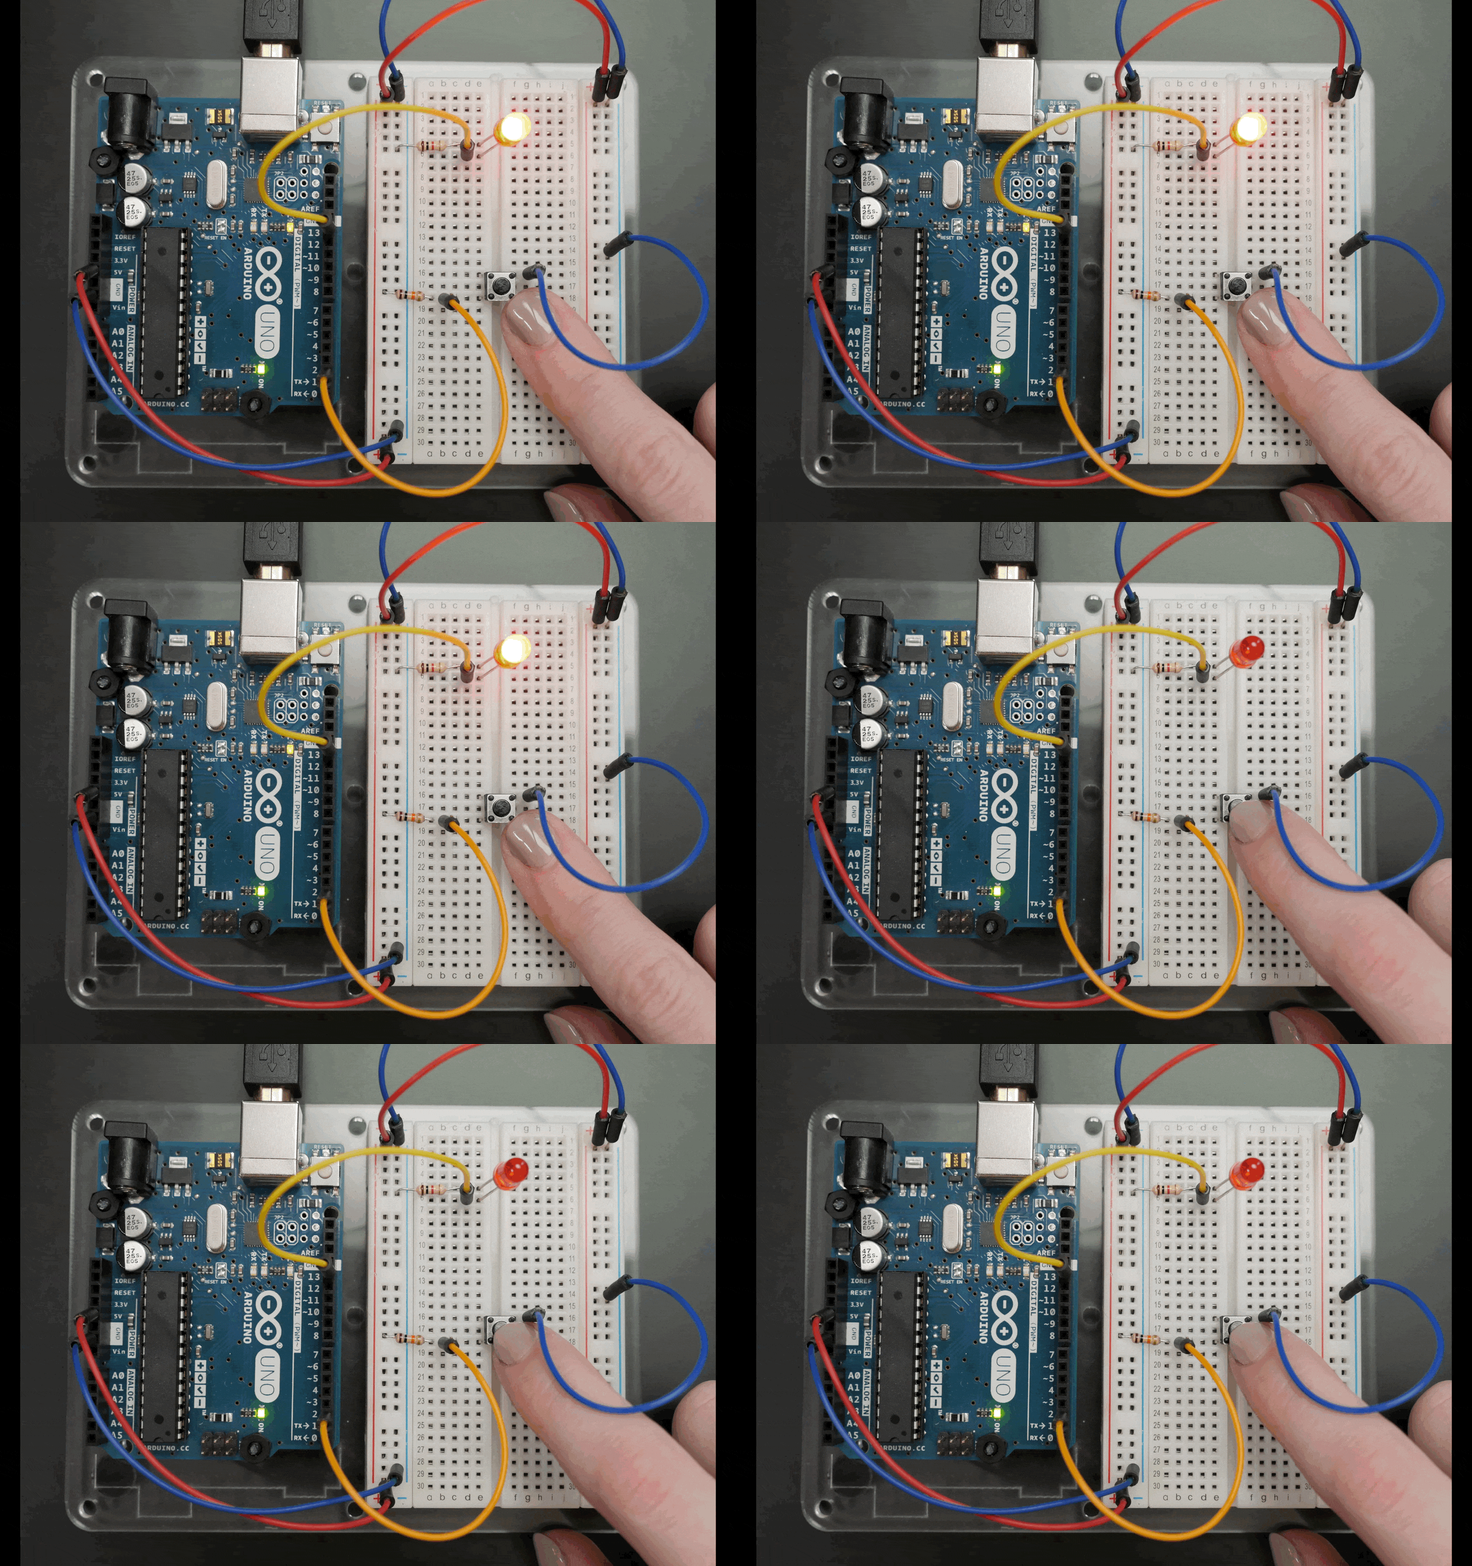
Once you upload the code to your Arduino board the LED should light up and turn off when you press the button.
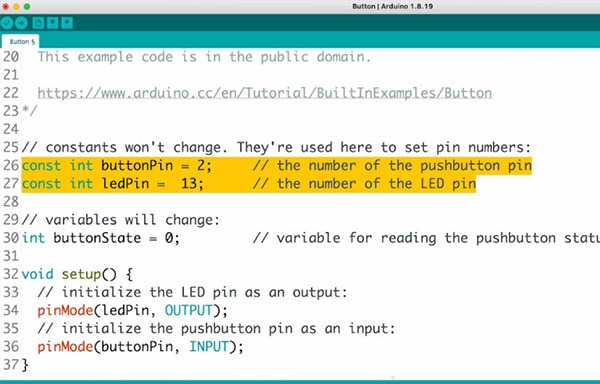
The first lines of this program introduce constants, which are similar to variables in that they store a piece of information. However, as you might guess, constants don't change throughout your program and are, therefore, great for things like PINs. They take up less memory space than variables.
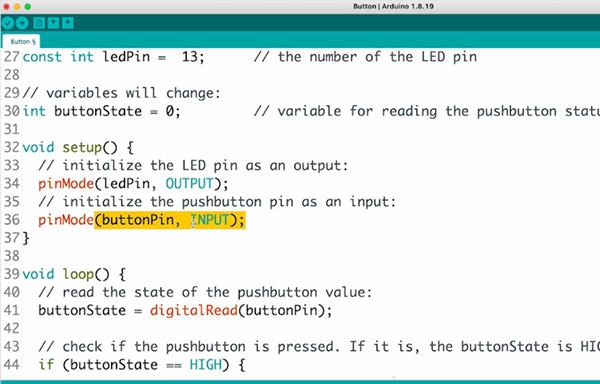
Row 36 configures Arduino pin 2 as an input, so we can "listen" to the electrical state of the pushbutton.

In the main loop, a function called digitalRead(); checks the state of pin 2, which will be either 5V aka HIGH or ground aka LOW, and stores that state in a variable called buttonState.

Row 44 contains an if statement which evaluates a condition using comparison operators like greater than, less than, or in our case, “equivalent to” noted with two equals signs. If the condition is met, the code inside the curly braces executes, setting the LED on (HIGH). If not, the code inside the else statement is executed instead, setting the LED off (LOW).
At rest, the switch leads are not connected. Pin 2 is connected through a beefy 10K resistor to 5V. When the button is pressed, the switch leads are connected, which allows pin 2 to be connected to ground with no resistor. Since electricity takes the path of least resistance, the pin will sense the ground connection strongly and ignore the weak (10K) connection to 5V. But when no other signal is present, like when the switch is not pressed that weak connection to 5V is all the pin can sense.
So, the resistor is "pulling the pin up" to 5V, and so it's called a pull-up resistor. Without one, pin 2 would be not connected to anything until the button is pressed. This is called a "floating pin" and can result in random noise from static electricity and electromagnetic interference.

Similarly, a resistor can be used to tie a pin to ground, which is called a pull-down resistor. Then you’d connect the other side of the switch to power instead of ground.
So, to change the function of the button, you can either change the wiring of your circuit or change the code. But don’t do both! The latter is less work in this case, but it might not always be.

Edit lines 43 and 44, the if statement and its comment, to say LOW instead of HIGH. Upload the updated sketch to your Arduino Uno board, and check that the button now turns the LED on instead of off.

Arduino pins have built-in pull-up resistors on many of the pins–tiny ones, inside the chip just for this purpose, and you can access one by enabling it in the setup. Then you don’t need the resistor on the breadboard anymore.
You can also use the Serial Monitor to check in on different spots in your code by reporting back to the computer over the USB cable. To see how this works, navigate to File, Examples, 01 Basics, DigitalReadSerial in the Arduino software and upload the sketch to your Arduino.
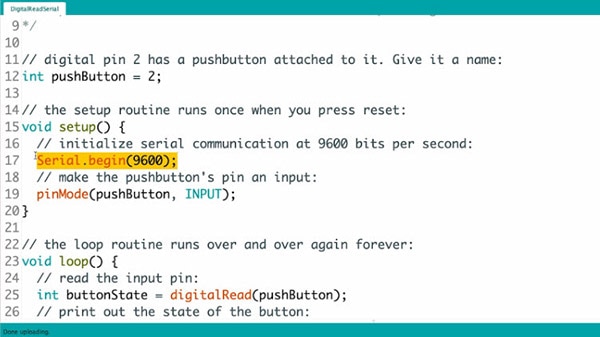
To create a serial connection, use Serial.begin(); inside your setup. The number 9600 is the baud rate, or data speed, in bits per second (bps).
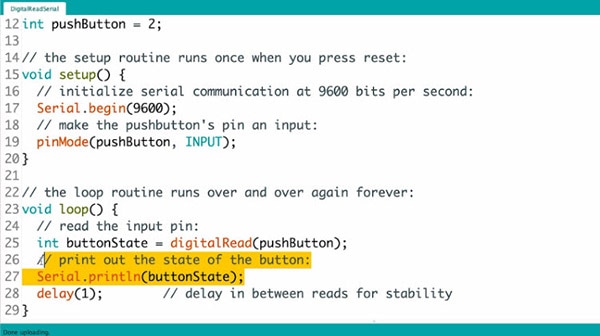
Inside the main program loop, you can use Serial.print(); to send information to the serial port. Serial.println(); does the same thing but prints on a new line.
Line 27 in our code prints the current value of buttonState to the serial port.
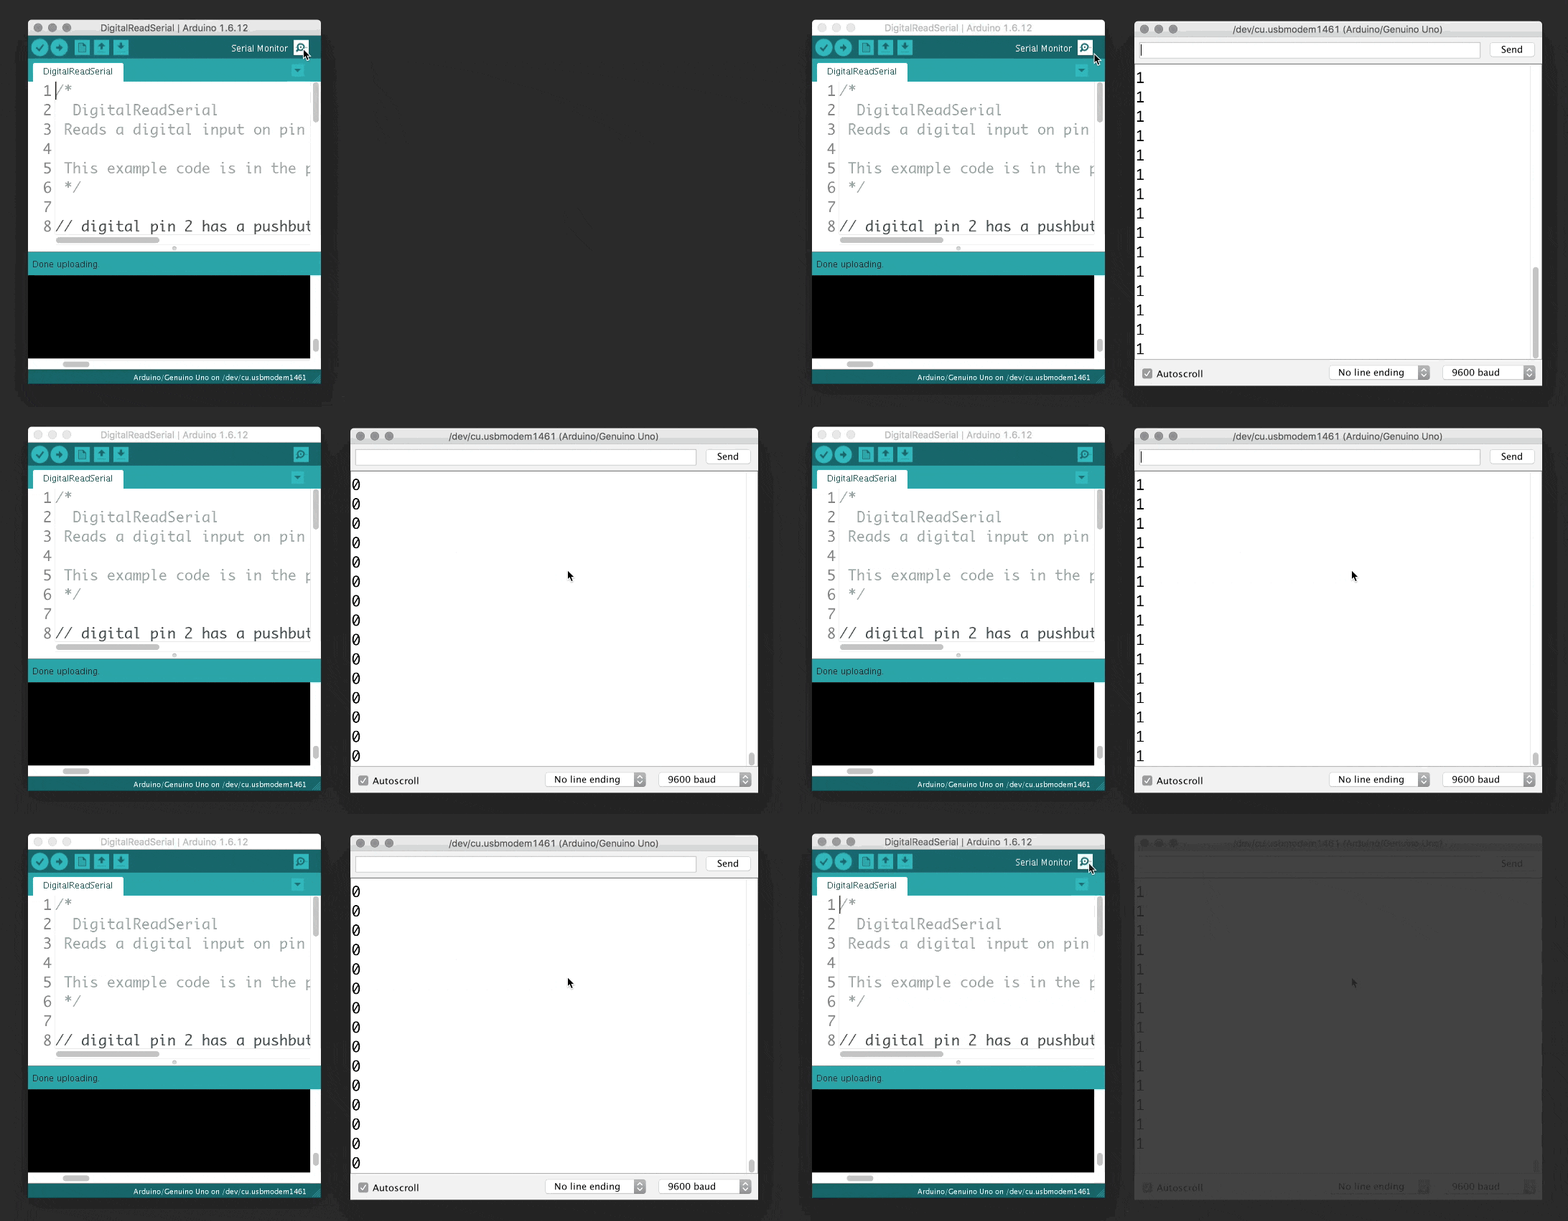
So, with the serial monitor open, we have a live-scrolling view of whatever the Arduino senses at pin 2. The serial monitor is exceptionally handy when troubleshooting since you can easily compare what you think should be happening to what the Arduino is doing.
You can also use serial communication to talk between devices and much more, which you can read about in the Arduino reference.
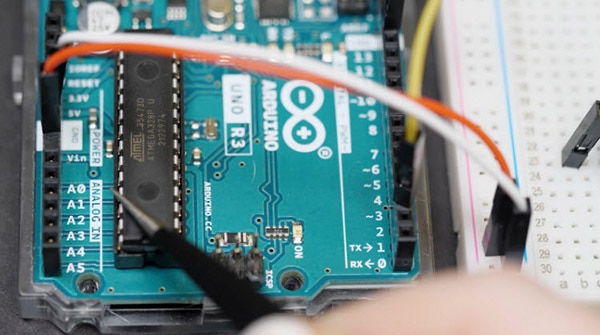
You can also use analog inputs to send information to your Arduino board. Analog inputs are the pins labeled with the letter A across the board from the digital input/output pins. These special pins are connected to the Arduino's analog-to-digital converter or ADC, equipped to convert an analog signal between 0V and 5V into a range of numbers from 0-1023.
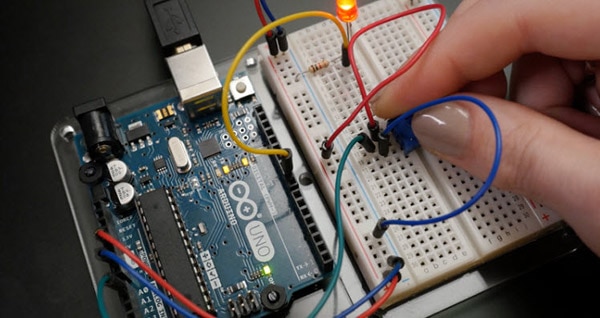
To create that analog signal, you can use a variable resistor that changes its electrical resistance when acted upon. For example, you can turn the knob on a potentiometer, press on or bend a force-sensitive resistor (FSR), or change the light exposure for a photoresistor.

Connect a small breadboard potentiometer to three rows on your breadboard. You’ll need to wire the outer pins to power and ground, and the center pin to Arduino pin A0.

You should also connect an LED to pin 9 so you can use pulse width modulation (PWM).

Find the built-in example code for this circuit in the Arduino software under 03 Analog, AnalogInOutSerial.

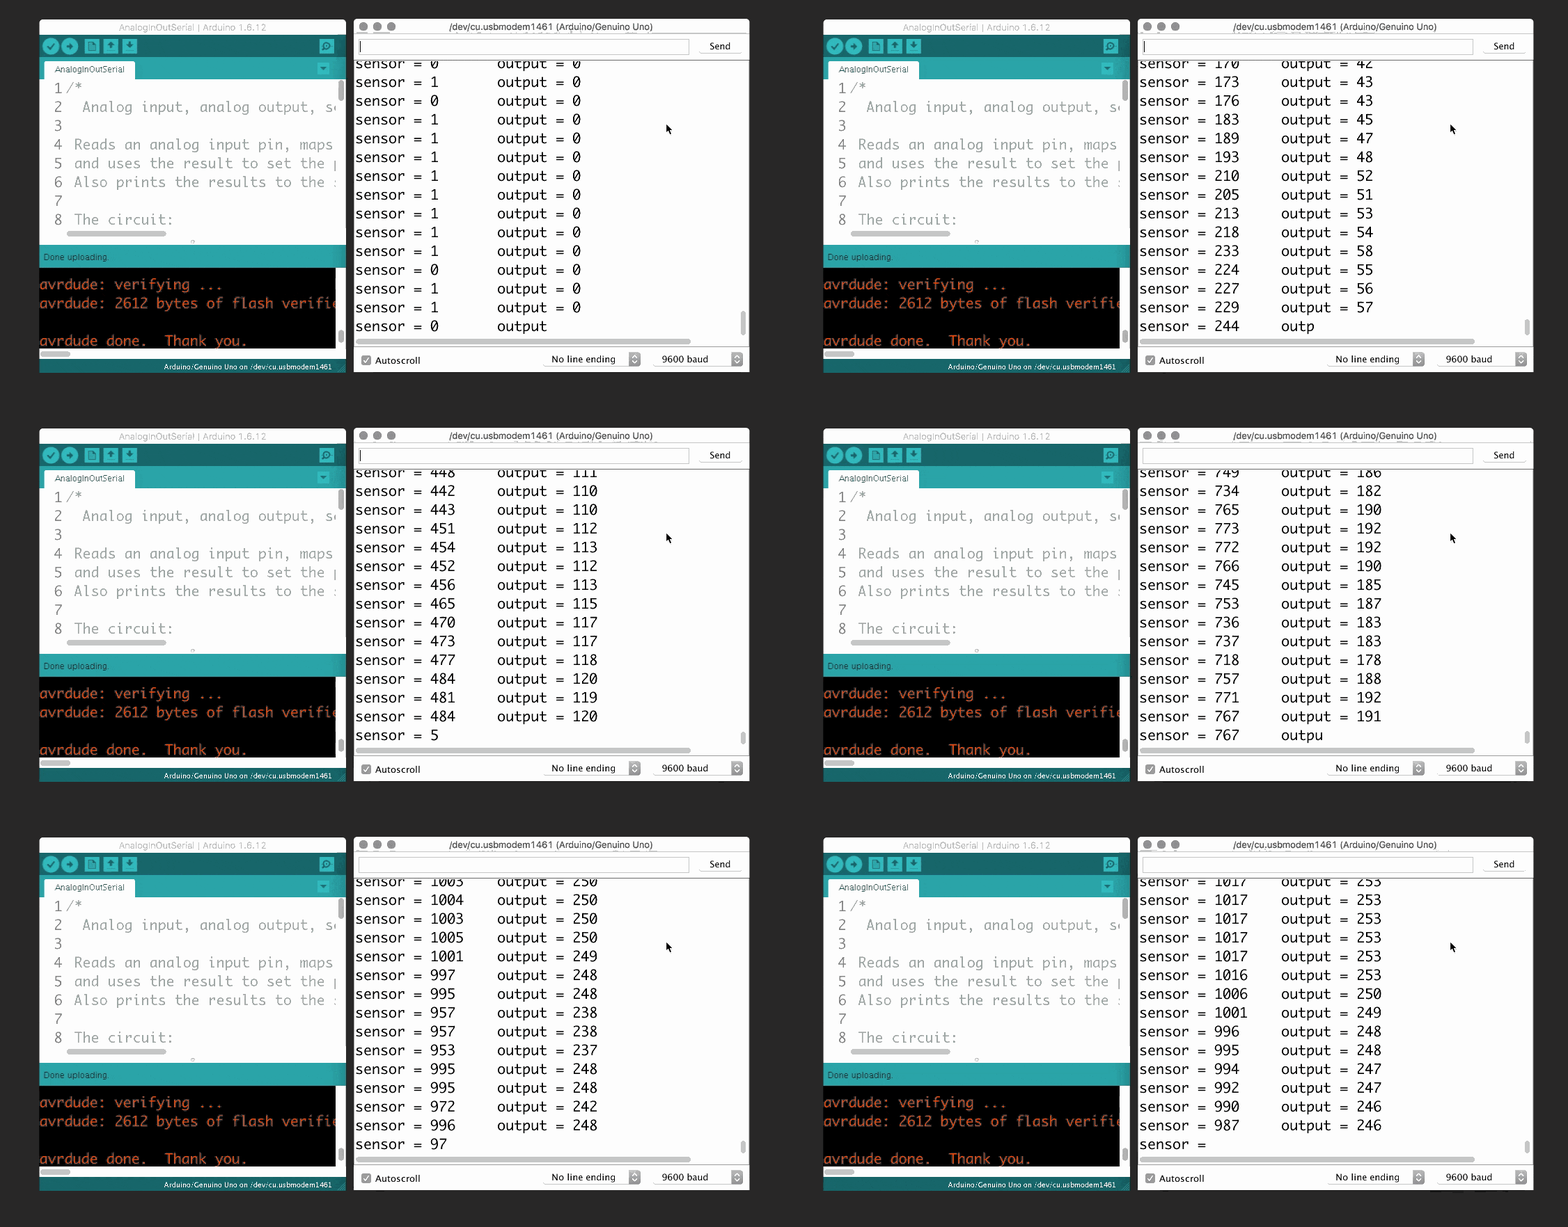
After uploading the code, open up the serial monitor and also observe the LED while twisting the knob on the potentiometer. The values read by the analog input are printed in the first column, and the brightness values applied to the LED are printed in the second column.
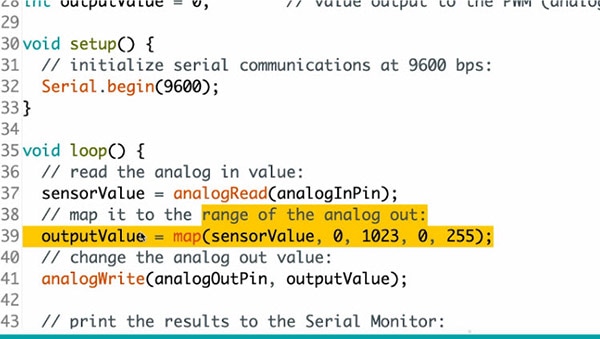
This sketch uses the map(); function on line 39, which takes one range of numbers and massages it into another range. It takes five arguments: the value to be changed, the lower bound of the value's current range, the upper bound of the value's current range, the lower bound of the target range, and the upper bound of the target range. So, this line of code sets a variable outputValue to a number between 0 and 255 depending on the position of the potentiometer.
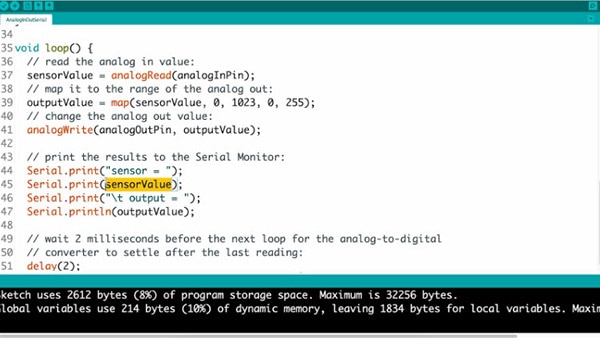
The serial printing commands on lines 44-47 print text labels, whatever’s inside quotes, and the values incoming from the sensor and outgoing to the LED.
Seeing these numbers change together in the serial monitor can really help you understand how functions like map(); work. Keep this in mind when working on your own sketches!
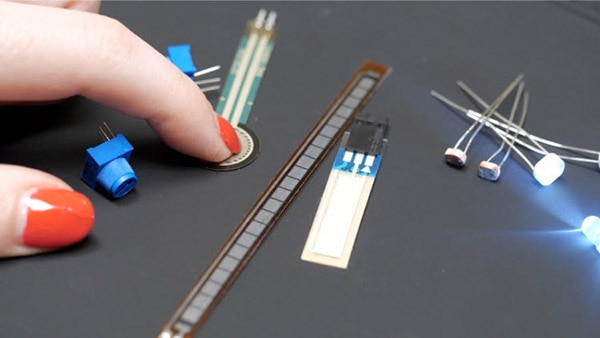
There are a multitude of sensors that act like digital switches or analog inputs and can therefore use the same code we just went over. Try swapping your pushbutton out for a PIR motion sensor, or your potentiometer for a photoresistor, for instance.
If you’ve made it this far in the series, you are now equipped with the basic building blocks of most Arduino programs. When you think of project ideas, ask yourself what the inputs are, what the outputs are, and whether they are analog or digital. Then you can mash up the built-in examples accordingly and get a good start on your prototype. Arduino also has more built-in examples which you can explore on your own.

Have questions or comments? Continue the conversation on TechForum, DigiKey's online community and technical resource.
Visit TechForum




 中国
中国