How To Use Particle Photon Cloud Functions
2019-08-05 | By Maker.io Staff
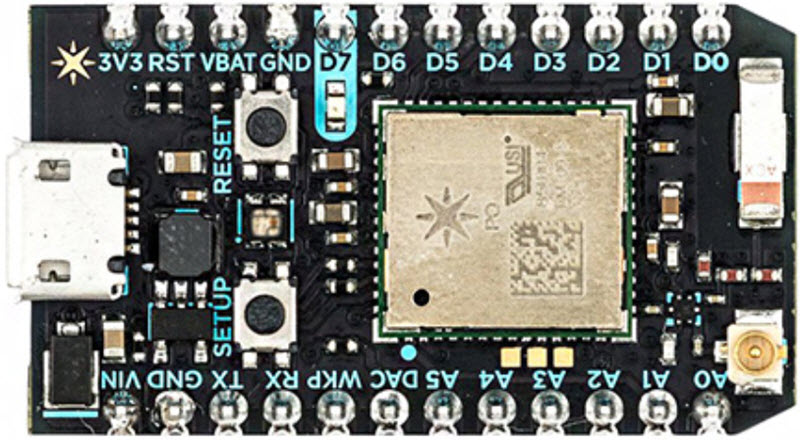
The Particle range of IoT controllers allow for the creation of IoT projects and products, but their cloud abilities go beyond making simple GET requests and performing MQTT. In this article, we will look at the cloud functions specific to the Particle Photon and how they can be used.
Public Variables and functions
Variables and functions are both used in programming and are almost always internal to a program. For example, a program can be started with some arguments and perform an operation, but all the internal functions and subroutines are not accessible externally. However, the Particle range of boards allows for variables and functions to be externally accessible via GET and POST requests. Before we look at how to register cloud variables and access functions, we first need to know a few things:
- Registered variables and functions all have a unique name
- All registered items have a maximum name of 12 characters
- Up to 20 variables can be registered
- Up to 15 functions can be registered
Variables are registered using the Particle.variable() function, which takes two arguments: the online name of the variable and the variable that is going to be accessible. When a GET request is made to the variable, the Photon returns the value of that variable at that current time (a simple method for accessing the variable will be discussed later).
Functions are registered using the Particle.function() function, which takes two arguments - the online name of the function and the function that will be called when called on the cloud. When a POST request is made for the function, the Photon executes the function with some given arguments and then returns a value. The function MUST accept arguments as a string.
The example below shows how a counter variable is registered as well as a function that resets the counter.
// Cloud variable
int counter = 0;
int reset_counter(String args);

void setup()
{
    if(!Particle.variable("counter", counter))
    {
        // Could not register variable
    }

    Particle.function("resetC", reset_counter);
}

// Main loop
void loop()
{
    counter ++;
    delay(1000);
}

// Cloud function
int reset_counter(String args)
{
    counter = 0;
    return 0;
}
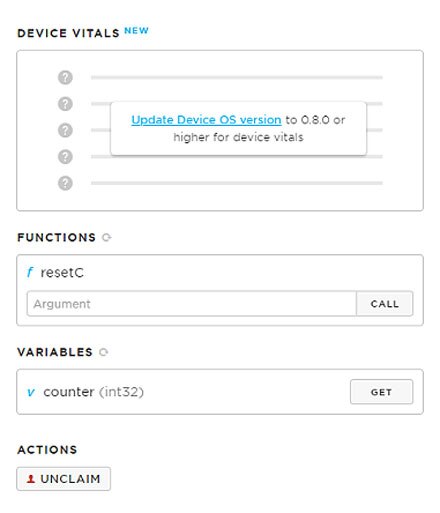
So how can we access these variables and functions? This is easily done via the online console available through Particle.IO. Start by visiting https://console.particle.io/devices, and then look for your Particle Photon in the list and click its name.

In the window on the right, there should be a panel that shows Functions and Variables. If your registered items are not showing up, you may need to click the small refresh icon next to the FUNCTIONS and VARIABLES titles.

From this panel, we can click the GET button to retrieve the current value of a variable or press CALL to run a registered function.
Particle MQTT
Particle has its own version of MQTT that can be used with other Particle Photons. Events can be published to Particle Photons that are subscribed to that event, which then run their respective function handlers. These handlers then accept arguments, including the event name and the data associated with that event.
Particle.publish() is used to publish to an event and accepts two arguments: the event name and data. The event name is the only compulsory argument, as an event can be called (such as alarm sound) without needing any attached data.
Particle.subscribe() is used to subscribe to an event and is required to take two arguments: the event name and data. The event name (a const char string) will contain the name of the event that called it (remember, multiple events could call the same function), while the data (also a const char) will contain whatever additional data was published to that event.
Particle.unsubscribe() is used to unsubscribe to all events called by Particle.subscribe().
The code below shows how a counter can be incremented upon receiving an event and then publishing back a response.
void messageReceived(const char *eventName, const char *data);
int counter = 0;

void setup()
{
    // Subscribe to the event "clockCounterPlease"
    Particle.subscribe("clockCounterPlease", messageReceived);

    // Make sure the counterClocked event exists
    Particle.publish("counterClocked");
}

void loop()
{
    // Do nothing as well only react to received events
}

void messageReceived(const char *eventName, const char *data)
{
    // Here we signal that the counter was incremented
    counter ++;
    Particle.publish("counterClocked");
}
Some useful functions
While these functions may not be needed in the simpler Photon projects, they may be useful as projects become more advanced.
Particle.process()
This function, when called, will make the Particle Photon check the clouds for events and incoming data. It also registers its status and tells the cloud that everything is okay. This function is automatically called after the main loop finishes and is typically not needed. However, if your code includes lengthy while loops (or even infinite loops), then you will need to call this inside that loop as your Particle Photon will reset itself, thinking it has stalled. Calling this will ensure that your Photon does not decide to stop, restart, and pretend that it had crashed.
Particle.syncTime()
This function is not needed for many projects that intend to operate over a few hours, but if your project is going to run for more than one day, this function will need to be called (once a day is enough). This function synchronizes the on board time with the Particle servers, but, similar to the Particle.process(), this function is automatically called upon startup. Just remember, if your Photon is going to be operating over long times, consider calling this once every so often to ensure it has the correct time.

Have questions or comments? Continue the conversation on TechForum, DigiKey's online community and technical resource.
Visit TechForum


 中国
中国