How to Configure Your micro:bit Peripherals
2018-07-26 | By Maker.io Staff
The micro:bit is a fun way to make LEDs flash and display show words, but there are some peripherals that allow a micro:bit to do all of these things. In this how-to article, we look at how to set up some of these peripherals and what these different peripherals do.
Things You Will Need
- micro:bit Essentials Kit
- PC running Windows, Linux, or OS X
A Brief On micro:bit Peripherals
Peripherals are devices that add extra functionality to a system. For example, IO pins are peripherals that allow a CPU to talk to electrical signals while a serial module allows a CPU to send messages over a serial line. Typically, peripherals require setup code to function properly. Thanks to the magic of MakeCode most of the configuration is handled internally.
Peripherals in micro:bits include:
- Buttons (input)
- LED Display (output)
- Compass (input)
- Accelerometer (input)
- Light (input)
- Bluetooth (input / output. Covered in a previous article)
- Temperature (input)
Buttons / Pins
Buttons (A and B) can be made to execute code when pressed as an event, or the value of the button can be read into a variable and used later. The micro:bit has three large IO circular connectors (0, 1, and 2), from which you can also read. The two code segments below show the use of an event (on button A pressed) and polling. The code on the left will execute as soon as the button is pressed, whereas the code on the right will only execute once the micro:bit has gotten to that point in the program.

Light Level
Despite not having a built in LDR, the micro:bit can measure the ambient light level in a very clever way. Normally, LEDs are forward-biased, resulting in light emission. However, it turns out that if LEDs are driven in reverse bias, they are somewhat sensitive to light. The micro:bit uses the LED display as a giant light sensor with the LEDs set in reversed biased to measure the light level. Using the light level is easy and only requires it to be assigned to a variable or used in a statement/function.

Compass
Like the light level, the compass heading is also a variable that can easily be used in programs. The peripheral itself does not need configuring in code, but when you use it for the first time the micro:bit will ask you to “draw a circle”. This means that you need to hold your micro:bit flat, then roll it around until the LED dot draws a circle (see the video).

Temperature
The temperature of the micro:bit can be read as a variable in a similar way to the compass heading and light level. Like the light sensor, the micro:bit does not have a dedicated temperature sensor and relies instead on the temperature sensor located on the silicon chip of the processor. Therefore, if your chip gets hotter during program execution, the temperature reading may increase.

LEDs
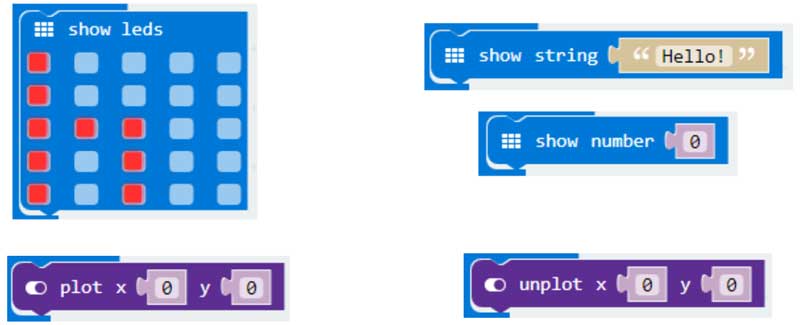
The LED display is an array of 5 x 5 lights that can be used to draw shapes, patterns, numbers, and letters. Pieces that perform these actions include plot, un-plot, plot bar graph, show string, show LEDs, show number, and show icon.

Accelerometer
The onboard accelerometer is an accelerometer chip used to determine orientation (relative to the horizon) and change in speed (acceleration). When using the accelerometer to return the “acceleration” of an angle, you will instead be given the absolute orientation relative to the horizon. If acceleration is needed then you will either need to constantly record old values of acceleration and then compare then to newer values (to show a change in position) or use some of the predefined acceleration measures. The examples below show how to detect 3g acceleration, detect a shake gesture, and read the x-axis from the accelerometer.

Conclusion
If these peripherals were on a standard microcontroller such as a PIC on AVR, you could expect lots of configuration code and access to strange sounding registers. With MakeCode, most of this is handled, making the use of onboard peripherals on the micro:bit quick and easy.

Have questions or comments? Continue the conversation on TechForum, DigiKey's online community and technical resource.
Visit TechForum


 中国
中国